
4th Annual Maxi Challenge
Hi guys, I’m an Ambassador (..in Training) for the Sew Maxi for Mother’s Day Challenge. This challenge is being hosted by Tea from Crumpets Tea and Sewing alongside Crystal from Crystal Sew and Stuff.
The Challenge is open from April 1st until May 9th, and your garment is to be made during this time.
Here are the rules!
Garments must be made between April 1st thru May 9th, 2022.
Finished makes must be a statement garment with an oversized collar, voluminous sleeves, tiers or ruffles. Tops, dresses, skirts, trousers or jumpsuits only. If you are entering a skirt or a dress it has to be maxi length!
Bold print fabrics and / or color blocking can be used to make a statement garment.
Post a picture of your garment on Instagram by the deadline May 9th, 2022 using the hashtag SewMaxiForMothersDay AND make sure to tag the hosts of the challenge @crumpetsteaandsewing @crystalsewandstuff.
There are prizes of course!


And of course check out the other ambassadors on Instagram for ideas on what you can sew for this challenge!
Tea @crumpetsteaandewing HOST
Crystal @crystalsewandstuff HOST
Nateida @sewnaturaldane
Talisha (Tee) @creativitieebyt
Rochelle @rochelle.handmade.designs
Andra @andramakes
Renata @twighlightstitcher

Late March Pattern Haul and Where is Butterick?

I’ve purchased some patterns at the store but my buying has slowed down to a trickle these days. I have gotten a few items off of Etsy and a few things I have thrifted (which is rather surprising I found these) as I’m honing in a little more into what I want to make, and I have been waiting and waiting for Butterick to release a new collection, and with that starts my question for today’s video…. Where is Butterick?
So it looks like Simplicity is about to release another collection of patterns and we are starting to see the changes in the envelopes. Bigger size range with inclusive sizing, finished garment measurements in the back of the envelope (can I get a Alleluia?!!!!), and some fun designs. I will be sure to pick up a few, but this leads me to ask… Where is Butterick? What happened to a Winter or Spring release for Butterick? We usually see two collections a year from them. I will say this, out of the Big four I do love Butterick and Simplicity the most. Mostly because they fit and I have to make the least amount of adjustments to their patterns, but I’m surprised that its almost end of March and we have yet to see another collection from them. The last one being in Fall of 2021 and if you are keeping track, that was 8 months ago when the last one was released back in July 2021 and Spring 2021 was released back in early March 2021.
You start seeing the changes coming your way slowly. Elisalex from By Hand London mentioned in her blog she is no longer offering printed patterns for now as the costs to print patterns is exorbitant and it really eats into her overall profit once all costs are taken into account to release that ONE pattern. Here is a link to her blog and I can understand as a former business owner (I remember I had to pay big amounts to pay just to be able to dump garbage! it drove me nuts paying that bill) and all the costs you have to take into account. OR if the majority of your sales happen thru PDF patterns then perhaps that is the way to go. So it makes sense.
Closet Core Patterns just released new patterns, its called the Chez Moi Collection. The Celine Bralette, The Ananis Undies, the Simone Slip Dress and the Veronik Robe… all are available individually or as a bundle. All are only offered as a PDF format.
I talk about these two indie brands because they have always for the most part released printed and PDF patterns. So is PDF patterns the way to go for indie pattern designers? So it seems, and as the options that catch my eye seem to dwindle down for the Big 4, I have to look at some of the indie pattern companies for new designs or look back into vintage patterns from the Big 4 for a pattern that is perhaps out of print but that I want to make.
I’m not going to lie it also becomes a cost issue, once you start printing more than 40 some pages to put together at home it starts to be cumbersome and it looks like more and more that I will have to send some of these indie patterns out to a pro printer to get them printed in a large scale format printer adding the shipping and you have paid between $20 to $25 for a pattern to get printed including paying for the actual pattern download. Ouch.
So with all that being said… sounds like PDF patterns it is. Not entirely thrilled about it but it is what it is.

Summer Tops by Indie Pattern Designers
We are what I like to call transitional weather, what does that mean? Seventy degrees and sunny today… and 30 degrees, gloomy skies and sideways rain. Its that time of the year when you need to have your sandals, shorts, short sleeve shirt, winter coats, long pants and beanie hat ready. Sunny today and nasty tomorrow. Which has given me pause for what I need to start sewing next and rapido.
Here is what I’m thinking:
Etty Camisole from Tammy Handmade. Great little camisole with a scalloped neckline. It gets better, Tammy has made this pattern available FREE. Cue the angels music because you can’t beat free and its a good one. She even has a sew along on her You Tube channel. Its perfect for beginners.

2. The Yellow Shirt Waterfall Top. But I got it once I signed up for Bernette’s newsletter. They have some quilting patterns but also some great apparel patterns. This is called the Yellow Shirt Bernette waterfall Top. It is an asymmetrical knit top. You are meant to make it in your serger/overlooker but guess what this one will be made on my beautiful sewing machine and finished in my serger. This pattern is a free download. Again… Free Download! Its been around for quite some time.

3. The Sofia Top from Stay Stitch Patterns. Quick download from Etsy and you get this great little pattern. Everyone looks amazing in it. Everyone! Different body sizes, shapes, they all look great. I’m making it in a Ponte de Roma, you see lots of pictures online saying you can make it Rib knit but Ponte is it for this girl.

4. The Esme Top from Jennifer Lauren Handmade - I love this pattern. I actually helped test the pattern when Jennifer was grading her patterns for her Curve sizing and she has great patterns. Double bonus she ensures you print a small amount of pages for your PDF patterns if you are printing at home and its usually less than 13 pages. Can’t beat that.


5. Alek Rib Top from Just Patterns - this pattern is brand spankin’ new. it was just released last week and I can’t wait to try it. I will have to raise the neckline so I can wear it with a bra but it looks like a great pattern for summer.

6. Adrienne Blouse from Friday Pattern Company - I have made this now two times and it is in heavy rotation. I love this blouse and you can make it with 1.5 yards of fabric. I usually decrease the amount of volume on the sleeves which you wouldn’t even know about it but I do, and it is a beautiful blouse.

So that’s it! I will be able to wear these with just about everything! Shorts, skirts, jeans (which I’m so delinquent in making) and just about everything else. Know of any summer tops that I MUST try…. let me know all about it.

Sew Along for V8959 a cape and a pattern review

At first glance Vogue 8959 looks somewhat intimidating but I assure you its a great pattern if you are a confident beginner want to take a shot at learning how to work with wool fabrics and how to put a lining in. I used a boiled wool from Minerva and for my lining I used a Rifle and Paper Rayon Challis from Fabric.com
What did you particularly like or dislike about the pattern?
I loved this pattern, as I was making it I can see how many people could ditch the lining and just use bias tape to finish off the seams.
Does it look like the photos/illustrations on the pattern envelope?
Yes it does.
Were the instructions easy to follow?
The instructions on this are two pages and yes I looked at them. I made some changes to the way I did the hem as I didn’t want to create a lot of bulk in the hem as I’m using a boiled wool. If I make it again I would most likely add 1.5 inches to the fabric and keep the length of the lining the same as the pattern pieces so I can just bag the entire lining and leave a small opening on which to turn the lining and just slip stitch. The two hems are a lot of work! Hence why I only did one.
I also extended the hand openings about 2 inches, so I could move freely.
Pattern alterations or any design changes you made:
I took in the shoulders once I had the cape sewn. Most of the other reviews mention to check the shoulders and sure enough it has a weird look that you can’t even see when you do a tissue fitting. You have to use the boiled wool to get an idea on the drape.
Would you sew it again? Would you recommend it to others?
Yes but I would most likely use a completely different fabric like an athletic knit that doesn’t need to be lined and make a lot of changes so its something I can just slip over my head and go about my day. I will say the boiled wool is nice and warm. It will be perfect on a fall day when its not too cold or too warm and I just want something to throw on.


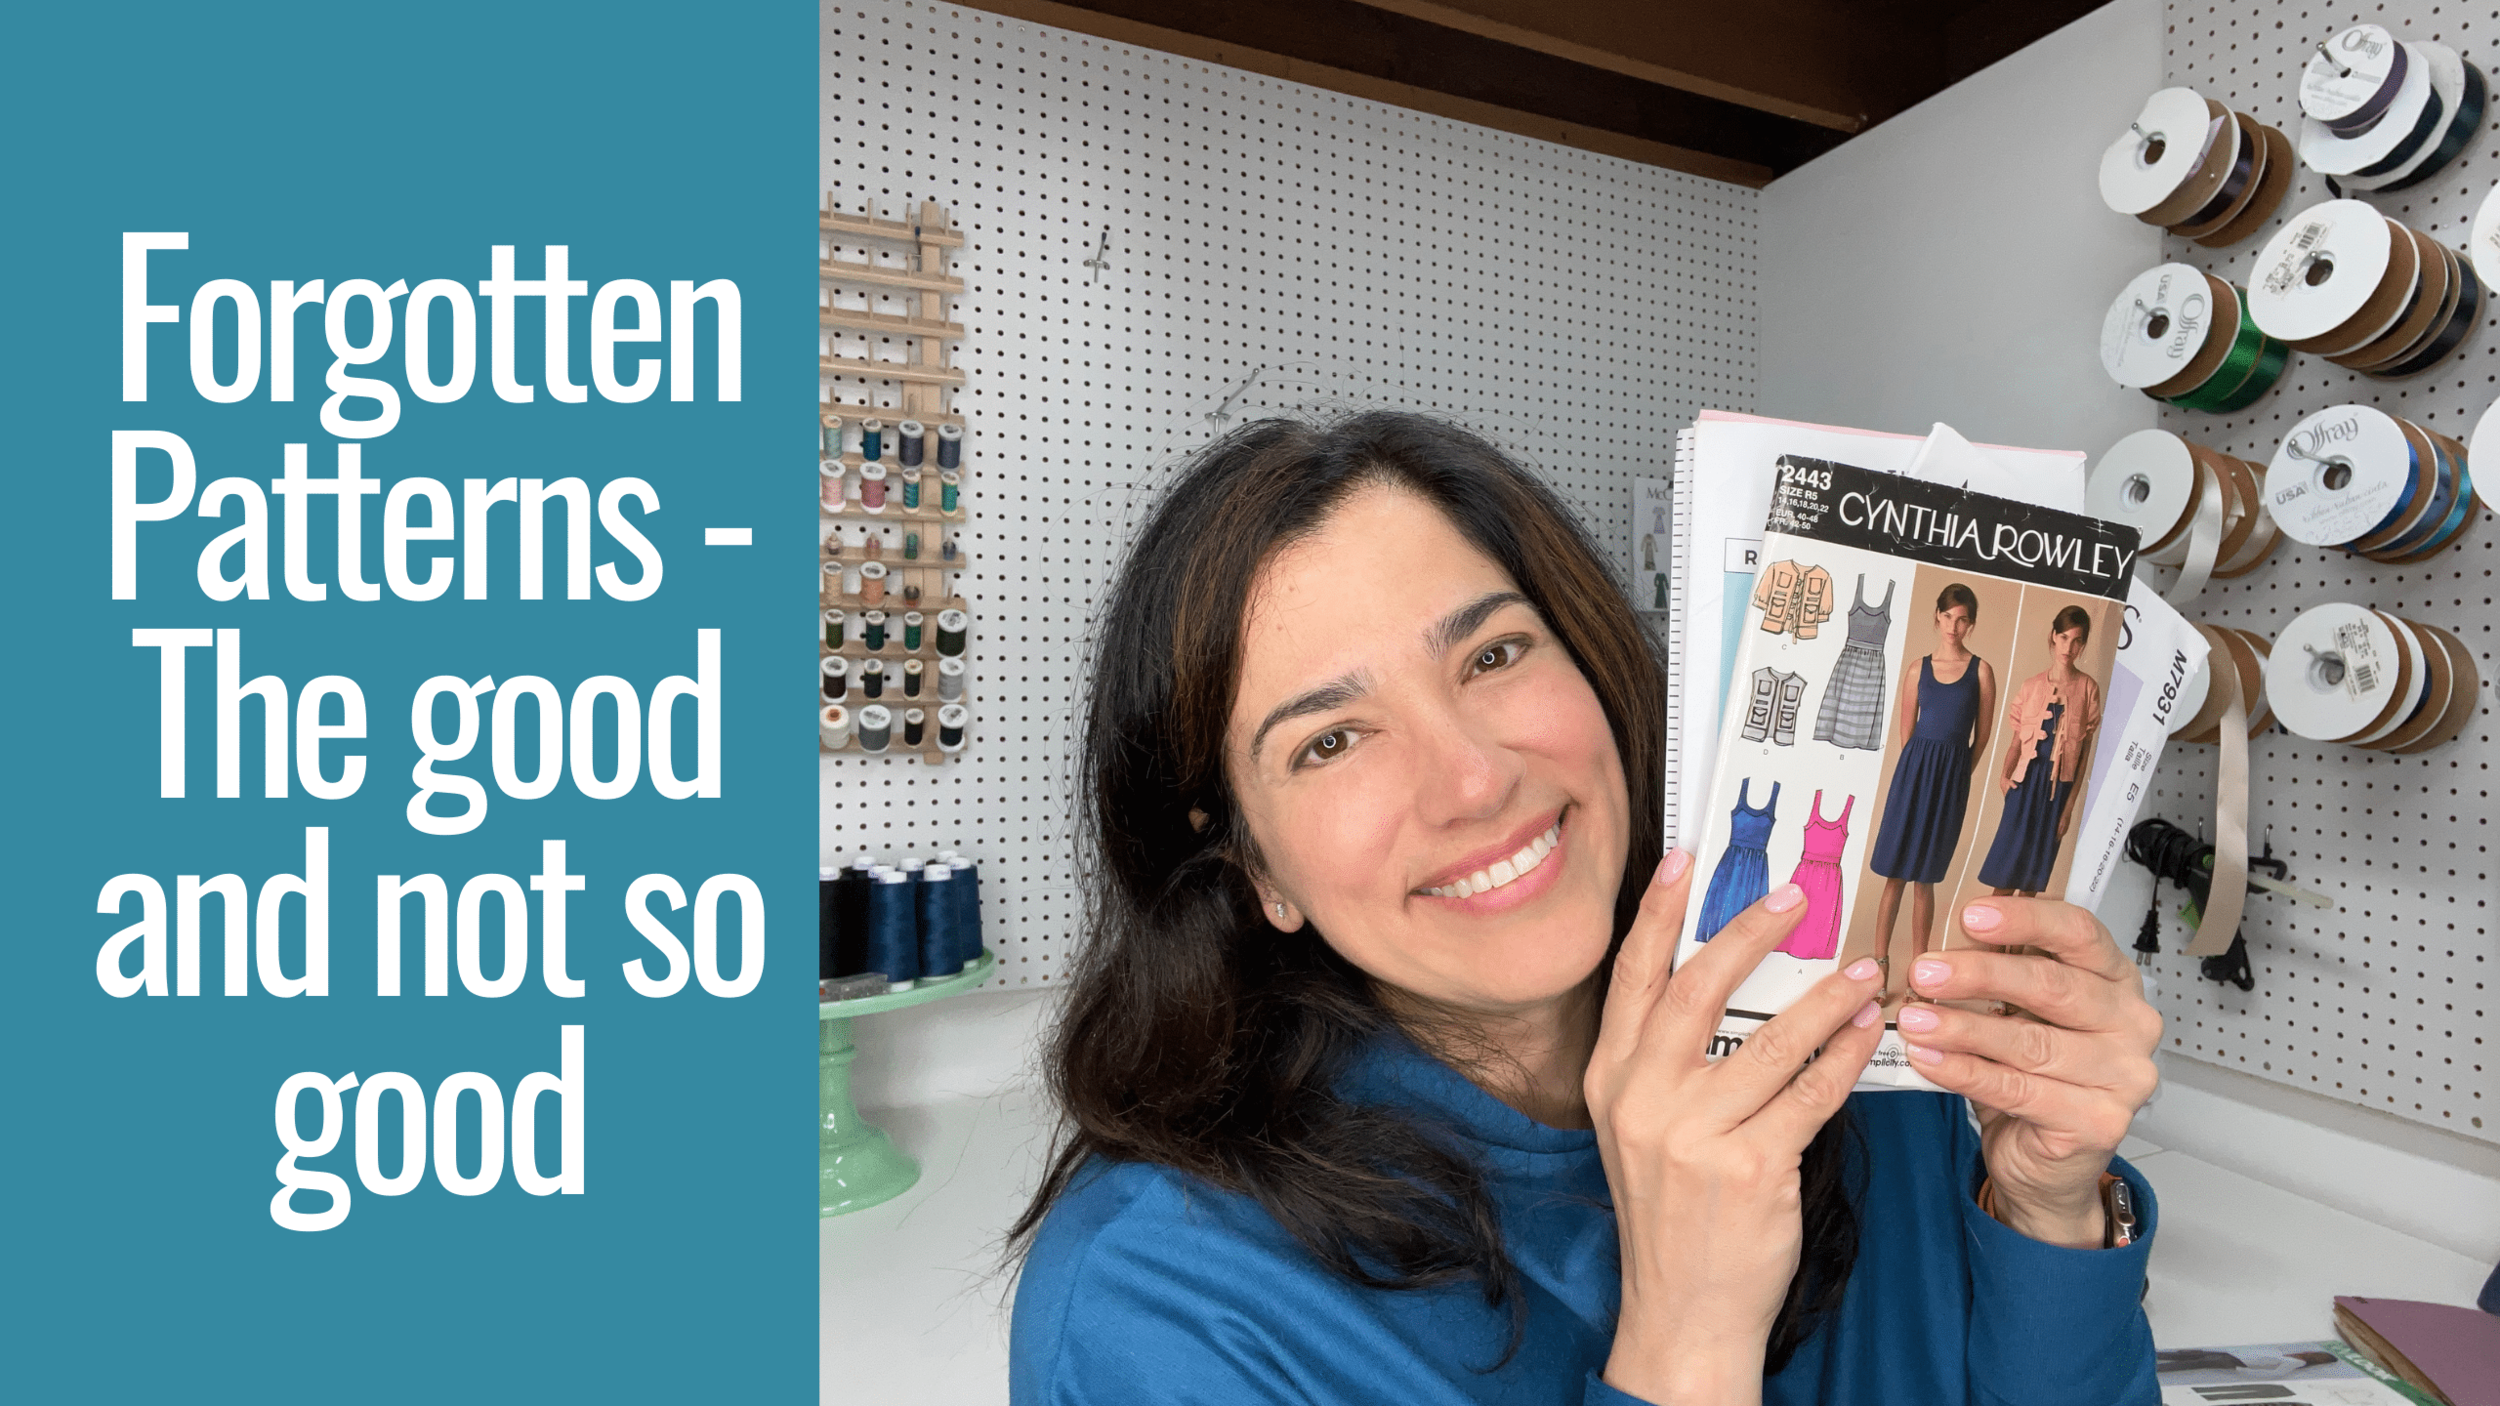
Forgotten Patterns - Some good and others not so great

As I look at all the new pattern releases so many of them are just not exciting to me. At the time I write this blog post I have yet to see any new releases for Butterick or New Look Patterns (they may be released this week… or not!) and trying to keep with my goals for this year which are:
Buy only patterns that are flattering to my figure and that I will in fact sew- I’m doing pretty good on this one!
Buy fabric for the exact amount you need and make sure you have a pattern selected for it BEFORE you buy it. If I’m giving myself a score on this one its 9/10. So far I’ve purchased one fabric for the pure joy of loving it and no pattern selected. But its bright red, orange and fuchsia so I better find a pattern soon because it screams summer!
Don’t bite more than you can sew and sew slowly. I’m for sure sewing slowly… super slow if you ask me. A little bit slower than I would prefer to be honest. I’m my defense I’m really looking at the details and making sure the finishes are exactly what I want them to look like, at times this means taking out the needle and thread … and finishing things by hand, or ripping stitches out and going back at it again.
Don’t be a perfectionist. I’m failing at this one and that’s why its taking me forever to finish anything. Trust me I’m working on it, but it’s hard.
It just leads me to ask you… what amazing patterns do you have in your stash waiting for you to make them? Is it a Vogue Pattern, that may be a little complicated but give you that feather in your cap that you will learn something new, is it a Simplicity pattern which I must say some look simple but they are quite the opposite, is it a Vintage Pattern in all its single size glory, is it a, perhaps a Butterick pattern, there are so many great ones! Or is it McCall’s pattern that perhaps may look a little youthful and no longer fits. Or is it one of the many Indie patterns that are released. I have a list of ten I want to get but I have very little time on my hands these days so I’m trying to be a little bit more selective on what I’m choosing and buying. At $20 per indie pattern the costs on these can add up rather quickly.
As I have been doing a hard pass on some of the newly released patterns; a lot of them just don’t sing to me. I have been looking back on some of my much older patterns that have a great styles but they have just been collecting dust and mostly forgotten. I came to this Cynthia Rowley dress and jacket combo S2443 (see picture of the cover below). I loved the colors and I felt it was a great transitional piece between winter and early spring. I love the dress and although the fabric on the jacket was quite the interesting one to sew, I actually like it after I added buttons. Lets just say I didn’t feel that way two thirds of the way, but now I do love it.

S2443 - This Pattern is almost ten years old, hence why its out of print


S2443 Cynthia Rowley Dress and Jacket
I also worked on The Romy Dress by Tilly and the Buttons. I believe this pattern may be two or three years old. There are not a lot of reviews of this pattern out there, perhaps because it looks as a rather simple sew (and it is) but fitting the pattern to your shoulders is key.

Romy Dress from Tilly and the Buttons


What are some of those older patterns, that are just waiting for you? Perhaps its time to shop your pattern stash and come back to some of those really good ones. Check out Sewing Pattern Review and see what others have to say about it before you dive in.

How to sew curved pockets that look beautiful and match

Do you ever go, oh man these curved pockets look awful. They never seem to match, sewing that curve is like taking a sharp turn going 90 miles in your car… it gets done but it never looks pretty. I have a little trick for you….
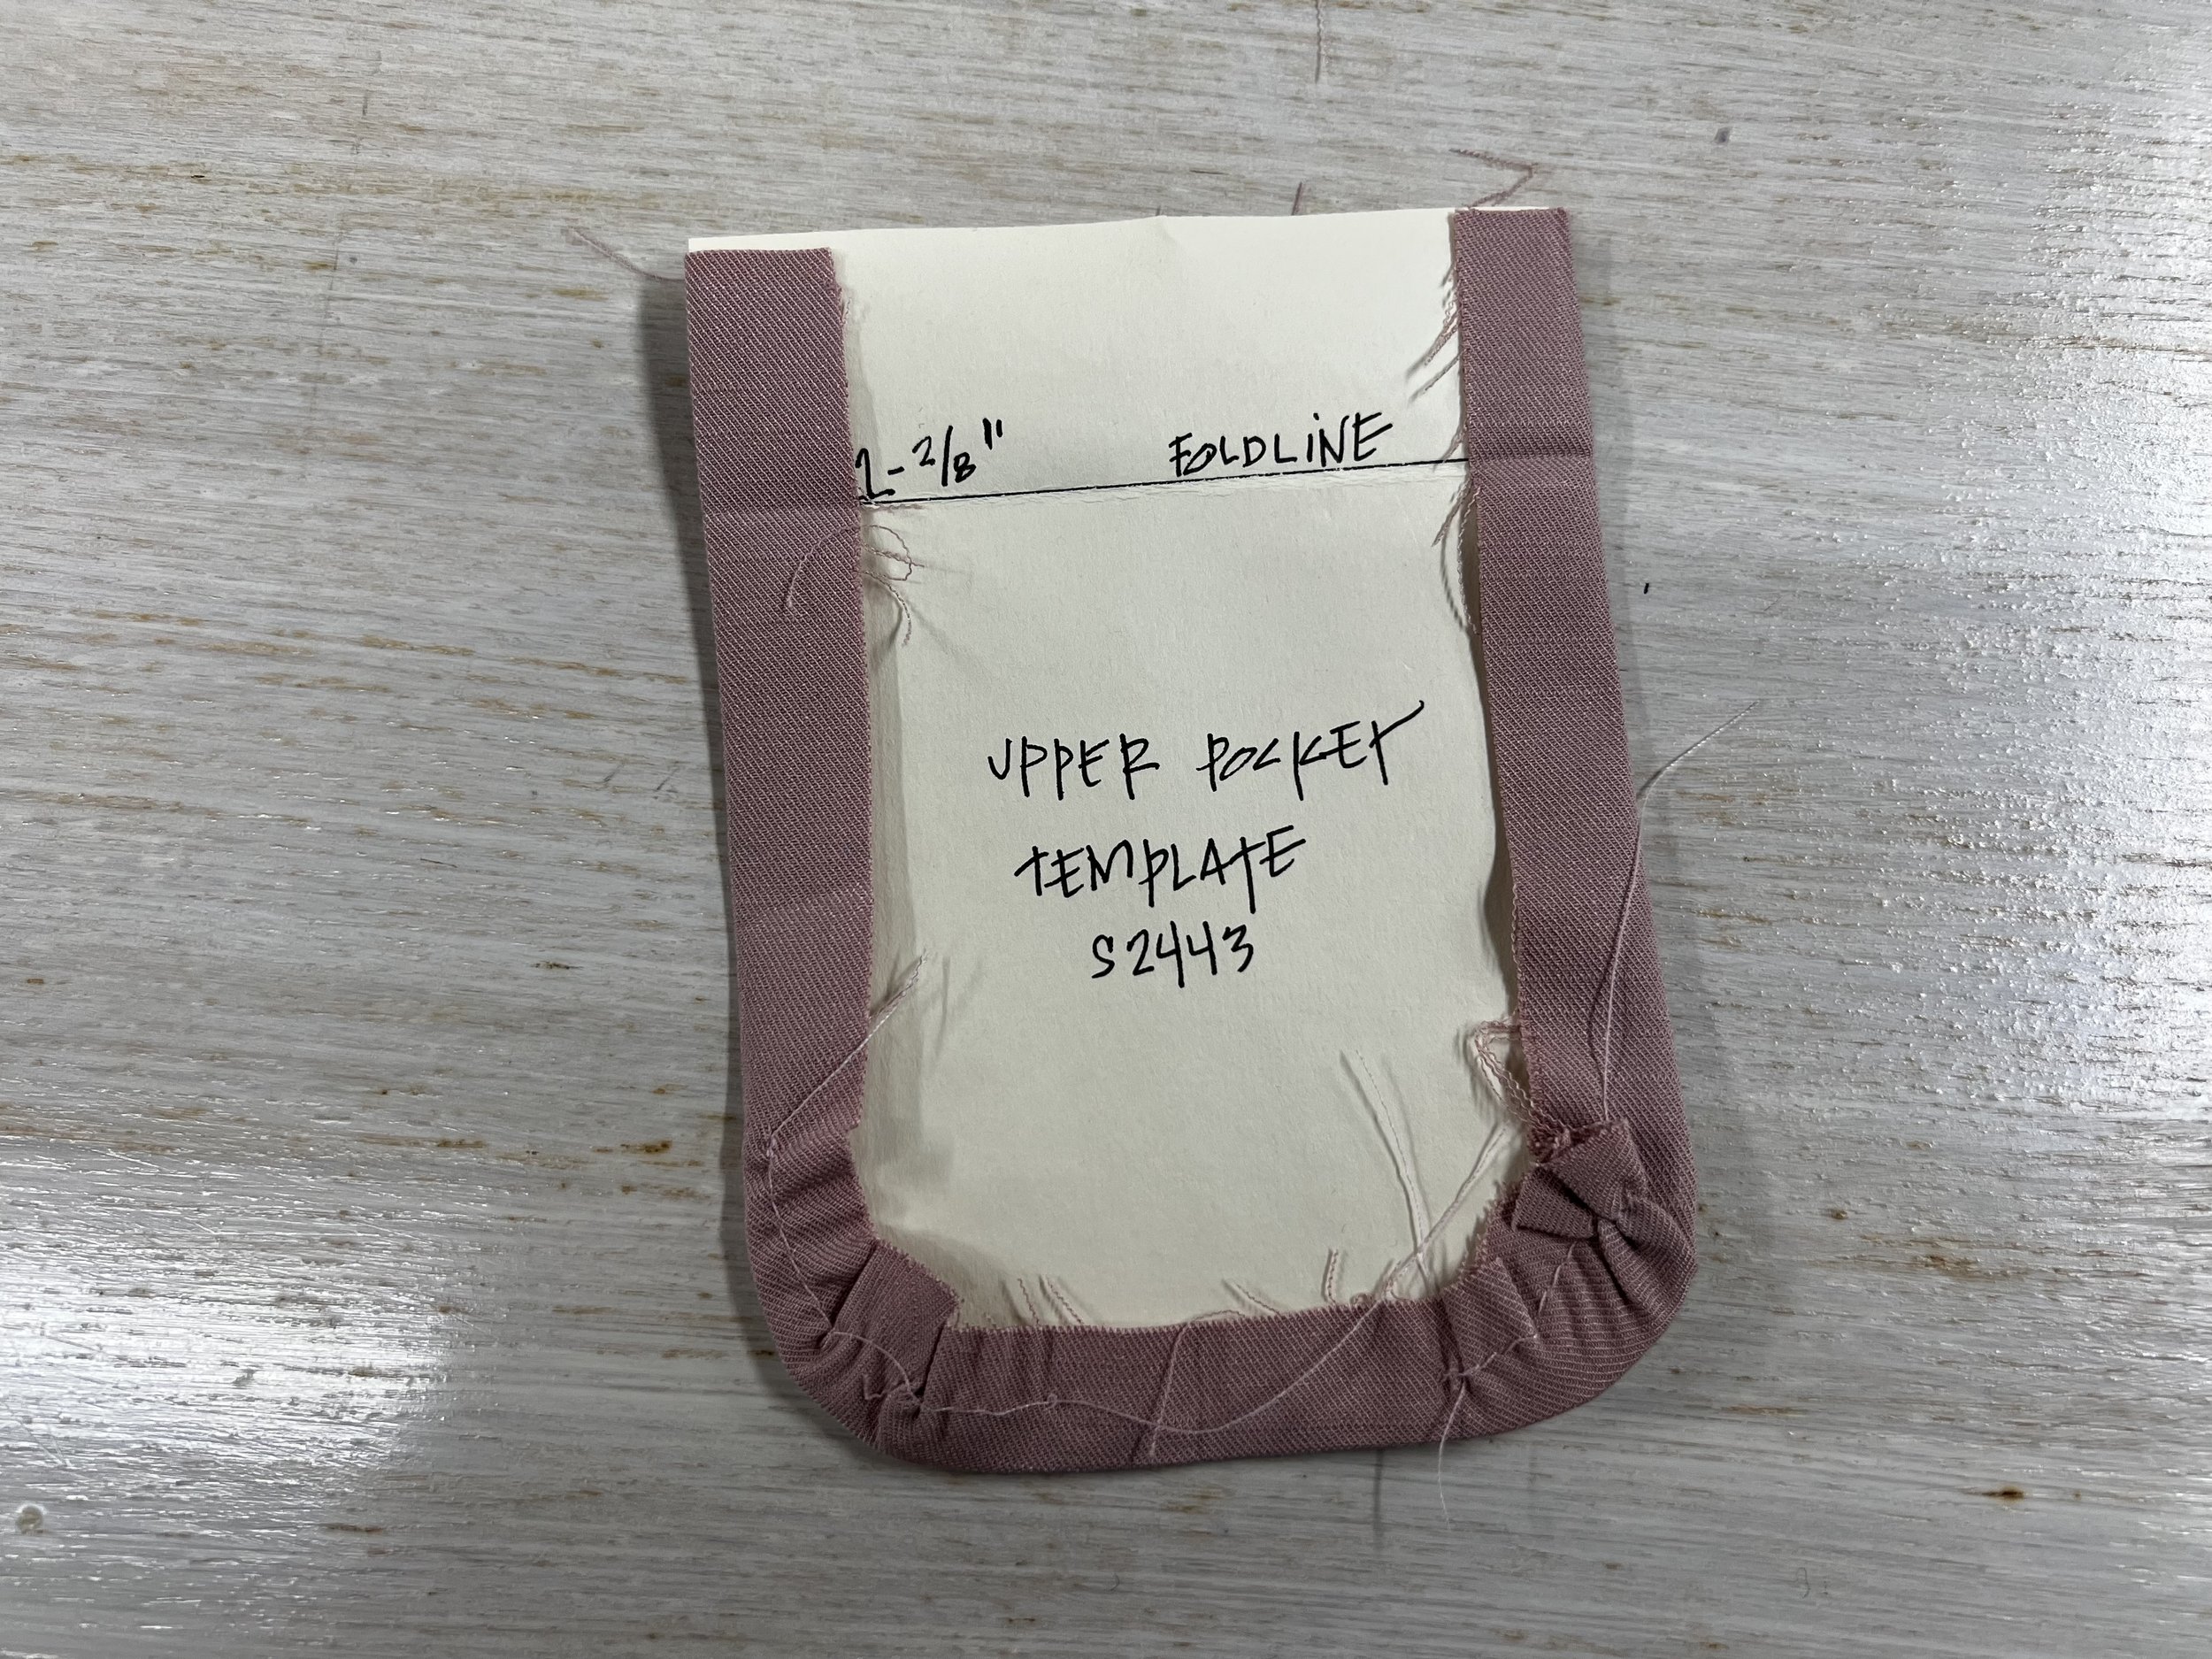
First thing, first make a template out of the original pocket pattern piece without the seam allowance. I usually make mine out of cardstock or a thicker paper because I will be using this to press and also I can use it again and again.

Pocket Pattern Template use cardstock and take out the seam allowance… In my case 5/8”
Next do gathering stitches 3/8” away from the raw edge. Make sure to back stitch at the start, but leave your threads long at the end.

Do gathering stitches 3/8” away from the raw edge. Lock in your stitches at the start with a backstitch… but leave your threads long at the end.
Now set your pocket piece on top the cut pocket fabric piece. Gather those stitches. The fabric will encircle the pocket template… now its ready to be pressed!
Now that you gathered the stitches, take it to the ironing board and press it
If you have a fold line, like I do in my pockets use the template to fold it at the same spot too. Fold the fabric and template… Press!

Voila! You have a beautifully finished curved pocket. Double bonus if you need to make more than one they will match!

You now have a beautifully finished curved pocket

Capes - Inspiration and Patterns to try

So as I finally got my fabric to make a cape for Vogue 8959 a beautiful boiled wool (although I’m waiting on the lining fabric but that’s another story) which I have to get pre-treated before I start working on my sew along. I thought it would be good to talk a little bit about the inspiration for making a cape. I’ve been seeing pictures of capes now for quite some time. I have to say almost a year ago I saw this picture of a red cape by Red Valentino. It has this beautiful Valentino red, and I’ve seen it in different colors… blue, black, etc. But I digress.. the front and hem is scalloped and the inside is equally as fun with an animal print. These pictures really pulled me into the cape trend.


I also saw this casual French Terry capelet from Cynthia Rowley as an ad on Instagram. I’ve told you all that the folks at Instagram serve me with some pretty darn good ads from Cynthia Rowley all the time and I saw this one. It’s a casual look but I think I could self draft this one for sure. They are just about sold out in my size range and it retails for $265. The description states it has ribbing on the neckline and side openings for your arms along with the hem. It is also available in black and I saw a few of them on Farfetch.com with studs on the sides or rhinestones embellishments.

Cynthia Rowley
Capes were also all over the recent runways for Fall 2022. Burberry, Oscar de la Renta and even Carolina Herrera had a few capes on the runway. Talking about Carolina Herrera, look at this beautiful purple cape.

Carolina Herrera
Without a doubt capes have been around for quite some time let’s look at a couple of sewing patterns that you can use besides V8959 to make a cape or perhaps self draft one.
V9288 - Cape with a front button closure along with pockets and a tie belt.
B6603 - Short cape with a placket and buttons and a short collar.
McCall’s M7477 - Mid length capes with different views one featuring a hood and a tie belt.
Kwik Sew K4224 - All Kwik Sew patterns are out of print but you can still get your hands on this Learn to Sew Pattern thru Amazon, or my personal favorite Etsy.
Simplicity S8264 - It has four styles, pockets, button front with stand up collar and a fun fur detachable trim.
New Look N6535 - Longer views and a capelet with sizes ranging from 6 to 24.
Don’t feel like getting a pattern for this? Well you can also download the free pattern from Threads Magazine, they have a great tutorial online for capes without a lining using bias tape. Here is a link to it.

How to change an elastic sleeve cuffs to sleeve binding

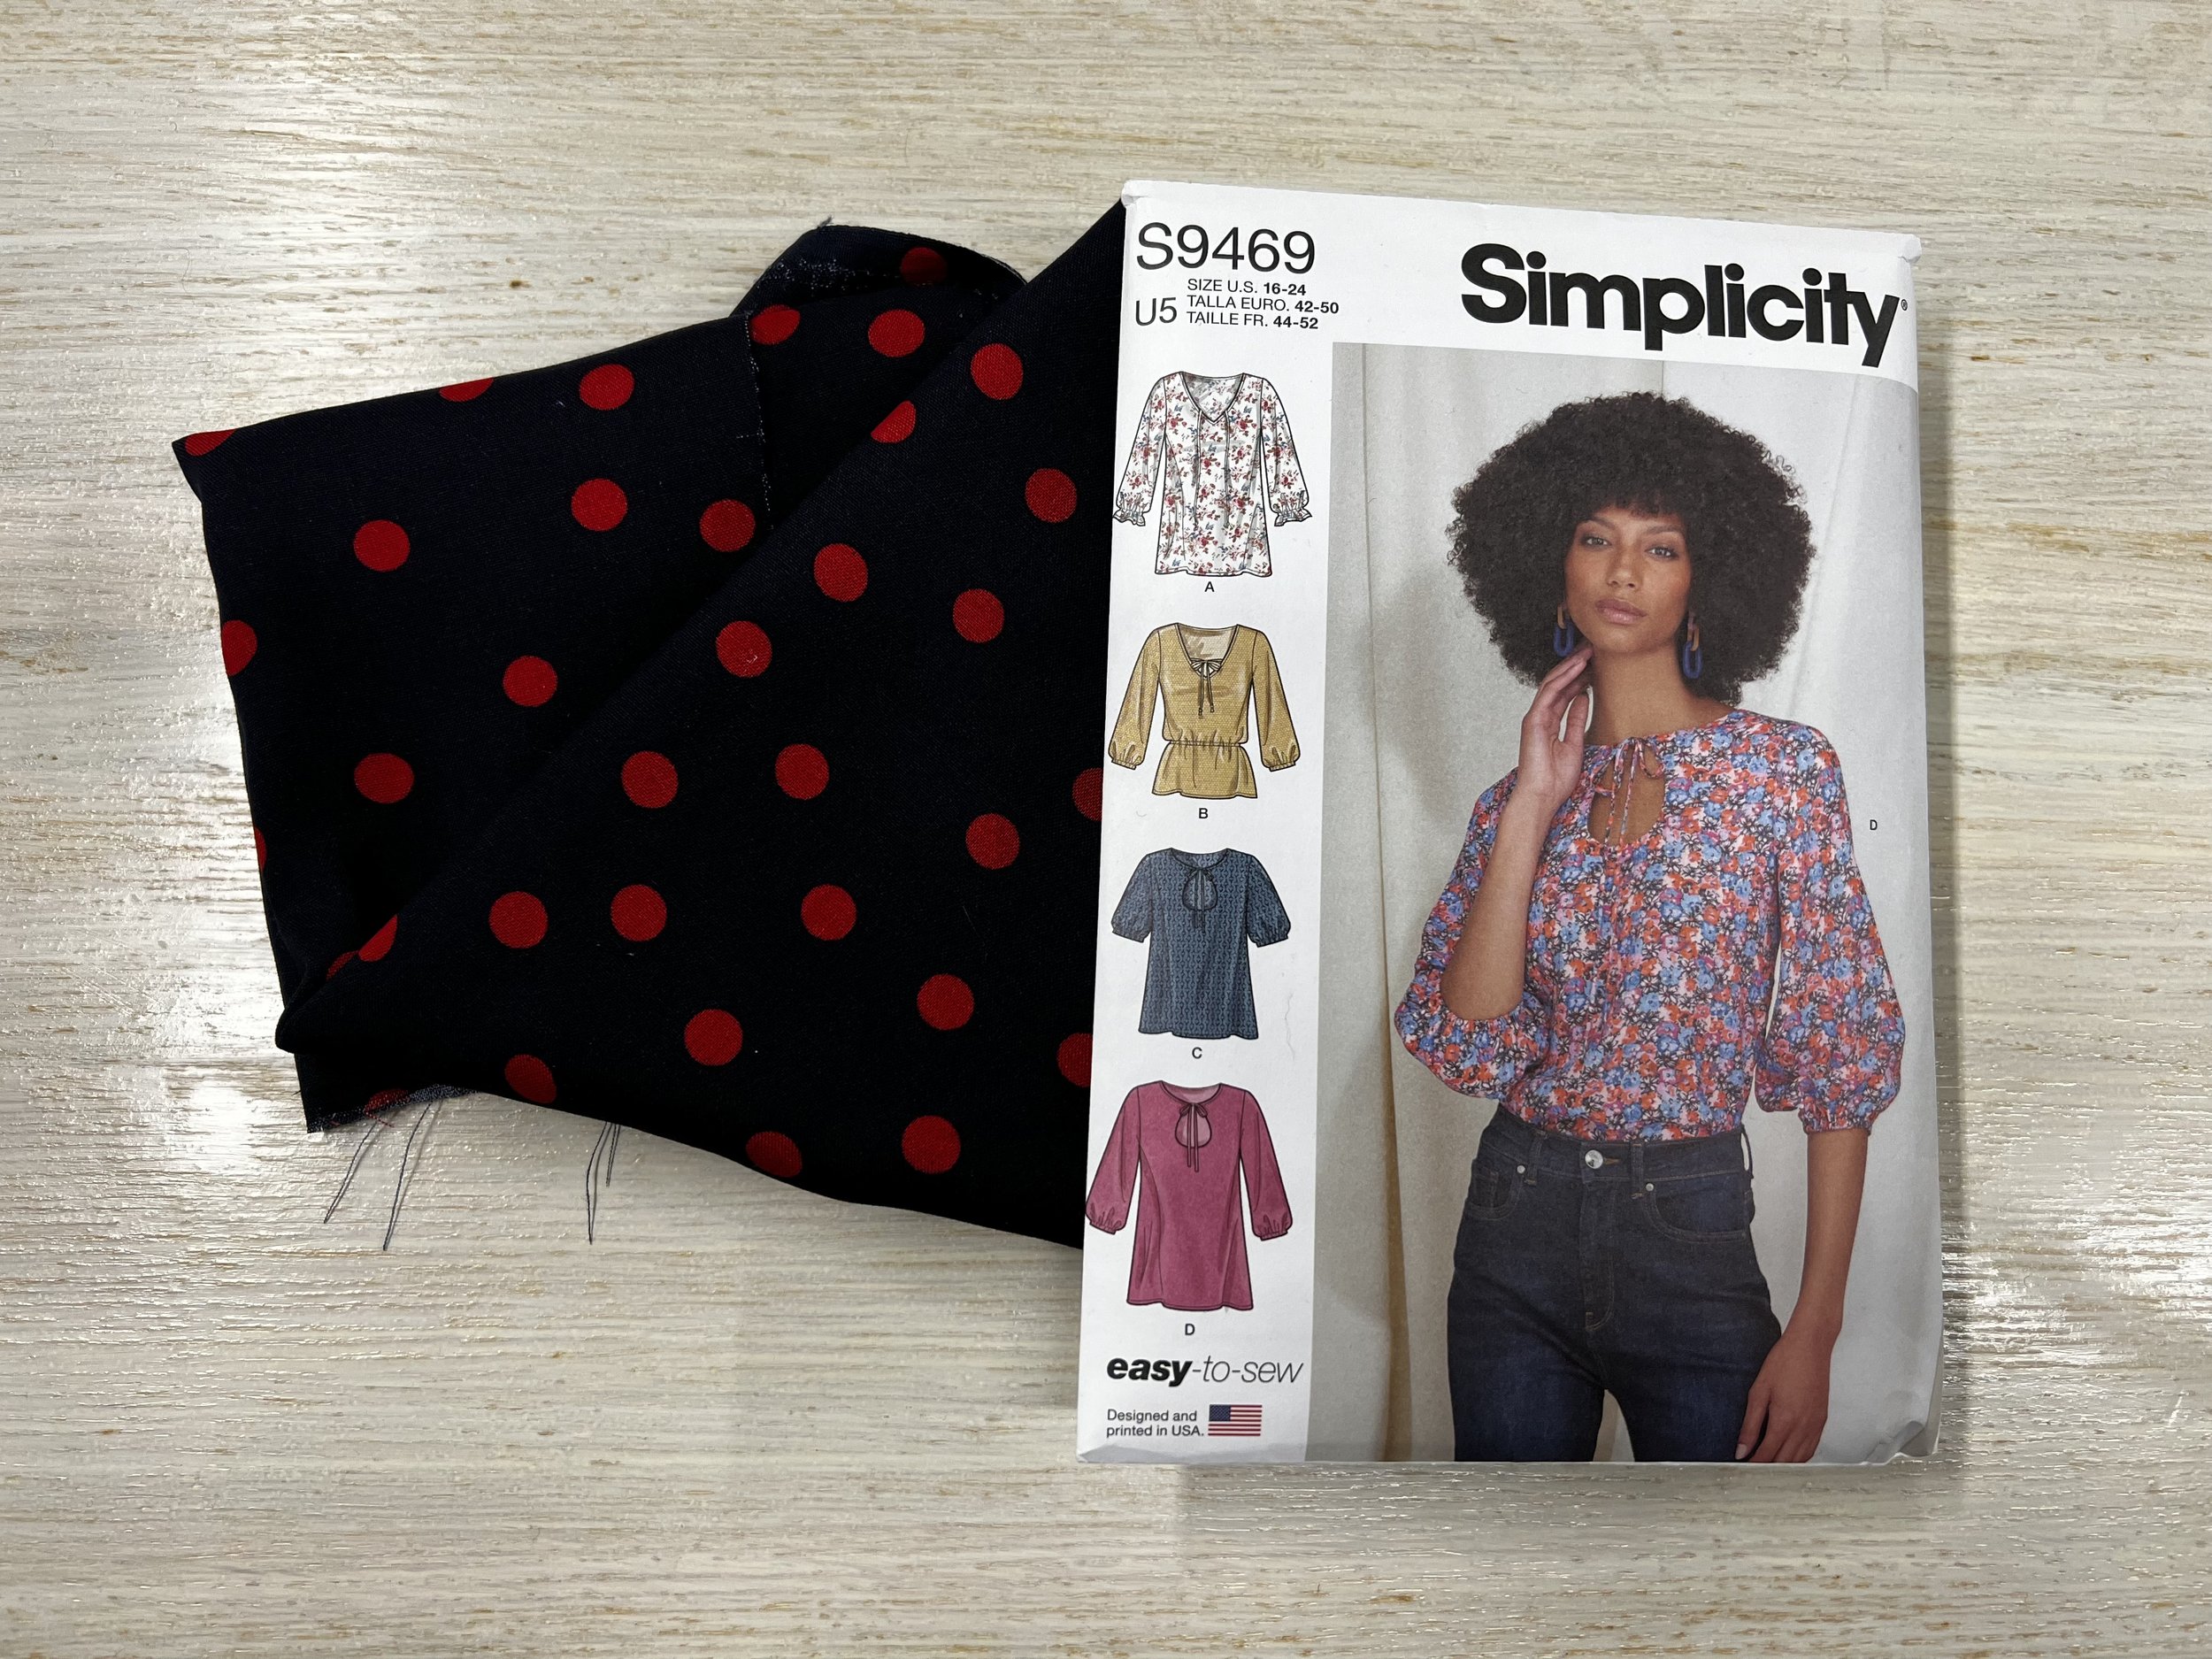
So we made S9469 earlier this week, and it is a great pattern! On my first version I had made a change to it. Mostly because I don’t care for elastic sleeves cuffs. There is nothing wrong with elastic on your cuffs but I just don’t care for it, they are actually somewhat uncomfortable for me. So today I’m going to show you how to change the elastic on your sleeve cuffs to a sleeve binding.
First things first, you need to remove the stitches on the sleeves and also the elastic. So get your seam ripper out and remove those stitches. Give your sleeve a good press.

Time to take out that elastic and rip out those stitches. Give it a good press once you are done.
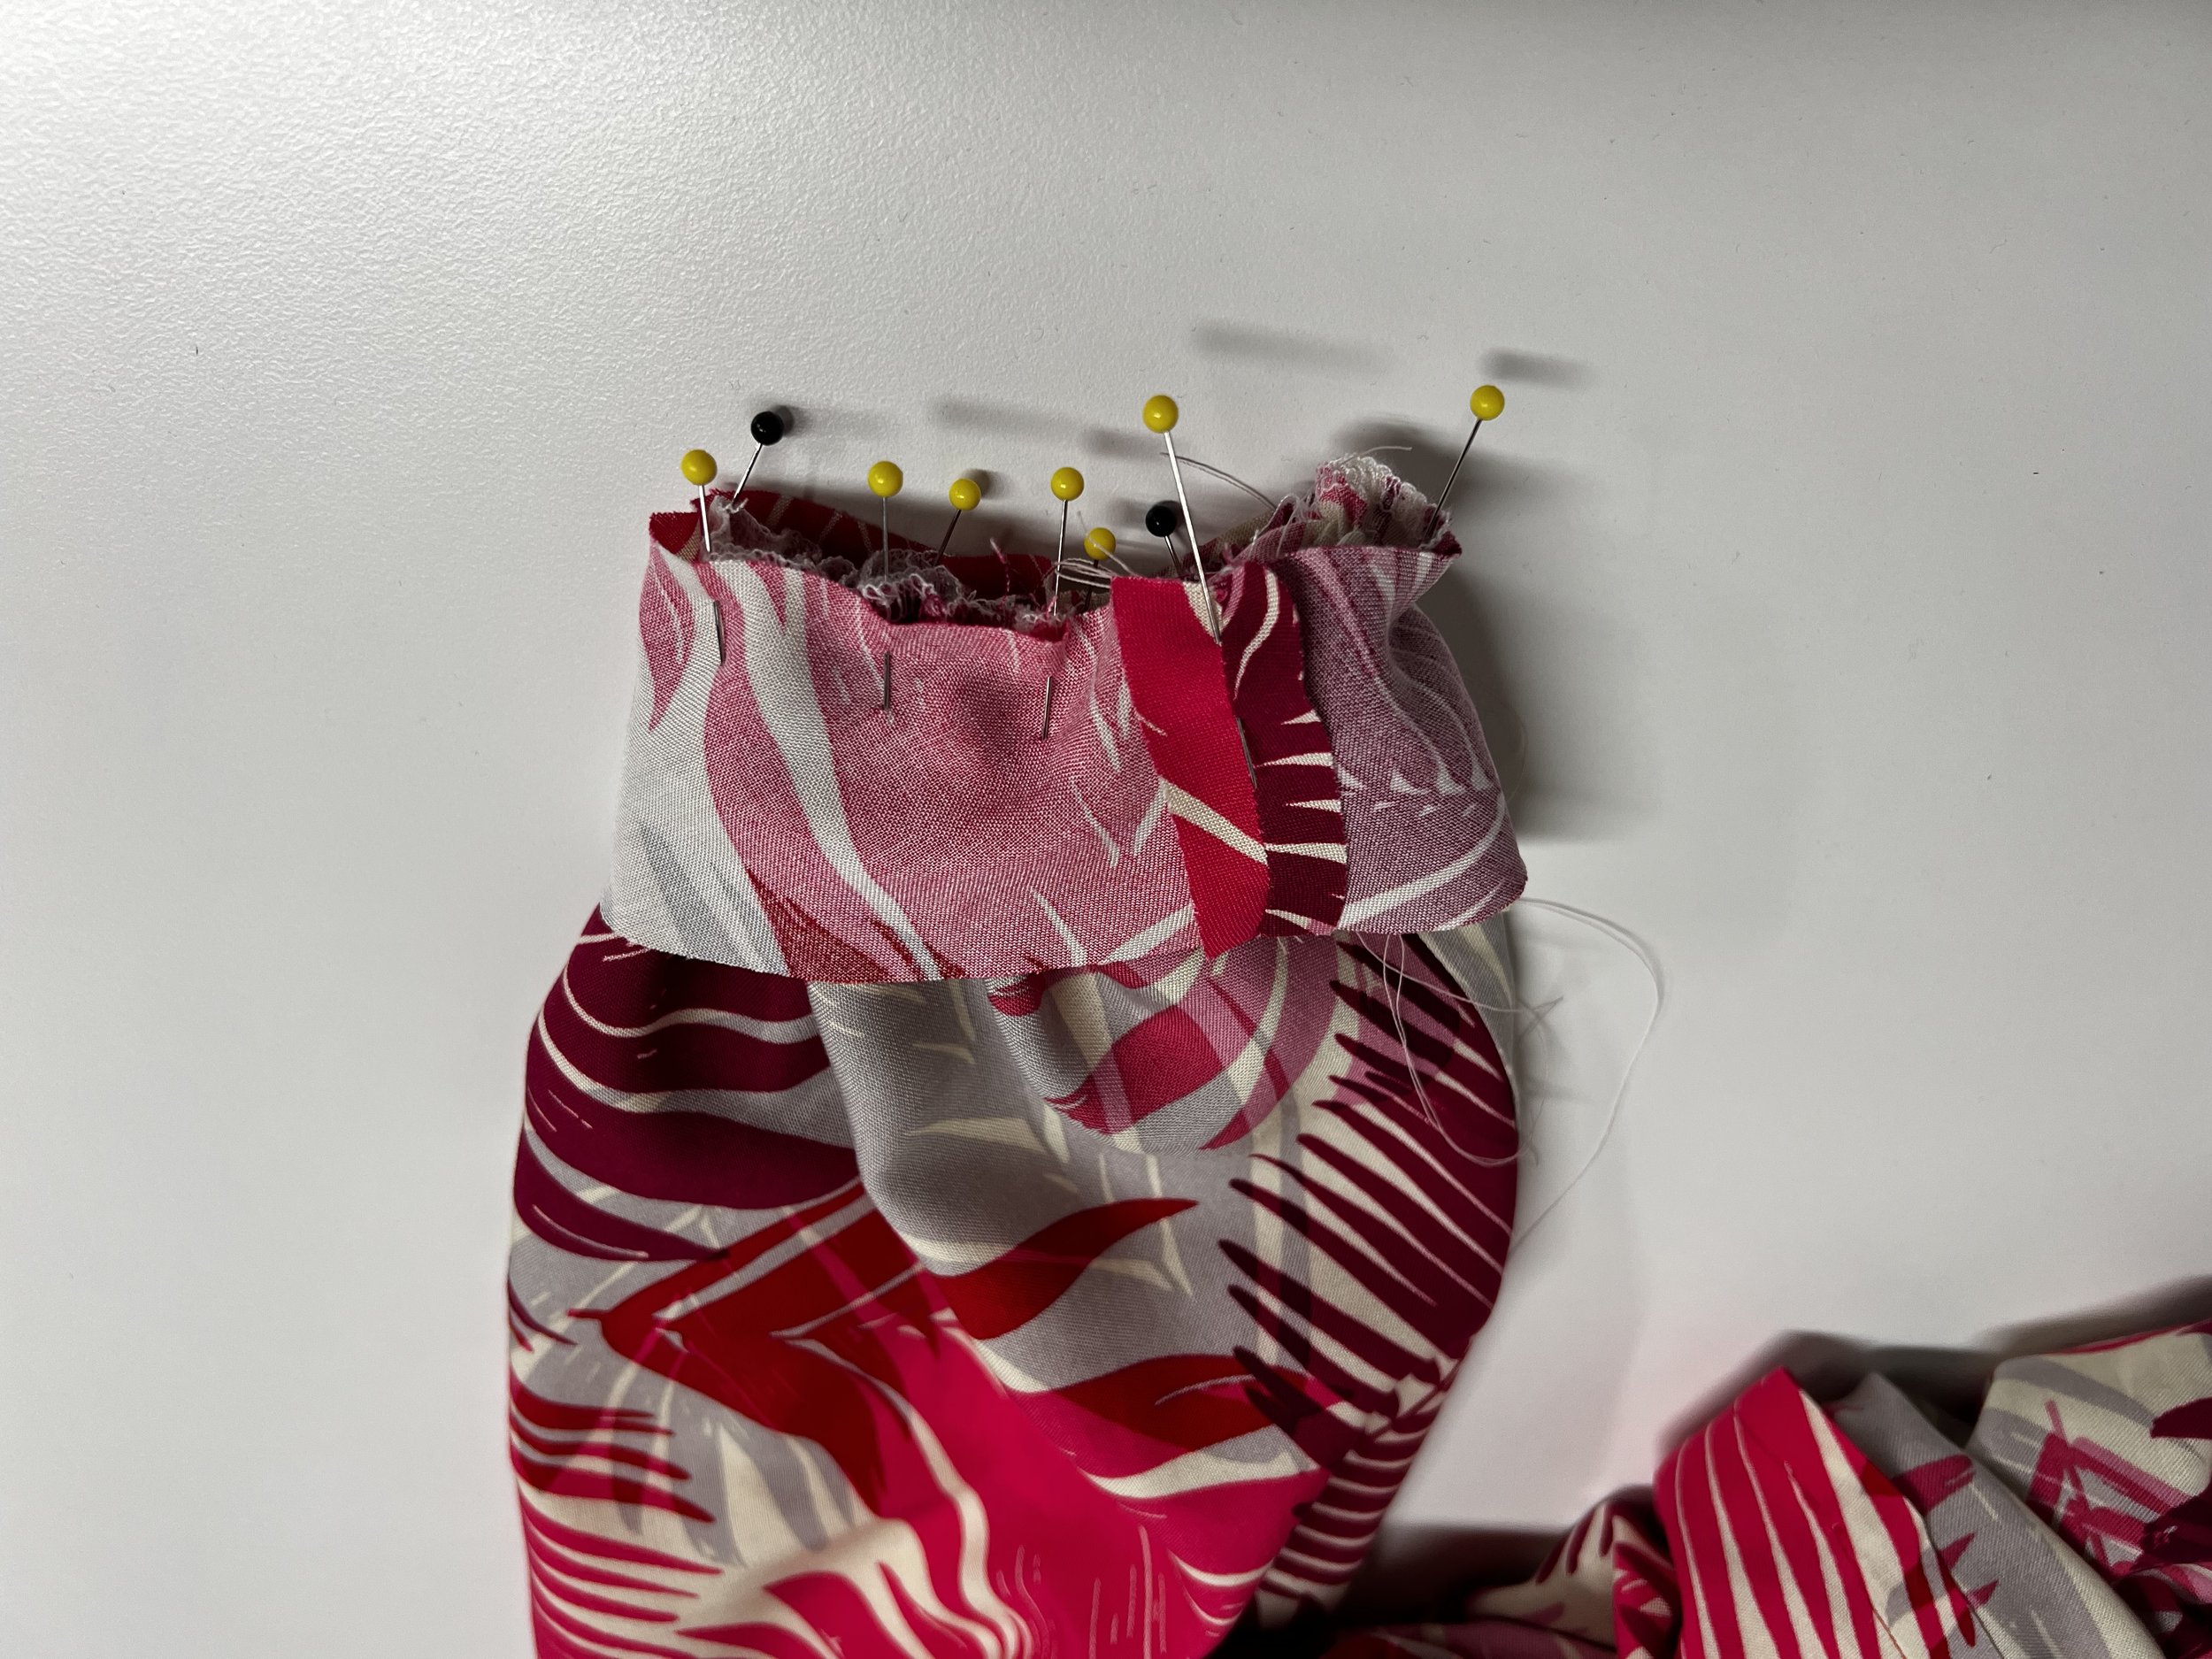
You will also need to do two rows of your longest running stitch on your machine as you want to create gathers as we have quite a bit of width on the sleeve cuffs.

Add two rows of gathering stitches… longest running stitch on your machine. Leave those threads long and don’t lock your stitches!
Next measure your forearm! Grab the measuring tape and measure the circumference of your forearm. That is the length of your forearm.

Length of Forearm + 1/2” Ease +6/8” Seam Allowance (3/8” per seam allowance and you have two) equals the total length of your pattern piece
Cut a 2” wide ( 5cm ) and use the length of your forearm plus 1/2” ( 1.27cm ) for ease and an additional 3/8” ( .95 cm) for seam allowance. Remember there are 2 seam allowances so you need to add 3/8” for each one… so 6/8”. That will give you the length of the pattern piece. In addition, this piece needs to be cut on the BIAS. I repeat, this sleeve binding pattern piece you are creating from scratch needs to be cut on the bias because it needs to stretch.
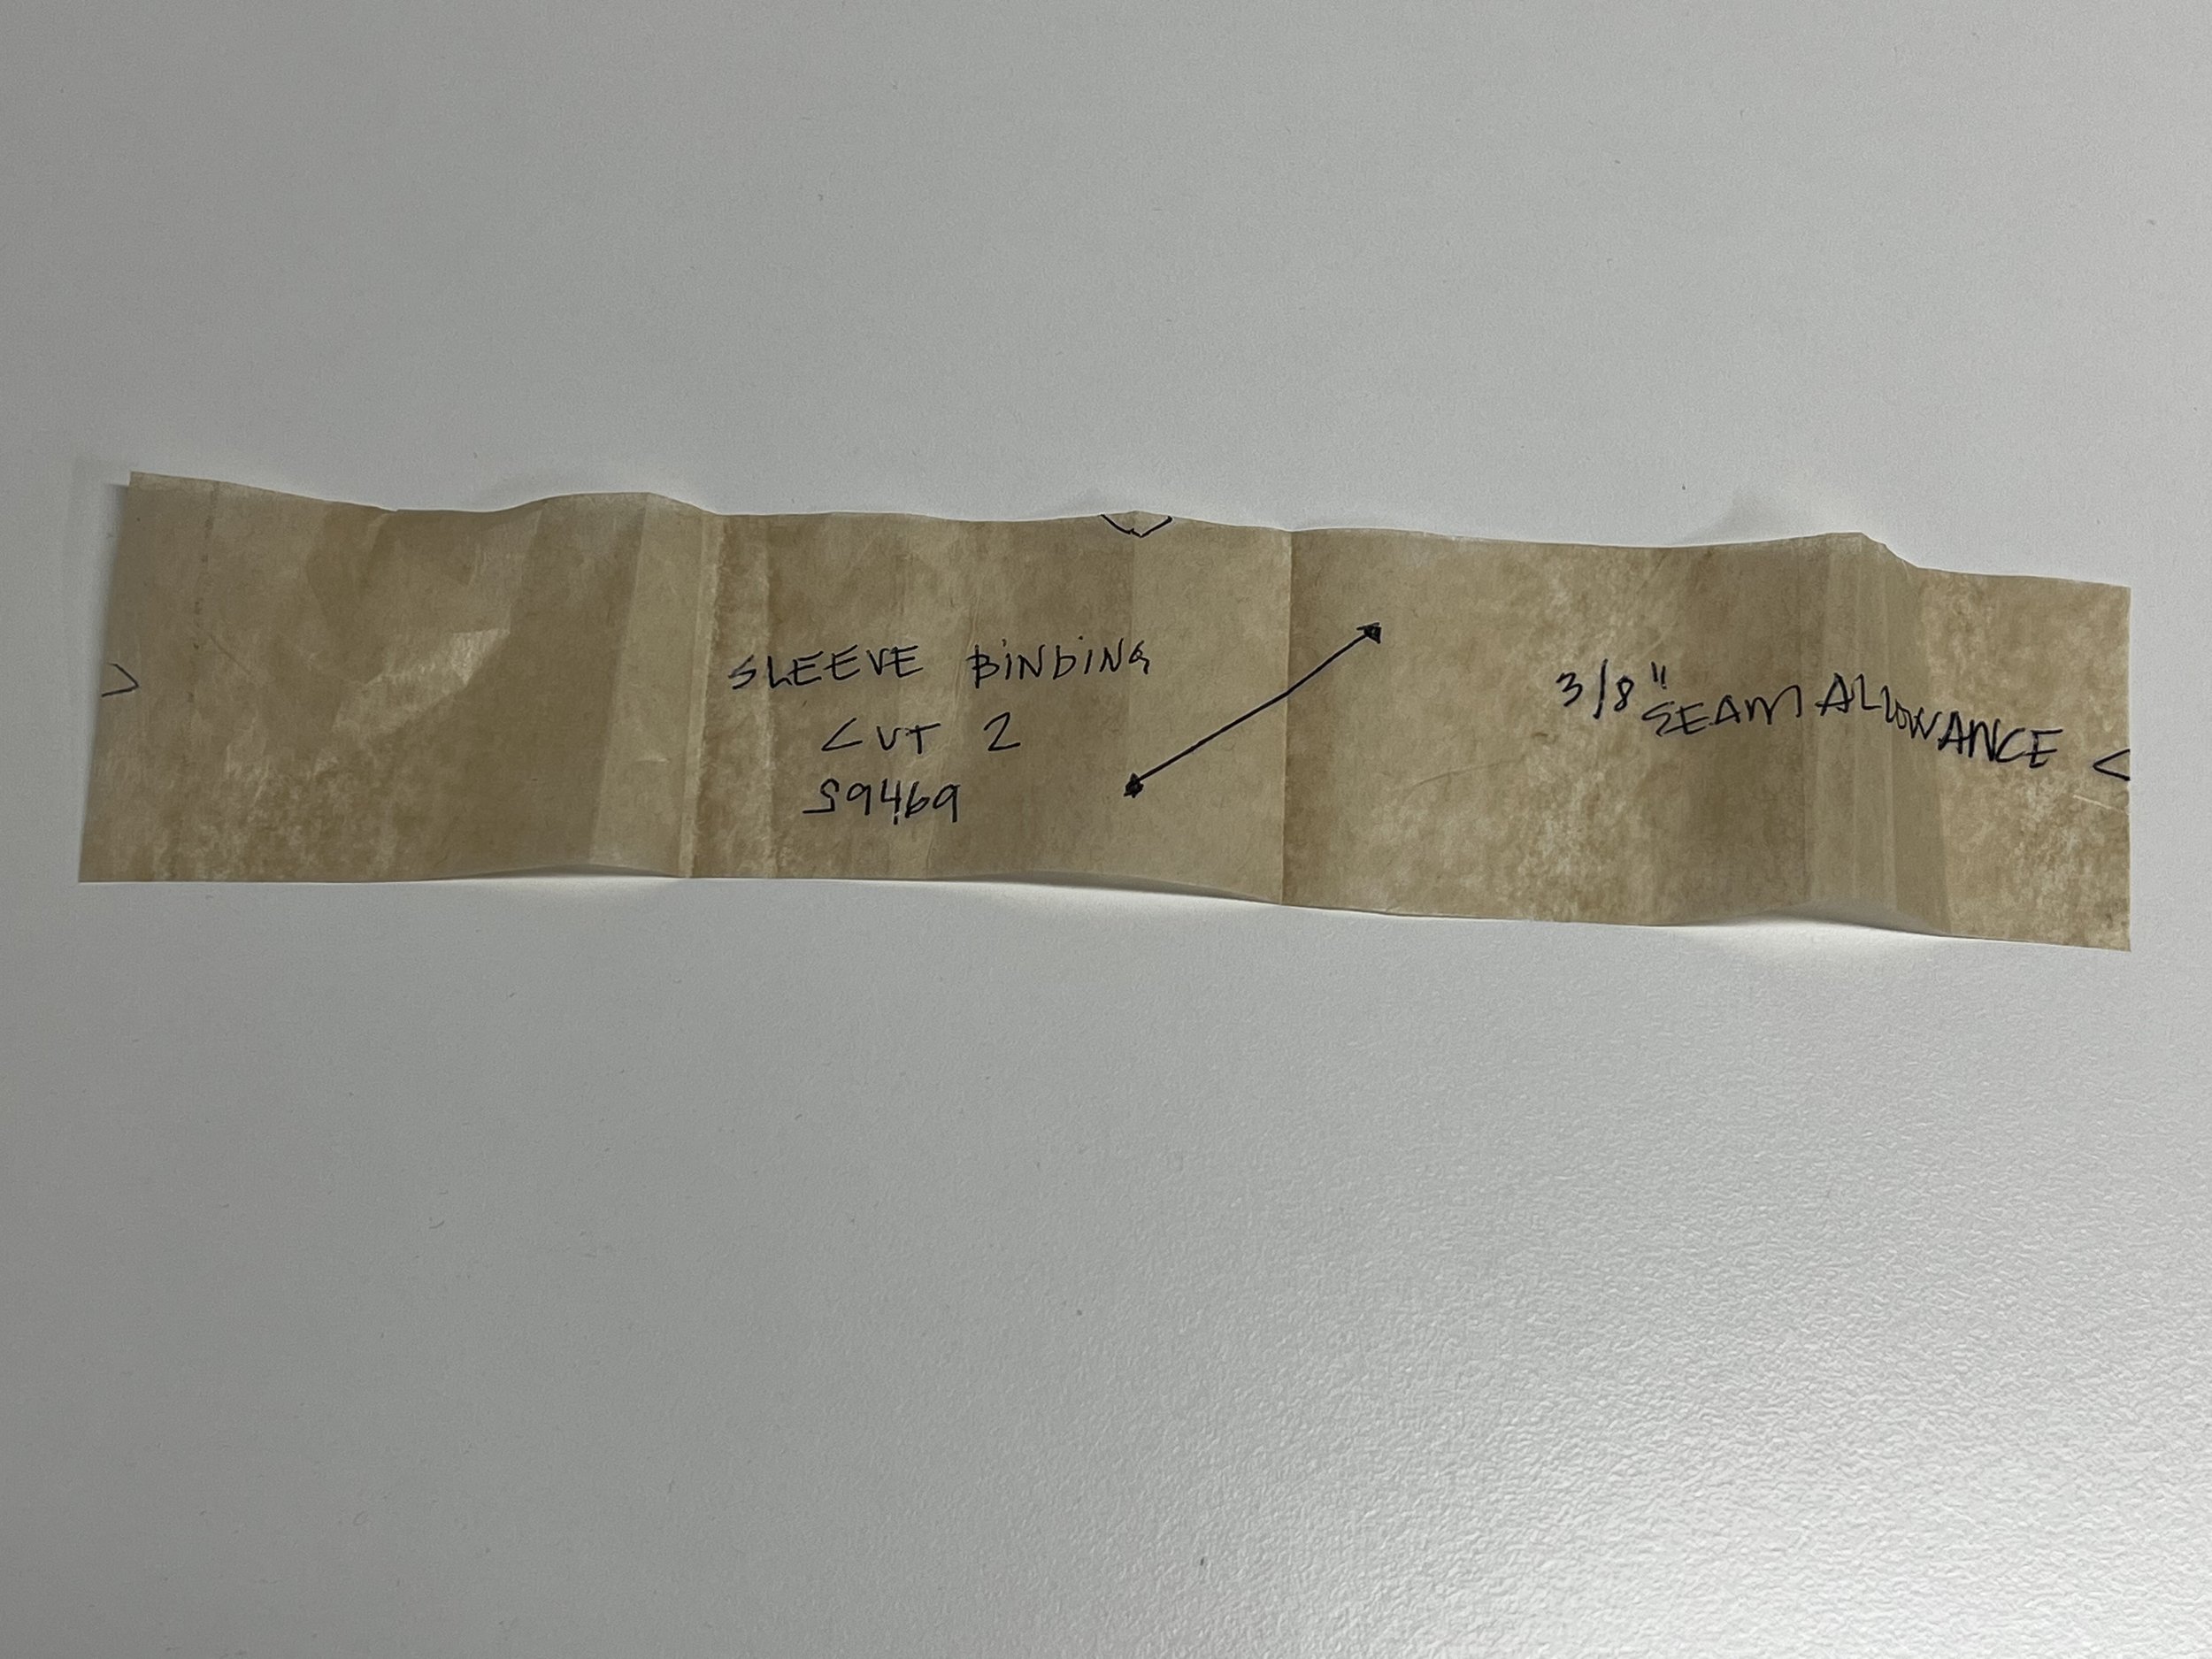
Self drafted sleeve binding pattern piece
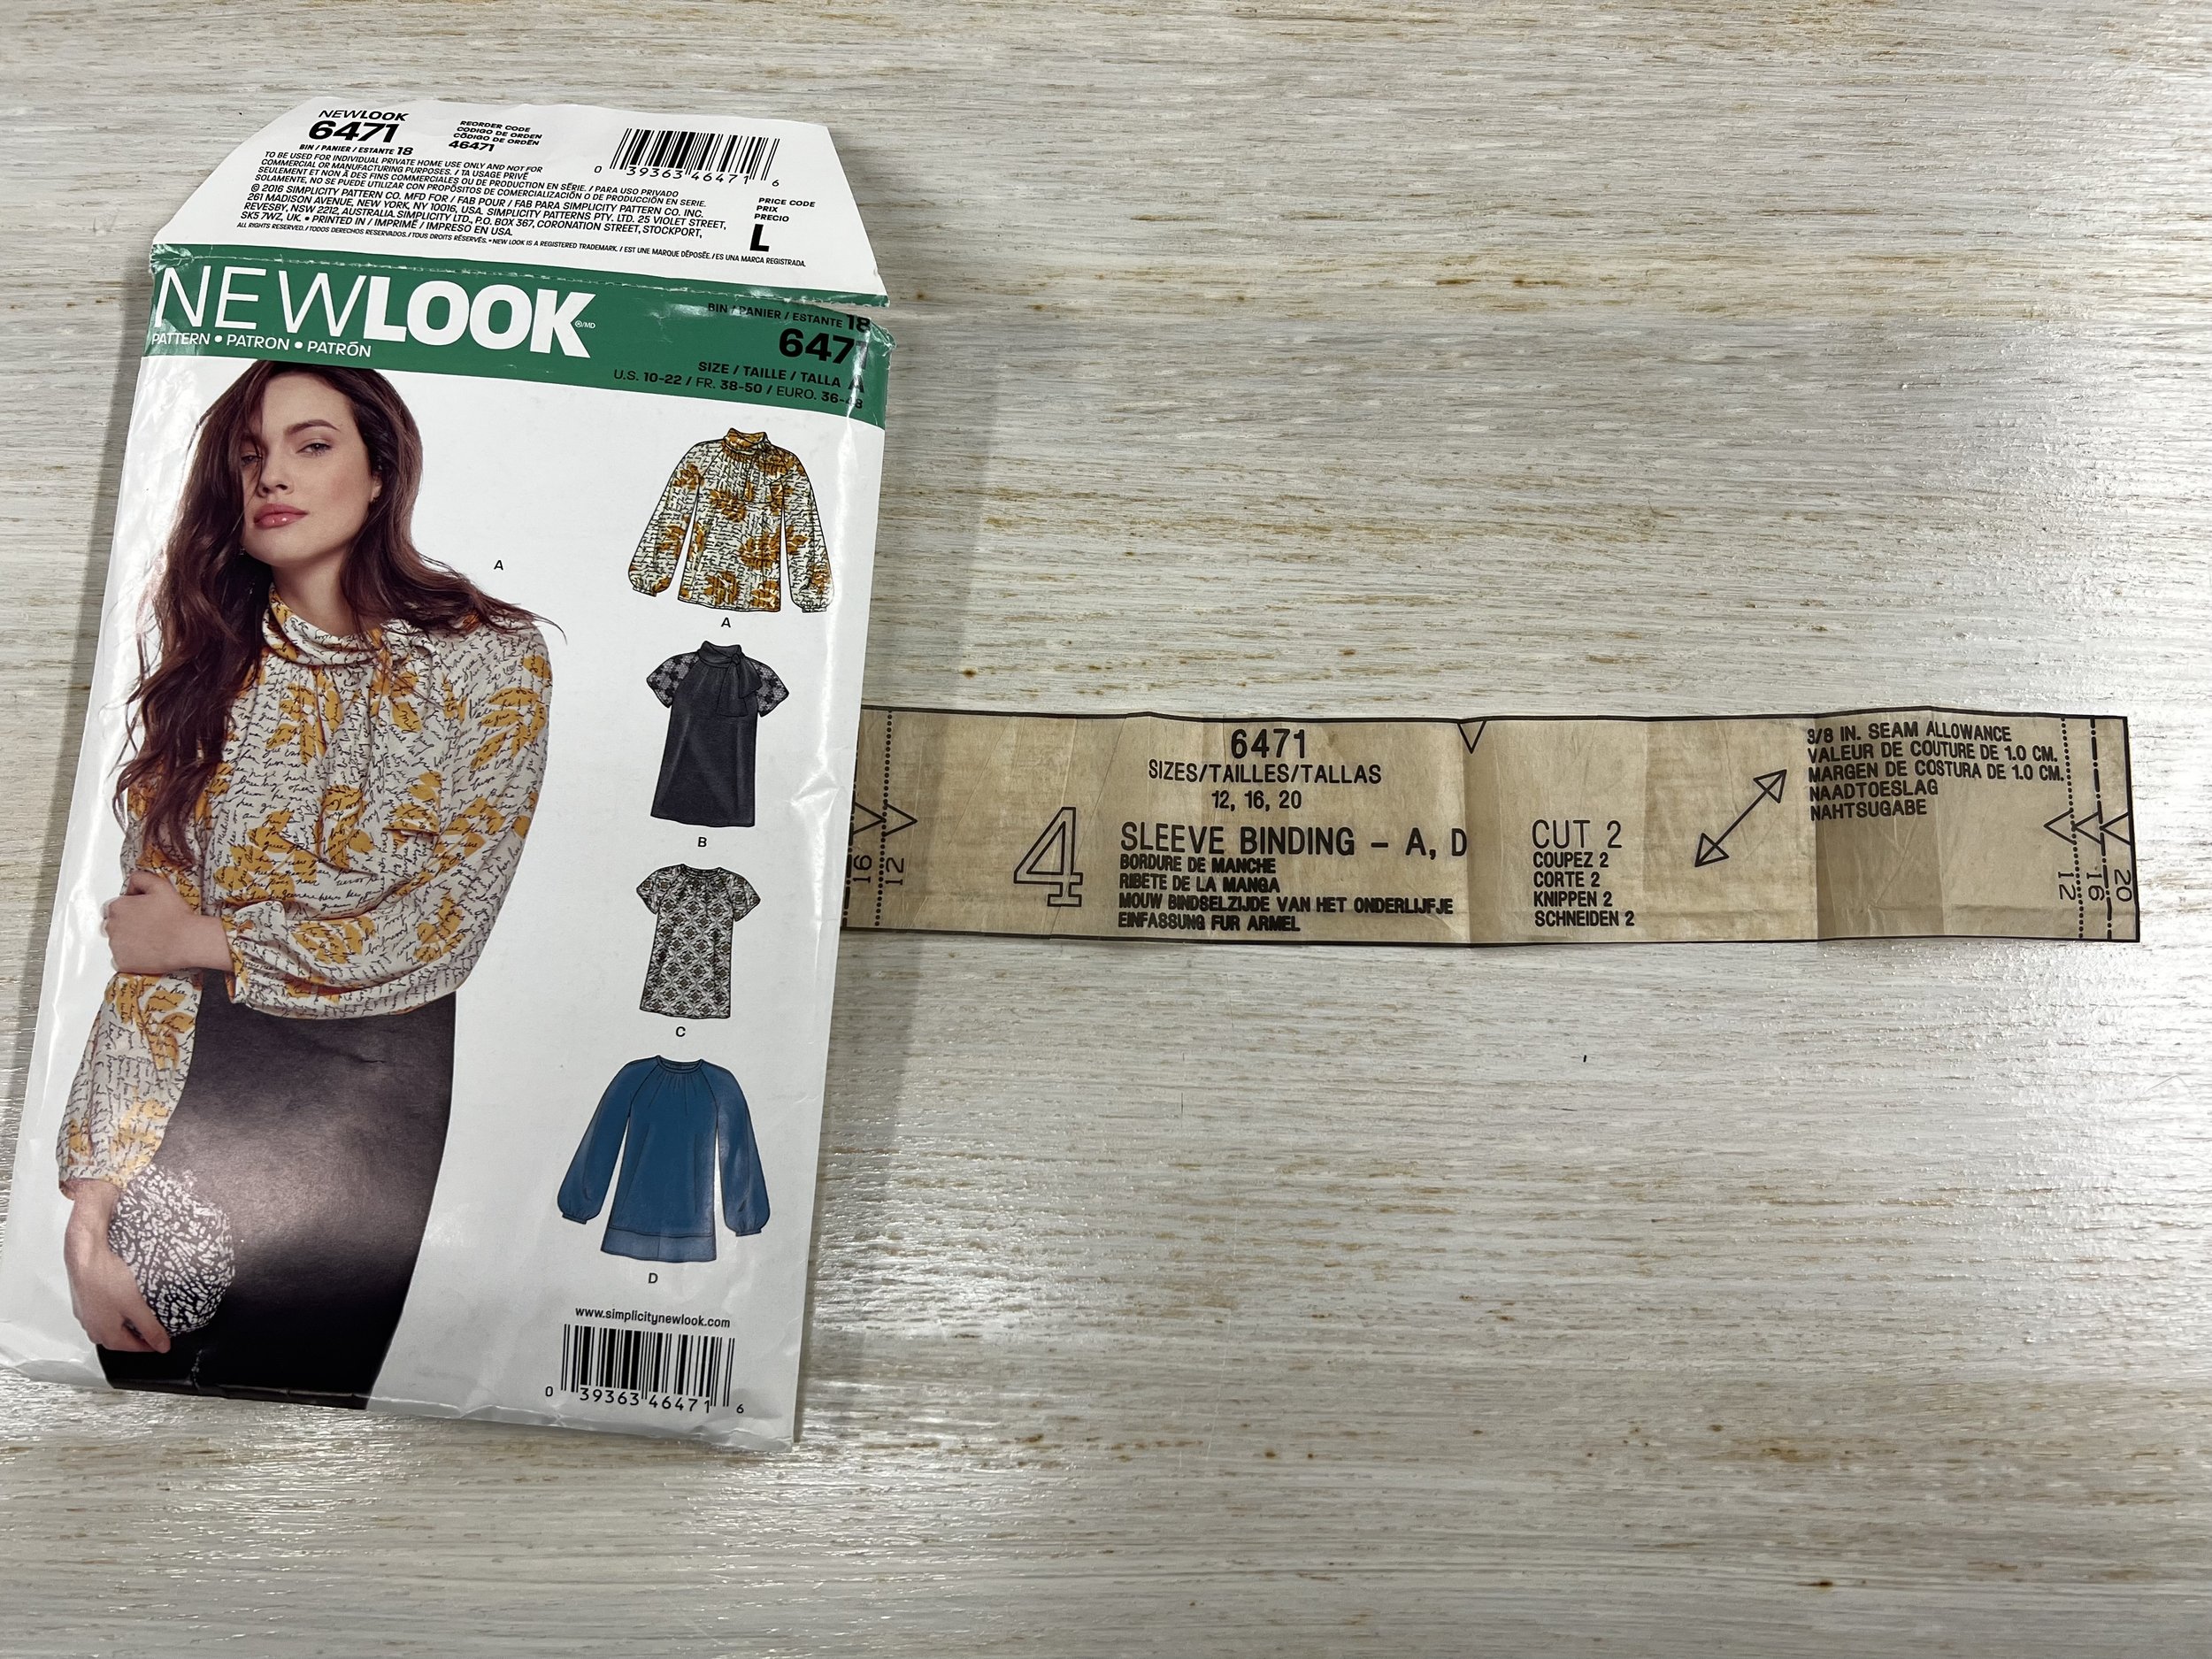
If you are not a lover of self drafting your own pattern pieces you can also use pattern New Look 6471 and a sleeve binding piece is included with this pattern. HOWEVER, you should measure it and see if you need to add a little length to it so it fits your forearm.
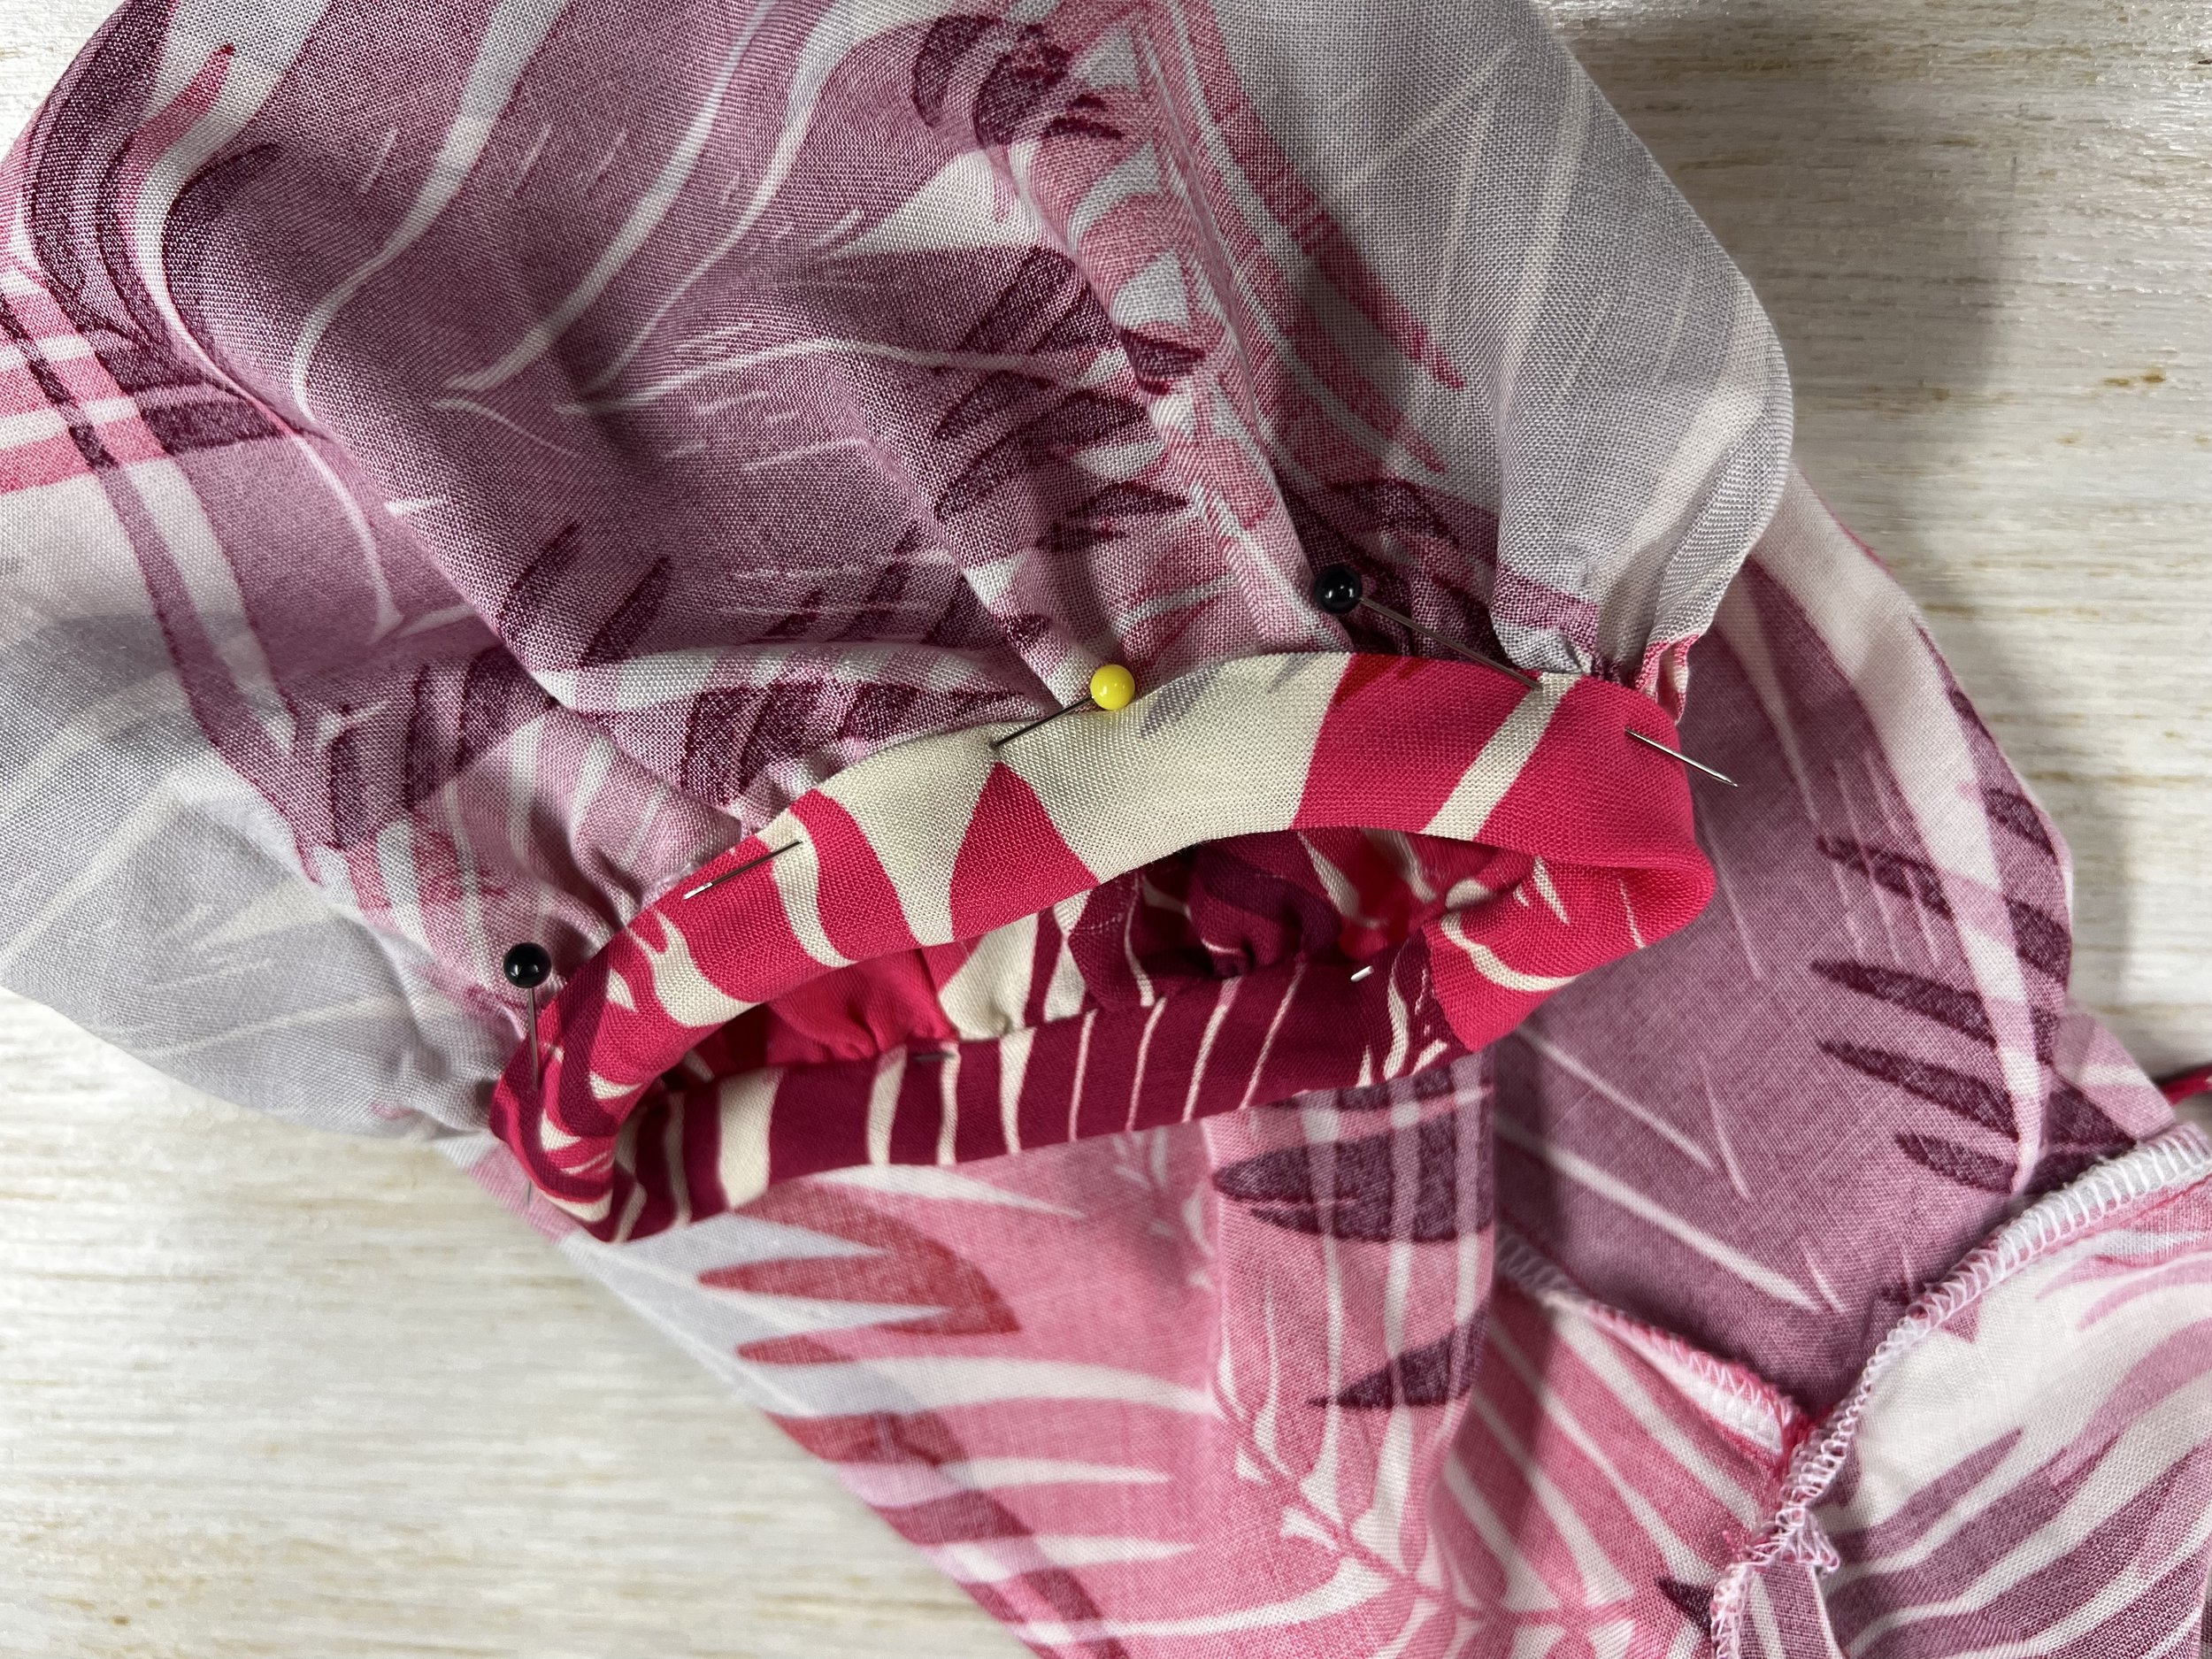
Now you need to stitch the sleeve cuff together. So with right sides together you have a 3/8” seam allowance. Press the seam allowance open!

Line up your seam with the seam on the sleeve. Pin. Pull your gathers so its the same opening width as the gathers on your sleeve binding. Pin. Remember you are pining on the outside (right sides together) because we are going to fold this towards the inside.
Stitch at 3/8” seam allowance all around. Don’t forget to back stitch at the start and at the end.
Now trim the gathered seam allowance down to 1/4” on the inside of the cuff and press your cuff towards the outside, and then press towards the inside 3/8”..

Now you need to slip stitch the inside of your cuffs. You can also stitch in the ditch (this is if you rather use your sewing machine!) but if you do make sure you catch the fabric inside the sleeve with your sewing machine…. hence why I like to use needle and thread and do it by hand. Give it one final press and you are done!
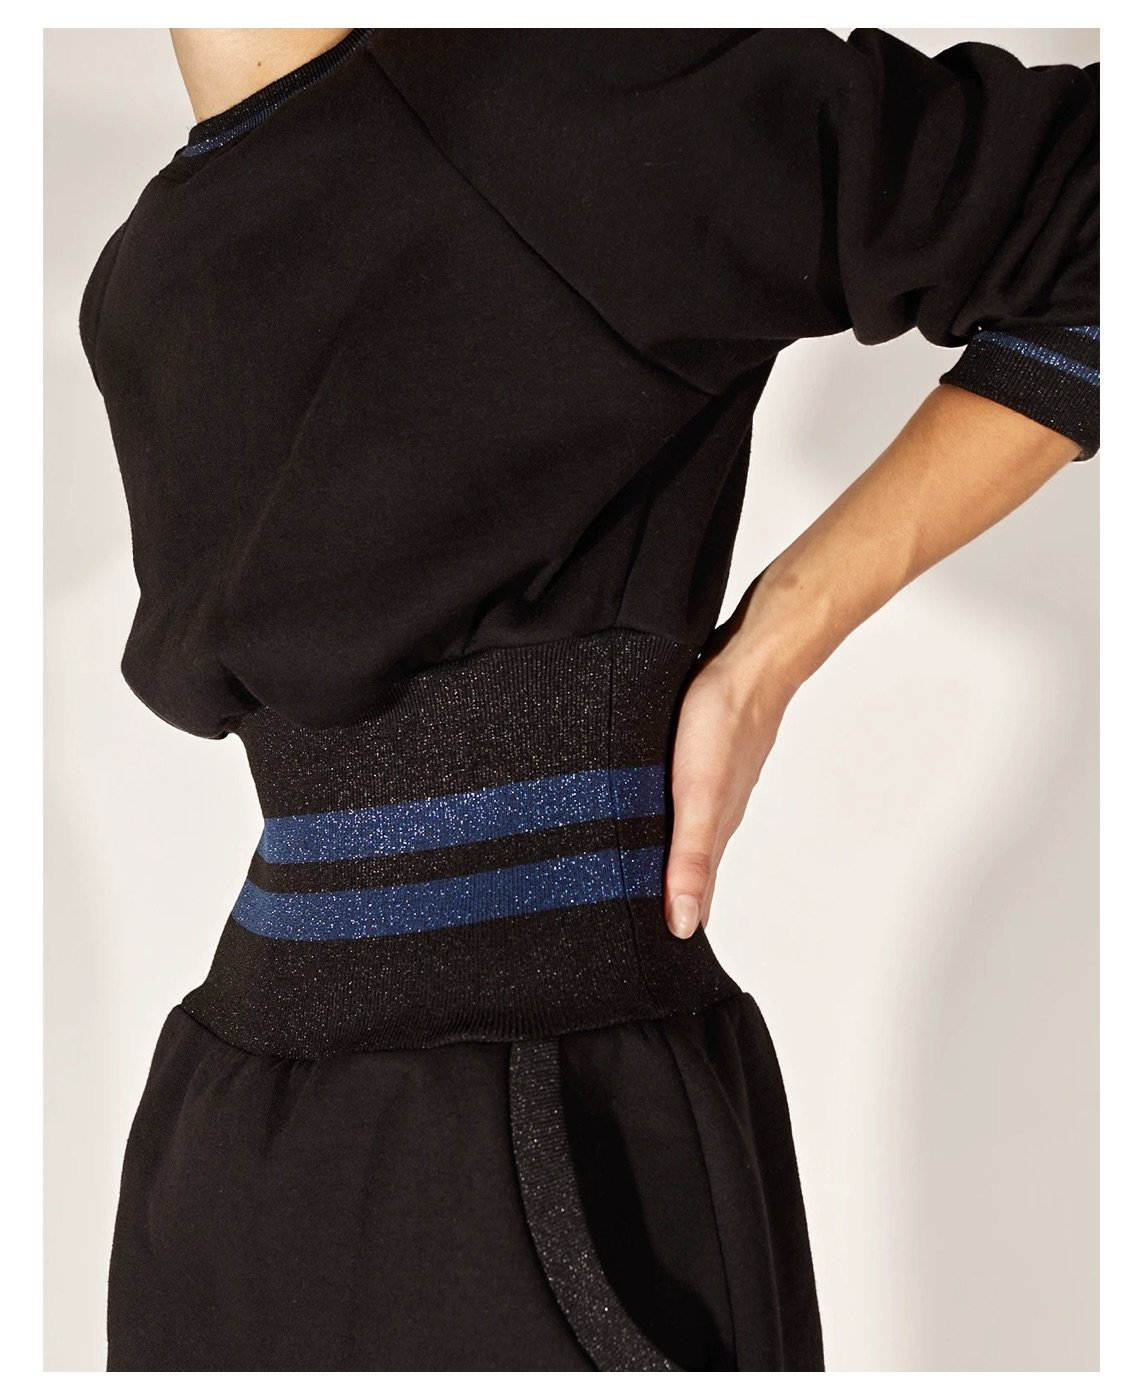
Which one do you prefer? Elastic cuffs or sleeve binding? I prefer sleeve binding, it elevates the look of the blouse, both are perfectly acceptable.

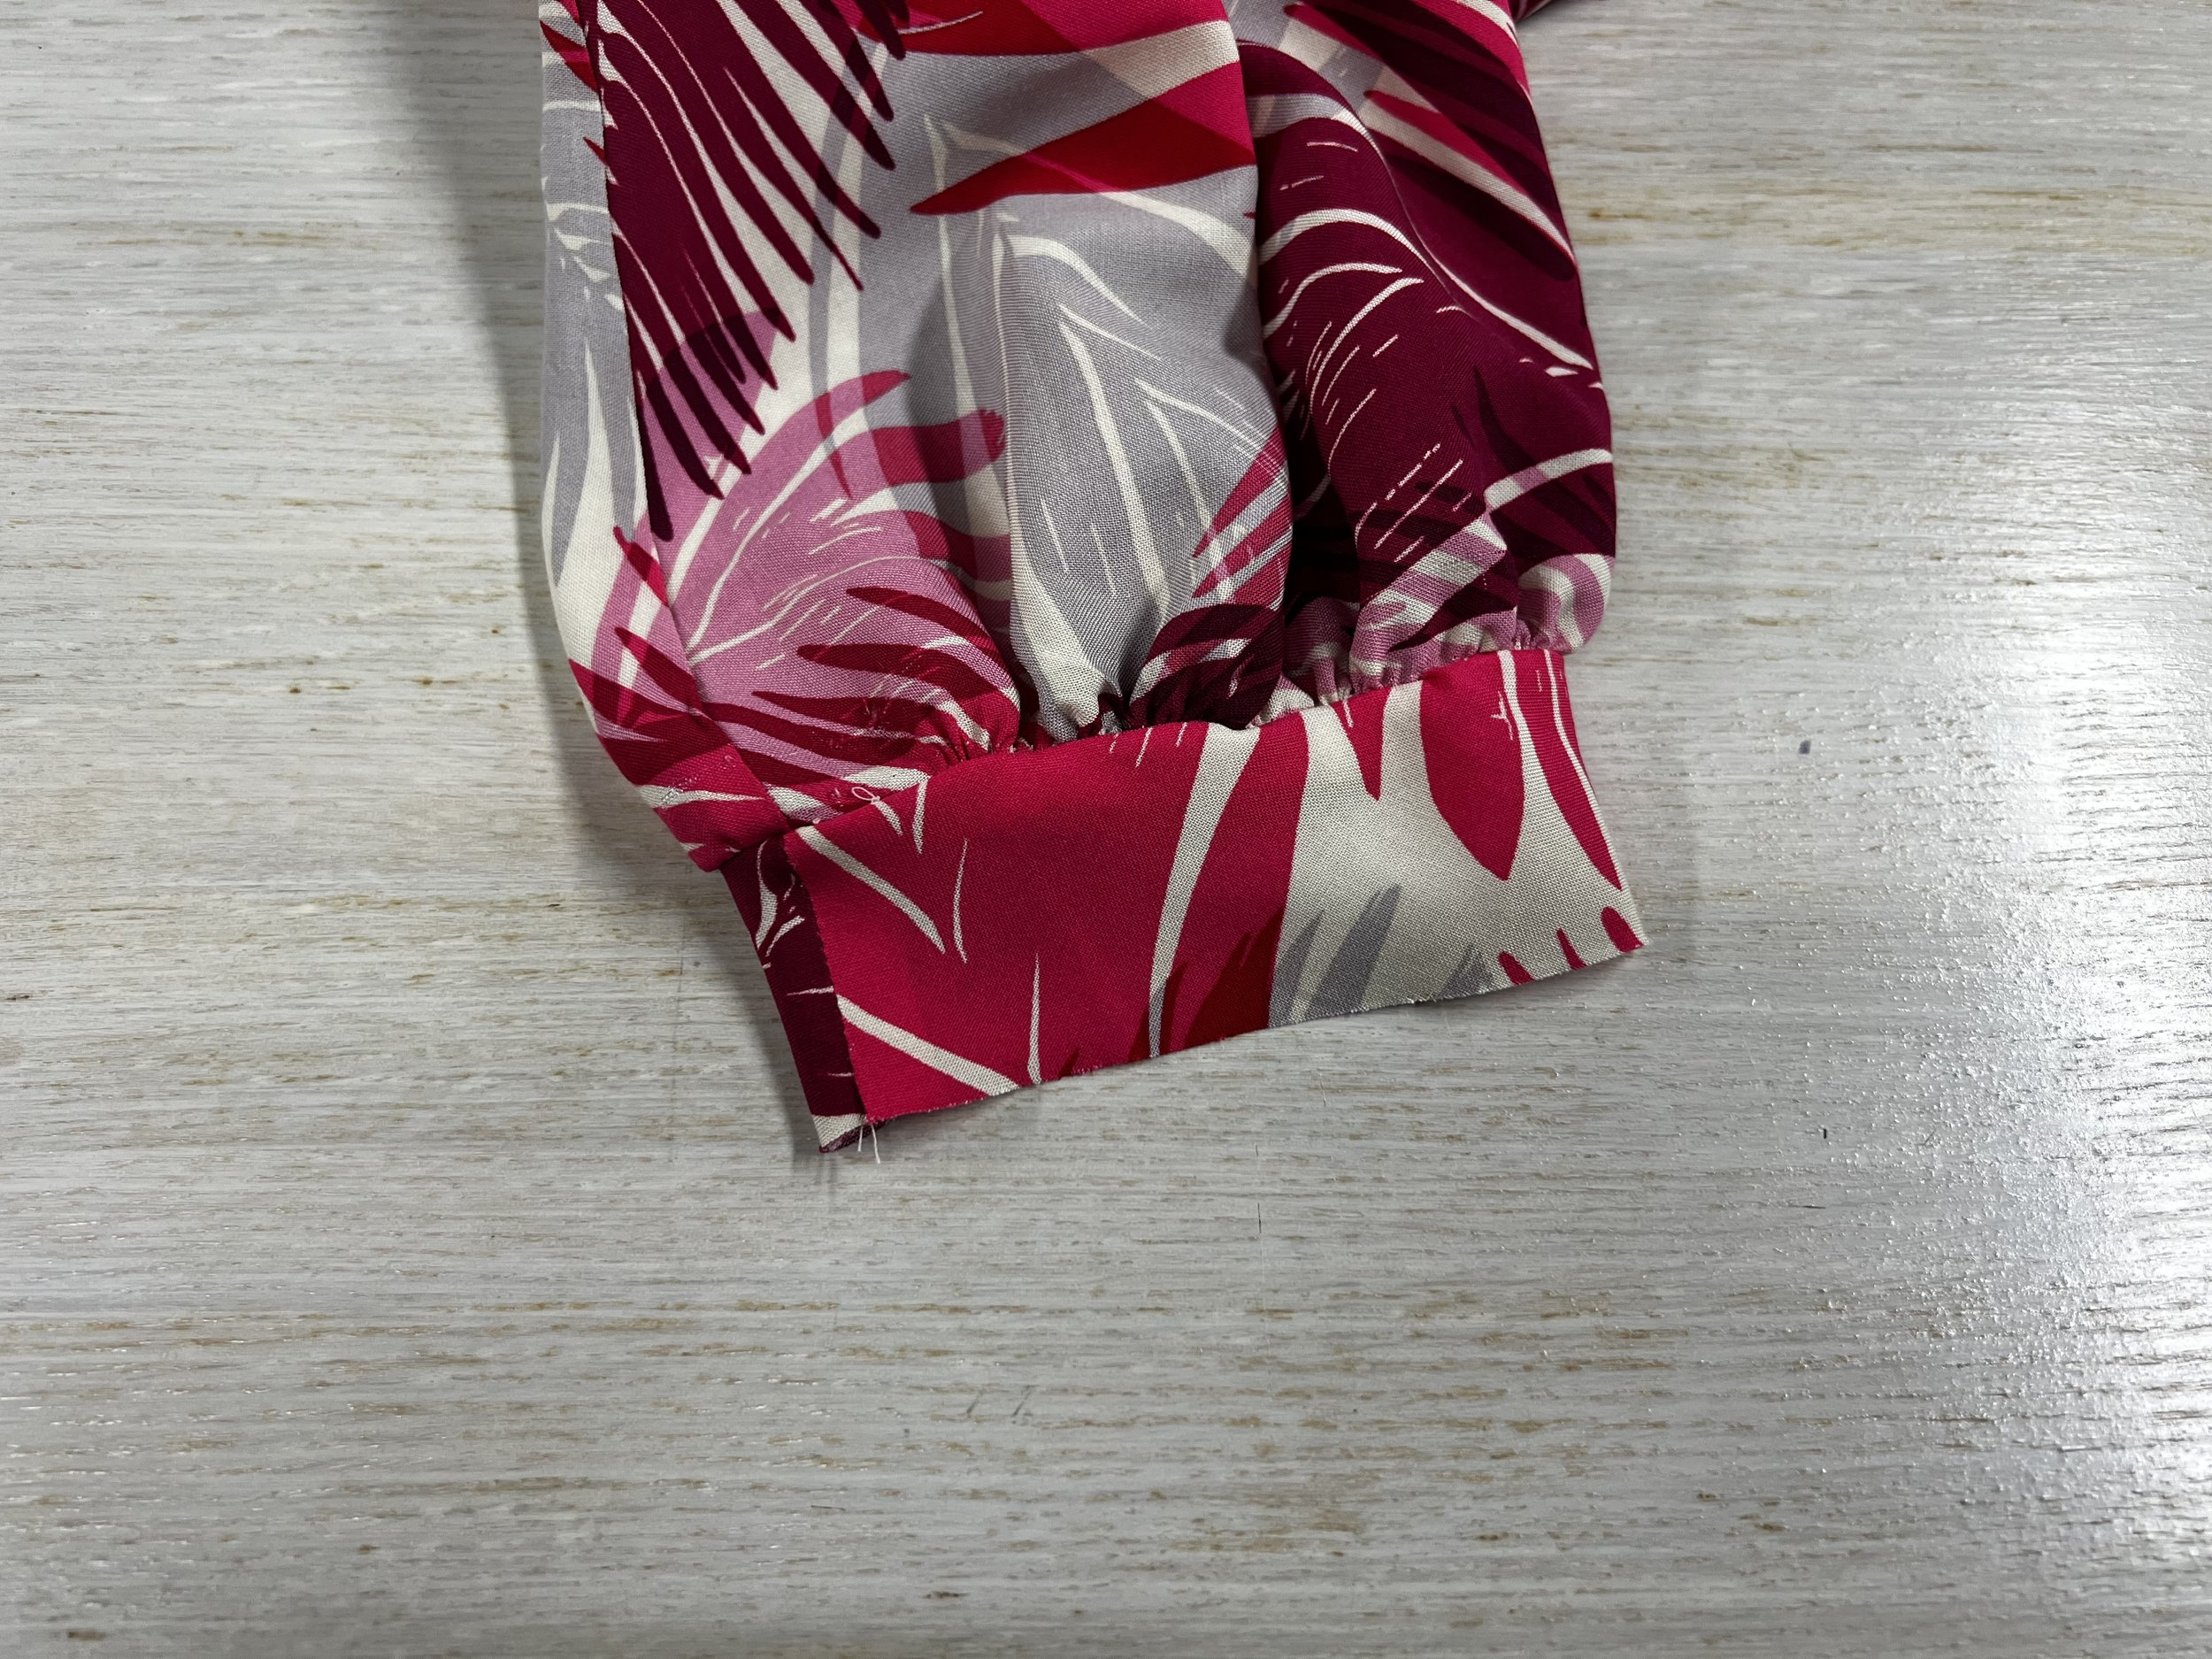
Love, Love, love my blouse! Now that I switched the elastic cuff with sleeve binding, it is also a lot more comfortable.

And better yet, I can put my arm on my hip, off to the side or even bend my elbow all the way and it doesn’t pull on my blouse!

Yes, it does take a little bit of extra work and time but I feel that it is well worth it.


Simplicity S9469 - Sew Along

You asked for it so it was fitting that I gave you a sew along video tutorial for Simplicity S9469. It is a great pattern to have in the stash. I didn’t even talk about all the ways you can hack this pattern and I should in a later video but it’s one of those must have patterns so you can make it over and over again in all the colors.
I used a rayon challis fabric from Vogue Fabrics in Evanston, IL before they moved to their new warehouse space. I tried finding a link for you online and I can’t find it. But any rayon, challis or even cotton lawn fabric would work for this pattern.
I wrote a pattern review for this pattern earlier as this is my second time making it in less than a month. Here is a link for it.


Mid February Sewing Plans 2022

Trying not to bite more than I can chew this year (remember one of my goals!) and as I’m juggling quite a few things last month ( as they say kids, pets and life) and into this month I’m trying to sew a few things and February is going the same way. I still think my plans for last moth were ambitious so lets see if I can scale things back a bit.
So here is what I’m planning for this month and I suspect into March because as you know its a quick month.
S9469 - I was itching to make this pattern so bad that its already done! If you haven’t picked up a copy of this pattern, you must. Easy and quick sew. I used a rayon challis and a cotton lawn would also work for this pattern. I wrote a blog post about it and the only thing I changed on it is the sleeve cuffs / binding that have elastics. Elastics be damned! I drafted my own sleeve binding pattern piece and changed it. I’m very happy with the outcome and I feel it finishes off the sleeves a lot better.
Rayon Challis and S9469 Pattern
Romy Pattern by Tilly and The Buttons - This pattern has been in my stash for a good couple of years. I started working on it and the fabric that I had picked at the time wasn’t working out so I just put it off to the side and casted off along with the pattern. But I actually think its a great simple dress and some times I just need a palate cleanser or what I like to call an easy sew. So this is what I’ll be doing for that. I picked this beautiful mint striped French Terry fabric from Minerva. They have it in a few different color ways. What I really like about it is the thin sparkle stripes within the white stripes. Its just enough and I think it will be a fun one. I’ll be doing something a little different with the back tie pieces as I suspect they may get in the way if I’m wearing a light jacket or cardigan over it.

Mint Striped French Terry and Romy Dress pattern
N6644 - I love those New Look Patterns, my only complaint is that their sizing is not inclusive at times, but We get what we can get that fits. This is a pattern for cargo pants. I have this fabric in my stash from Joann’s. Got it about a year ago and hoping to make a top that goes with it using the top shown on the pattern.
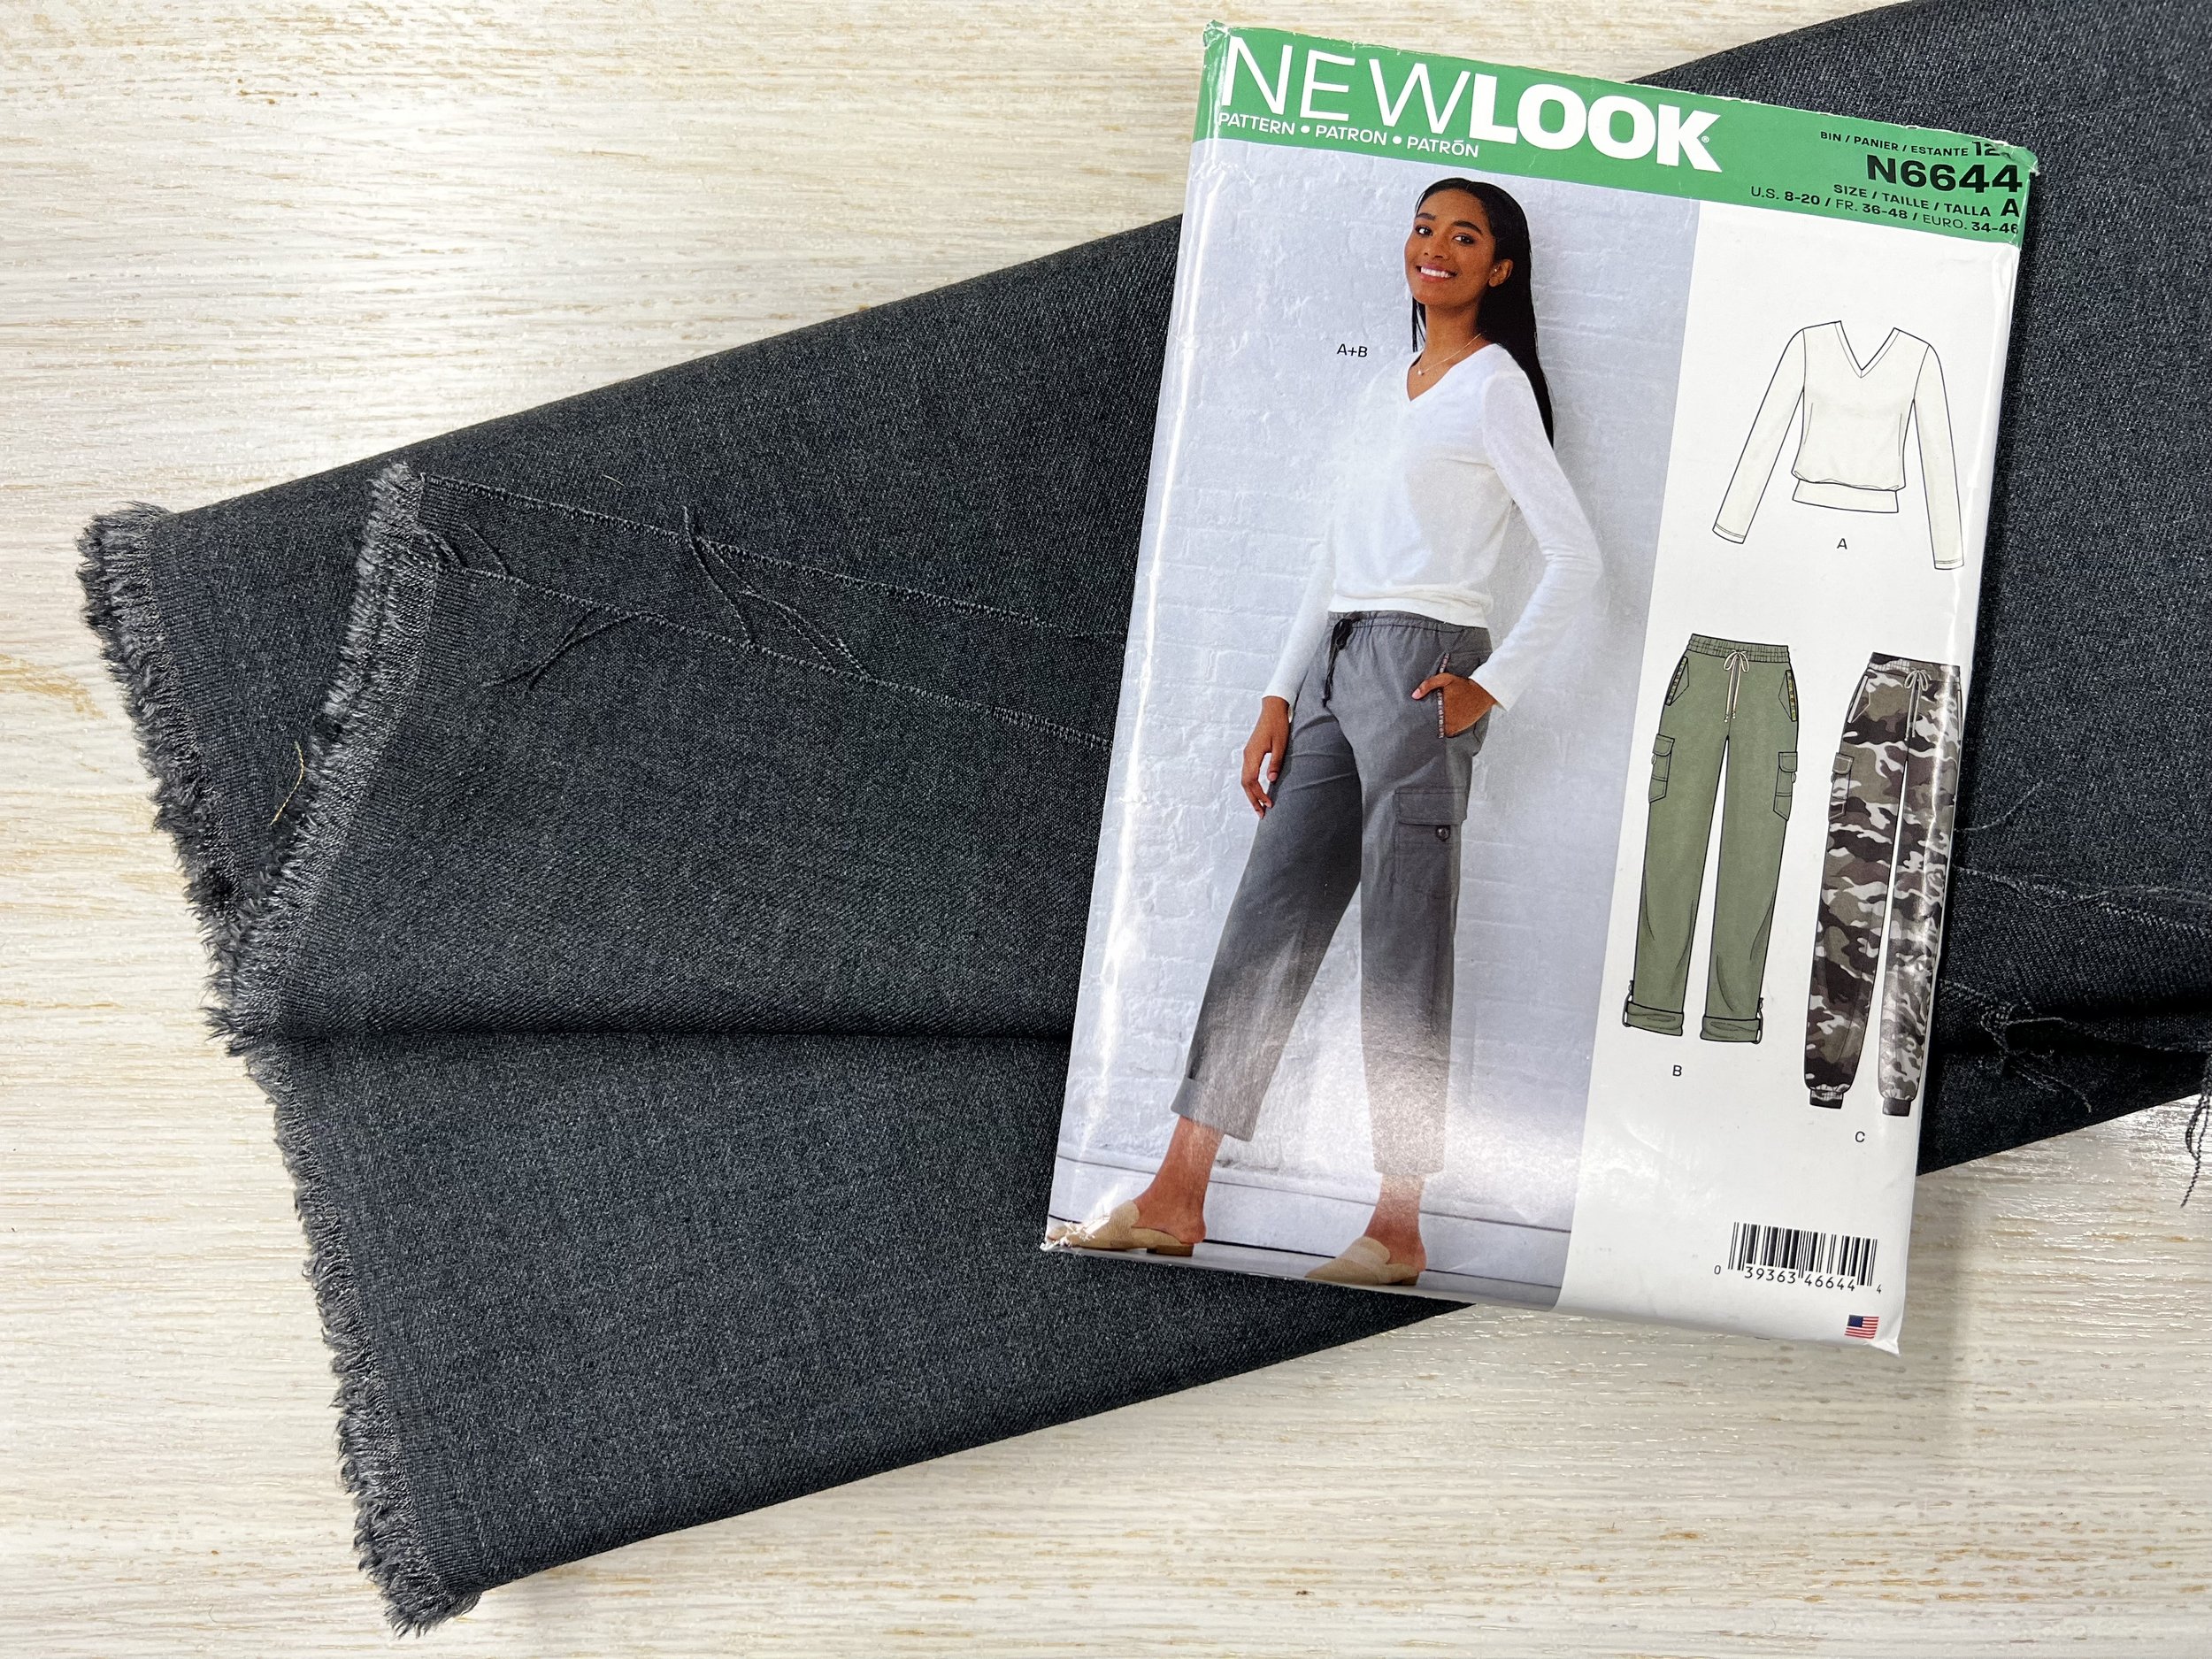
New Look 6644 pattern
V8959 - A cape, and they are on trend right now. I keep seeing capes all over the place. If you were looking at some of the fashion shows you will see them, and they are all over the place. Because I’m sure you are also getting bombarded with the clothing ads. So I’m sewing a cape and we are doing a sew along for it, because why not. I’m using a boiled wool from Minerva.
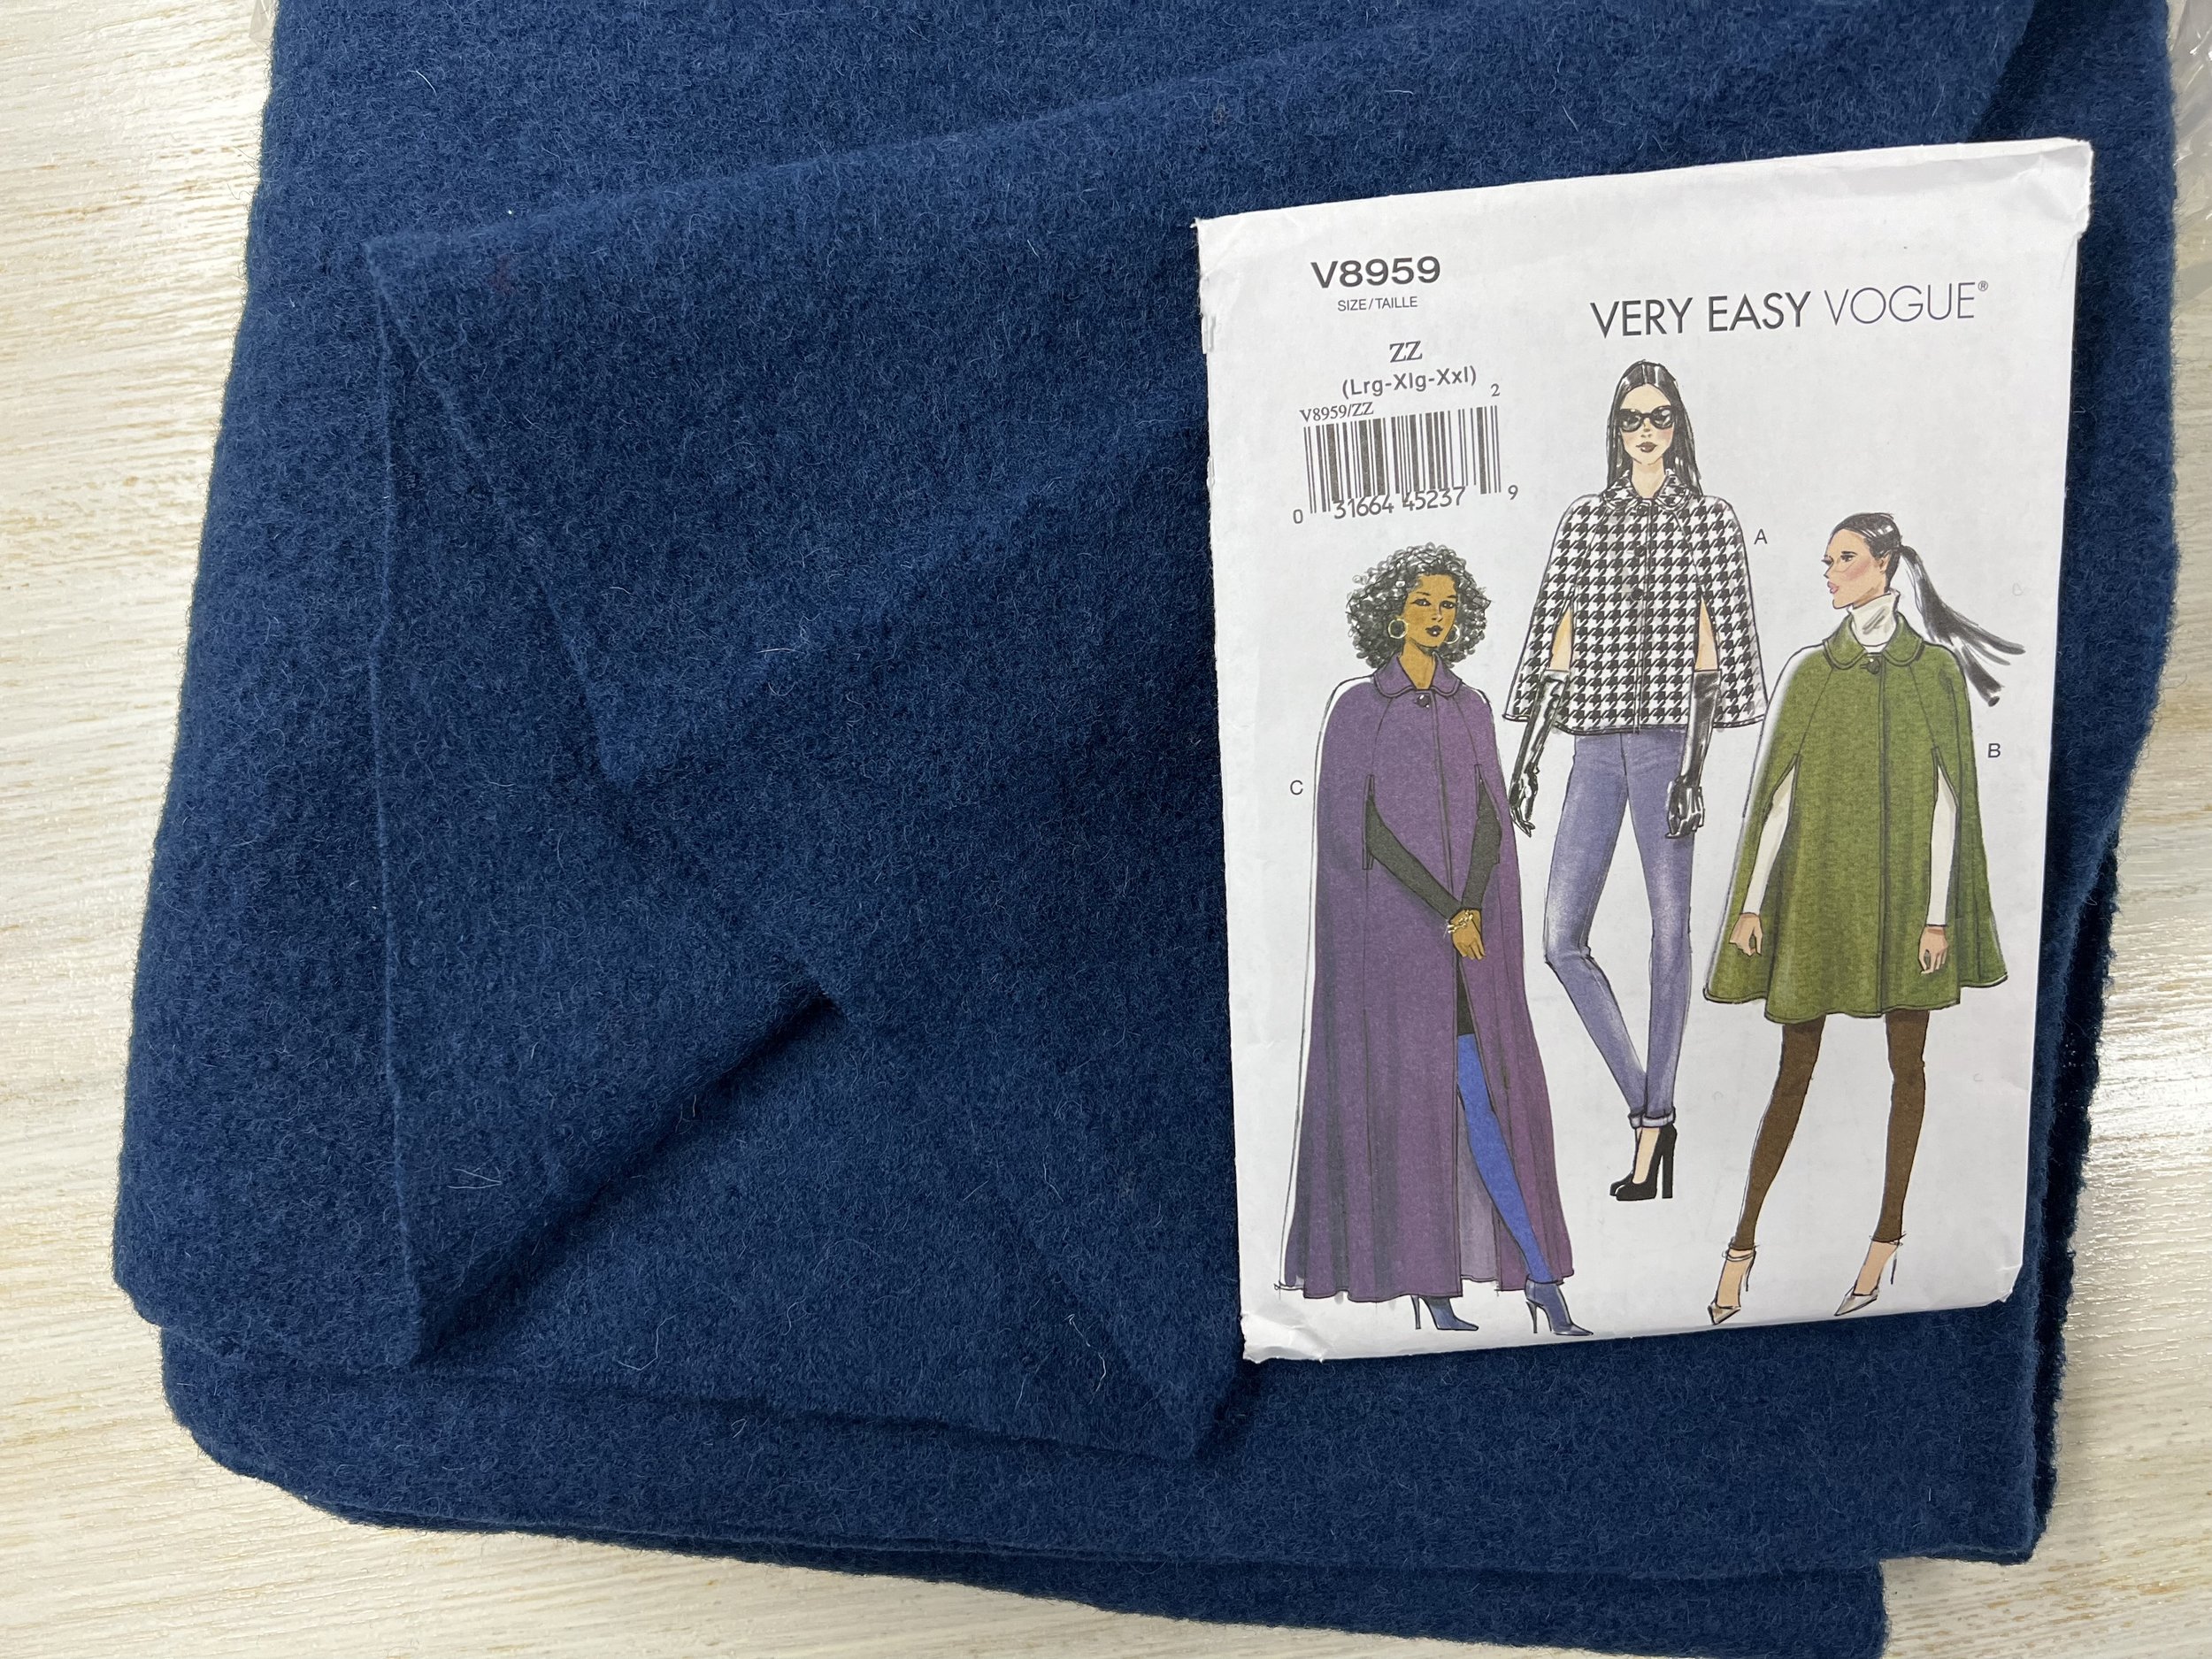
Boiled Wool and Vogue 8959 Pattern
S8334 - This pattern is out of print, but it is a Mimi G Pattern with snaps on the neckline and snaps on the sides. I have mentioned in my “Get the RTW designs with sewing patterns” video there is a dress from Altuzarra that I loved and felt this pattern was a great way to hack it, to get that look. See the picture of the dress below on the right… see the picture of the pattern on the left. Yup, not the same but its pretty darn close. I won’t do snaps all the way but half way.


I’m still waiting for my fabric to arrive but I picked this emerald Green pique Fabric from Fabric.com. I got it on a Friday were they put several things for 50% off or some much lower price, and I can’t wait for it to arrive. Lets hope its everything I wanted with the color, weight and feel.

Emerald Green Pique Fabric
So tell me, what is on your sewing table? Any fun things?

February 2022 Pattern Haul
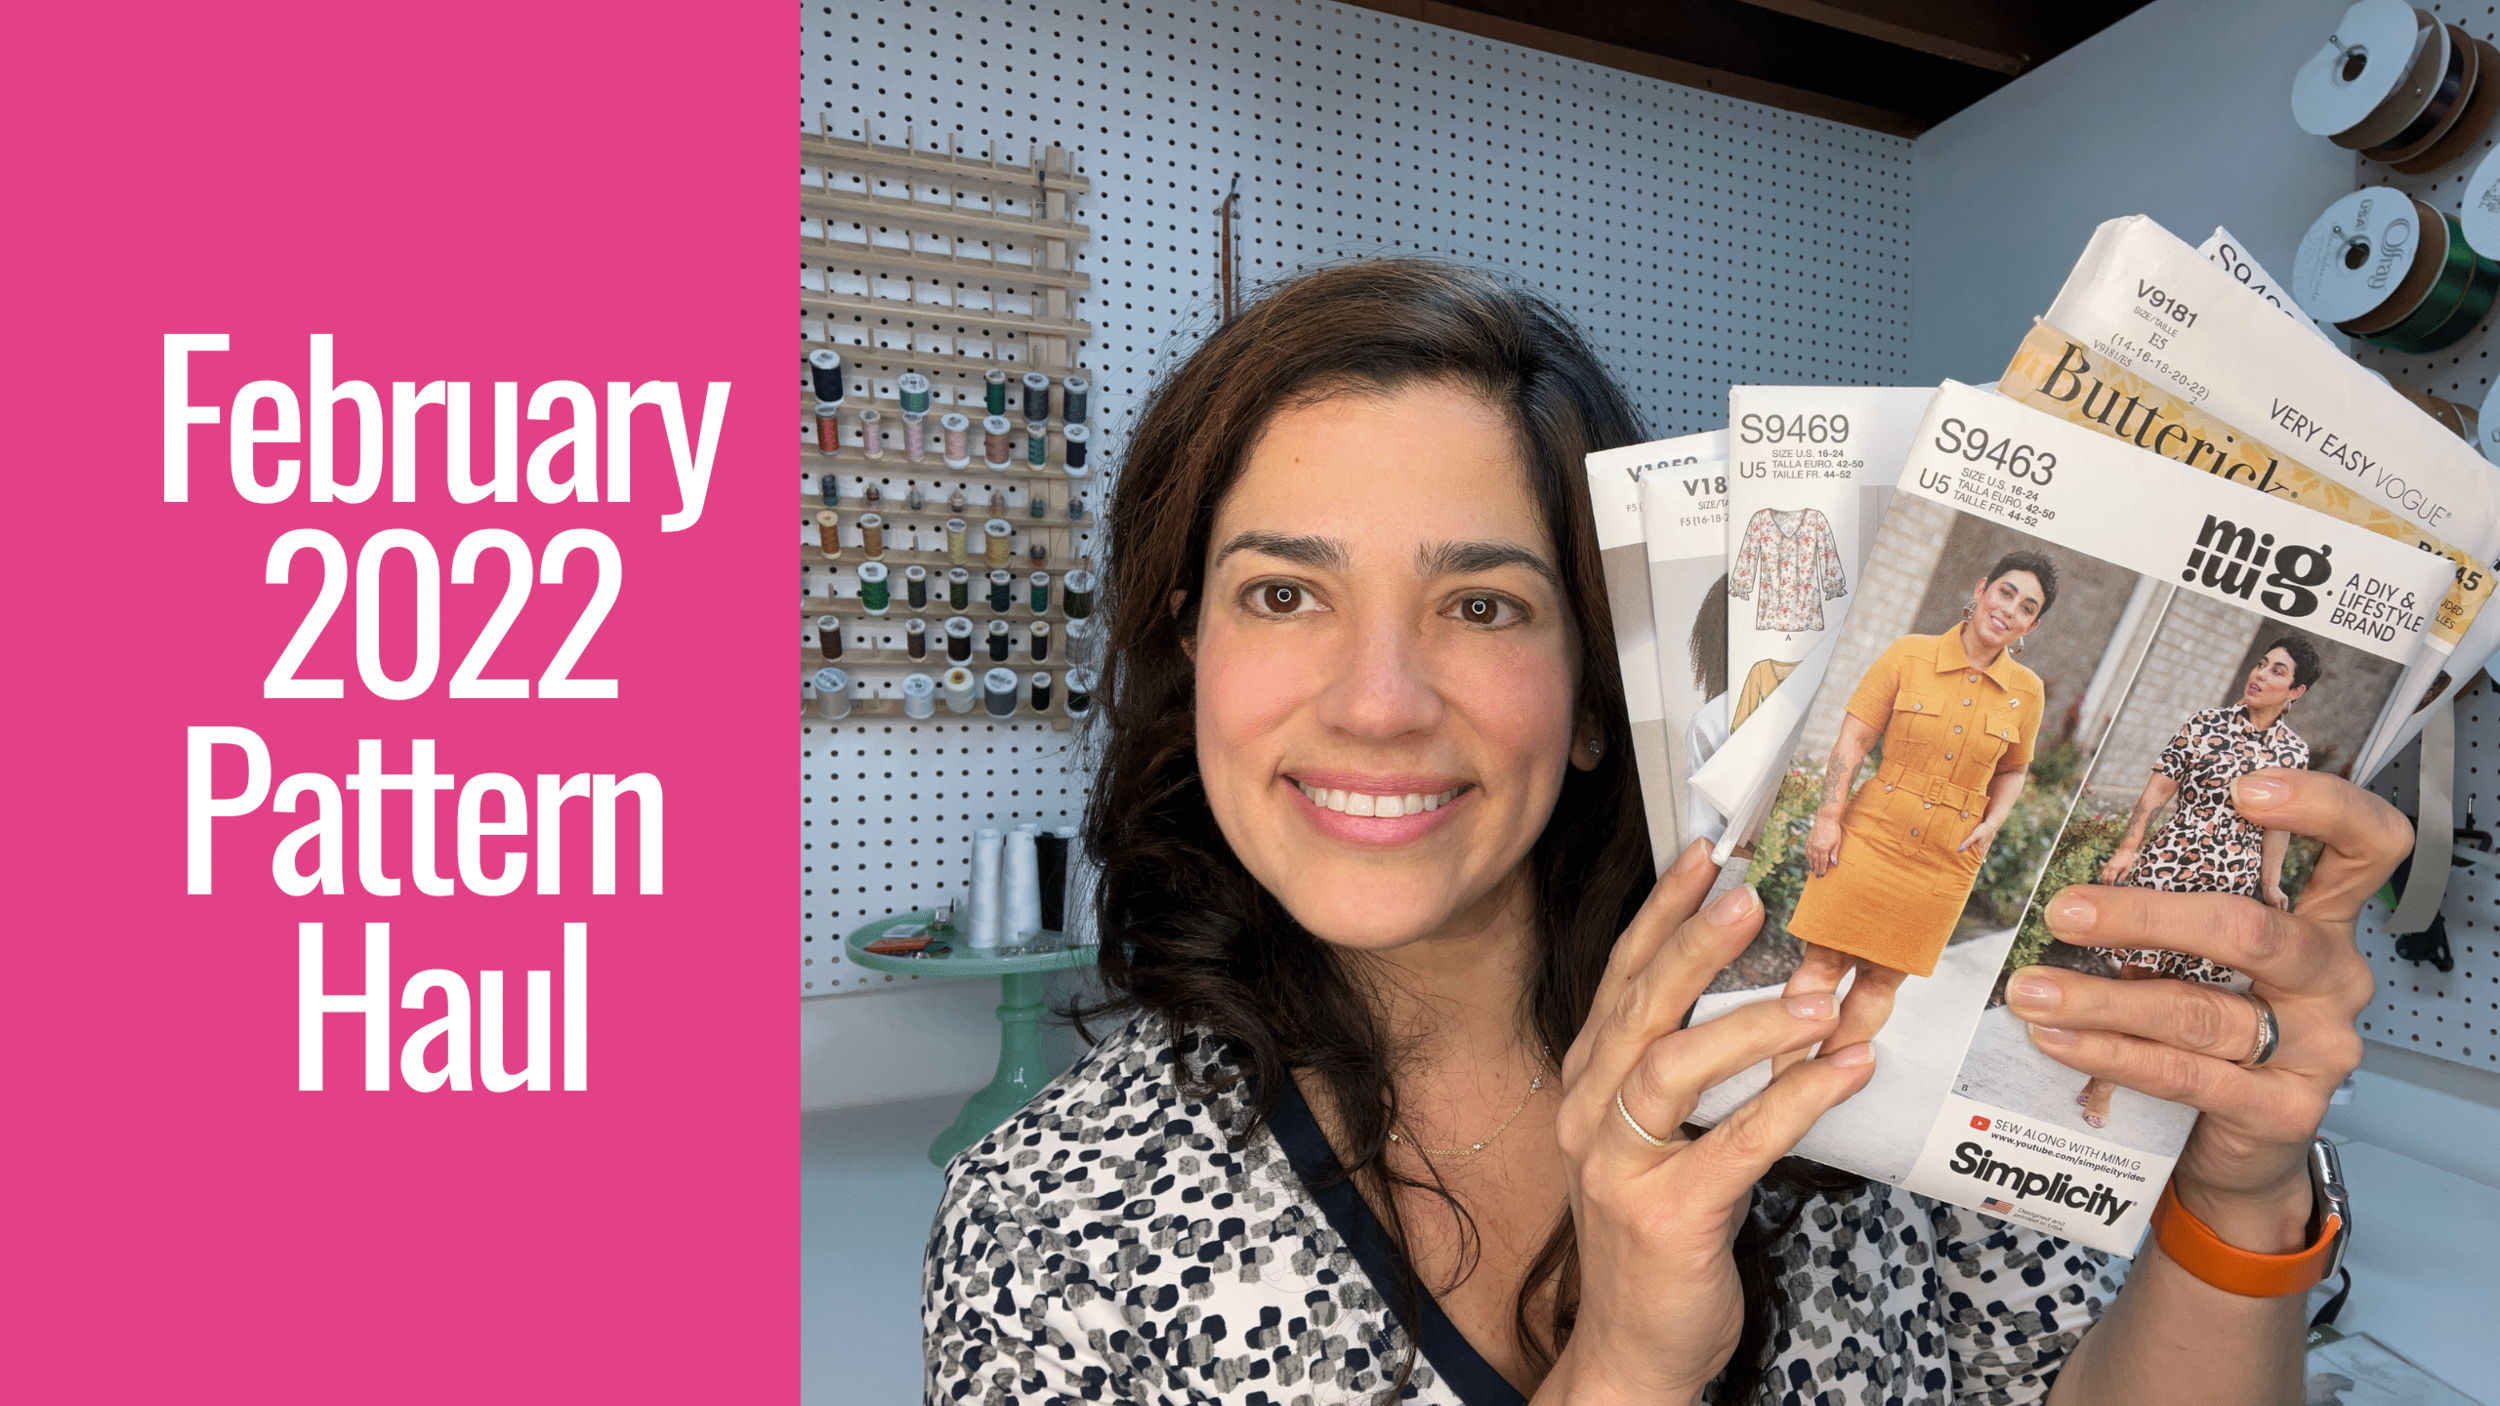
I told you that when I started the year I was going to really take a look at the patterns out there and ask myself, am I really going to wear that? Do I want to make it? Will this be a flattering style? If the answer is no, I’m not getting that pattern. Sure enough I got a few patterns but not as many as I would have in the past.
Vogue and Simplicity’s spring patterns are out and lots of great patterns, others I’m indifferent about and quite a few that are a hard pass. Pleated pants… hell nah. Can’t imagine that style looking good on anyone.
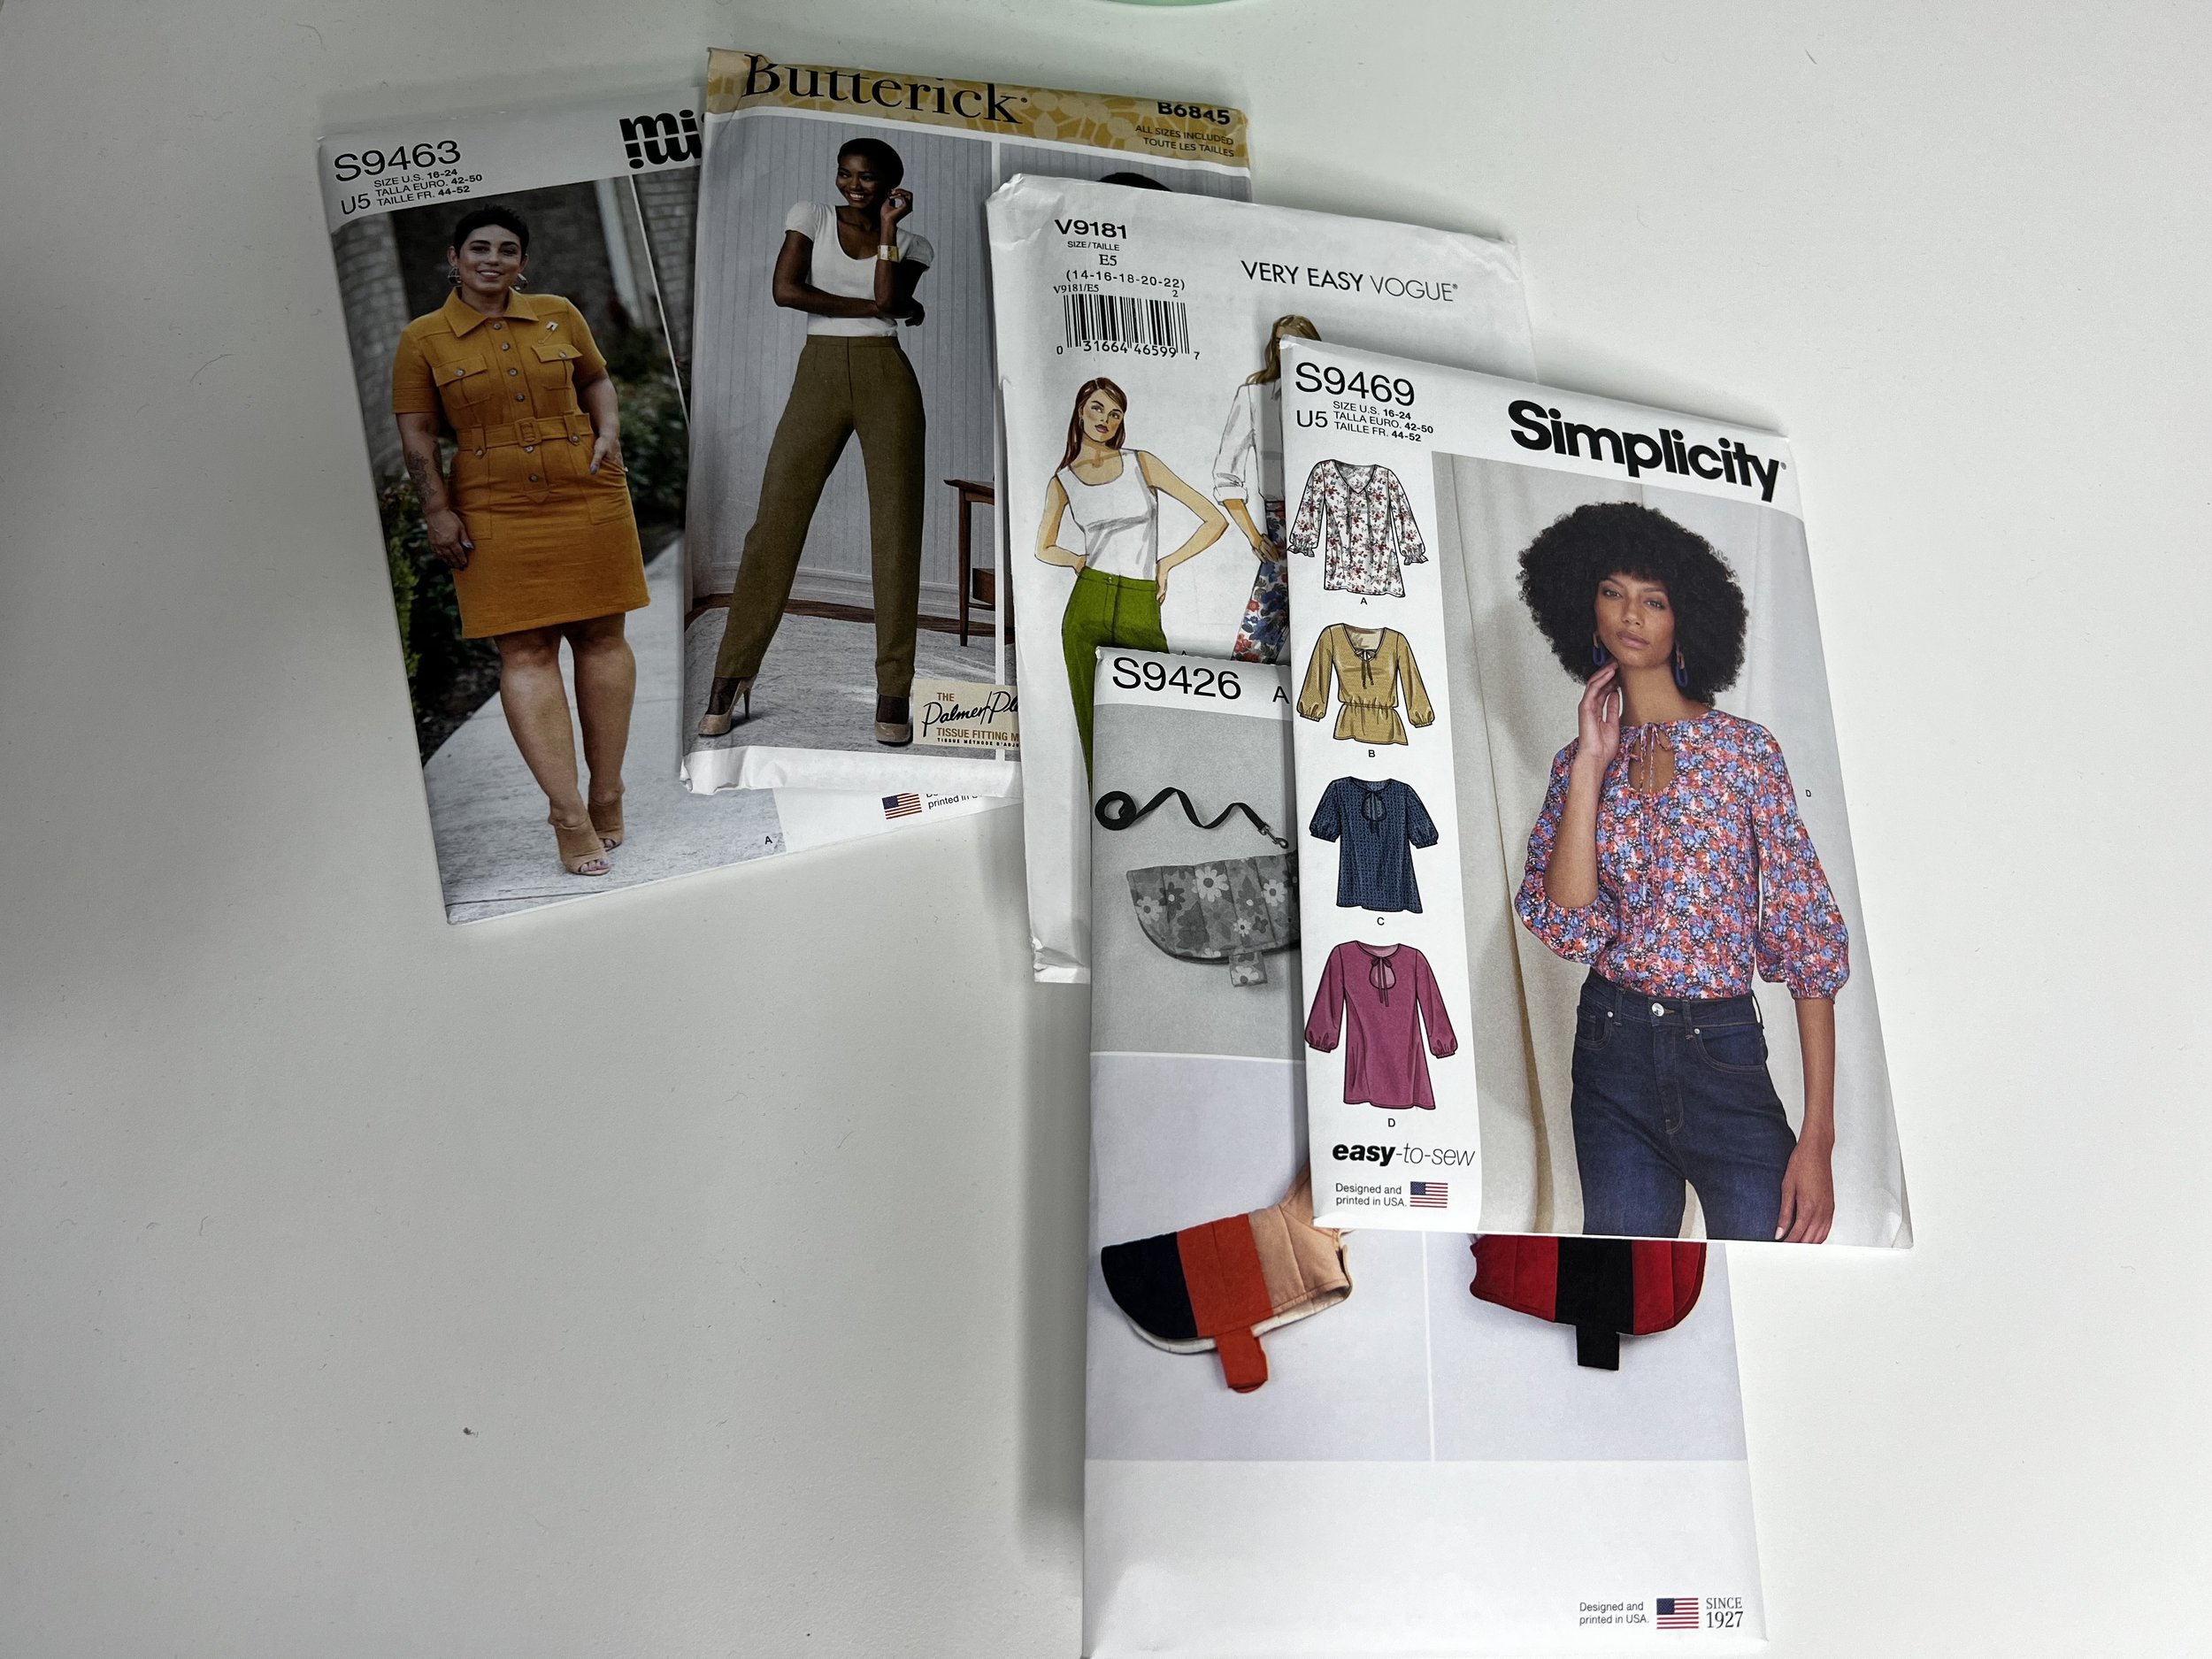
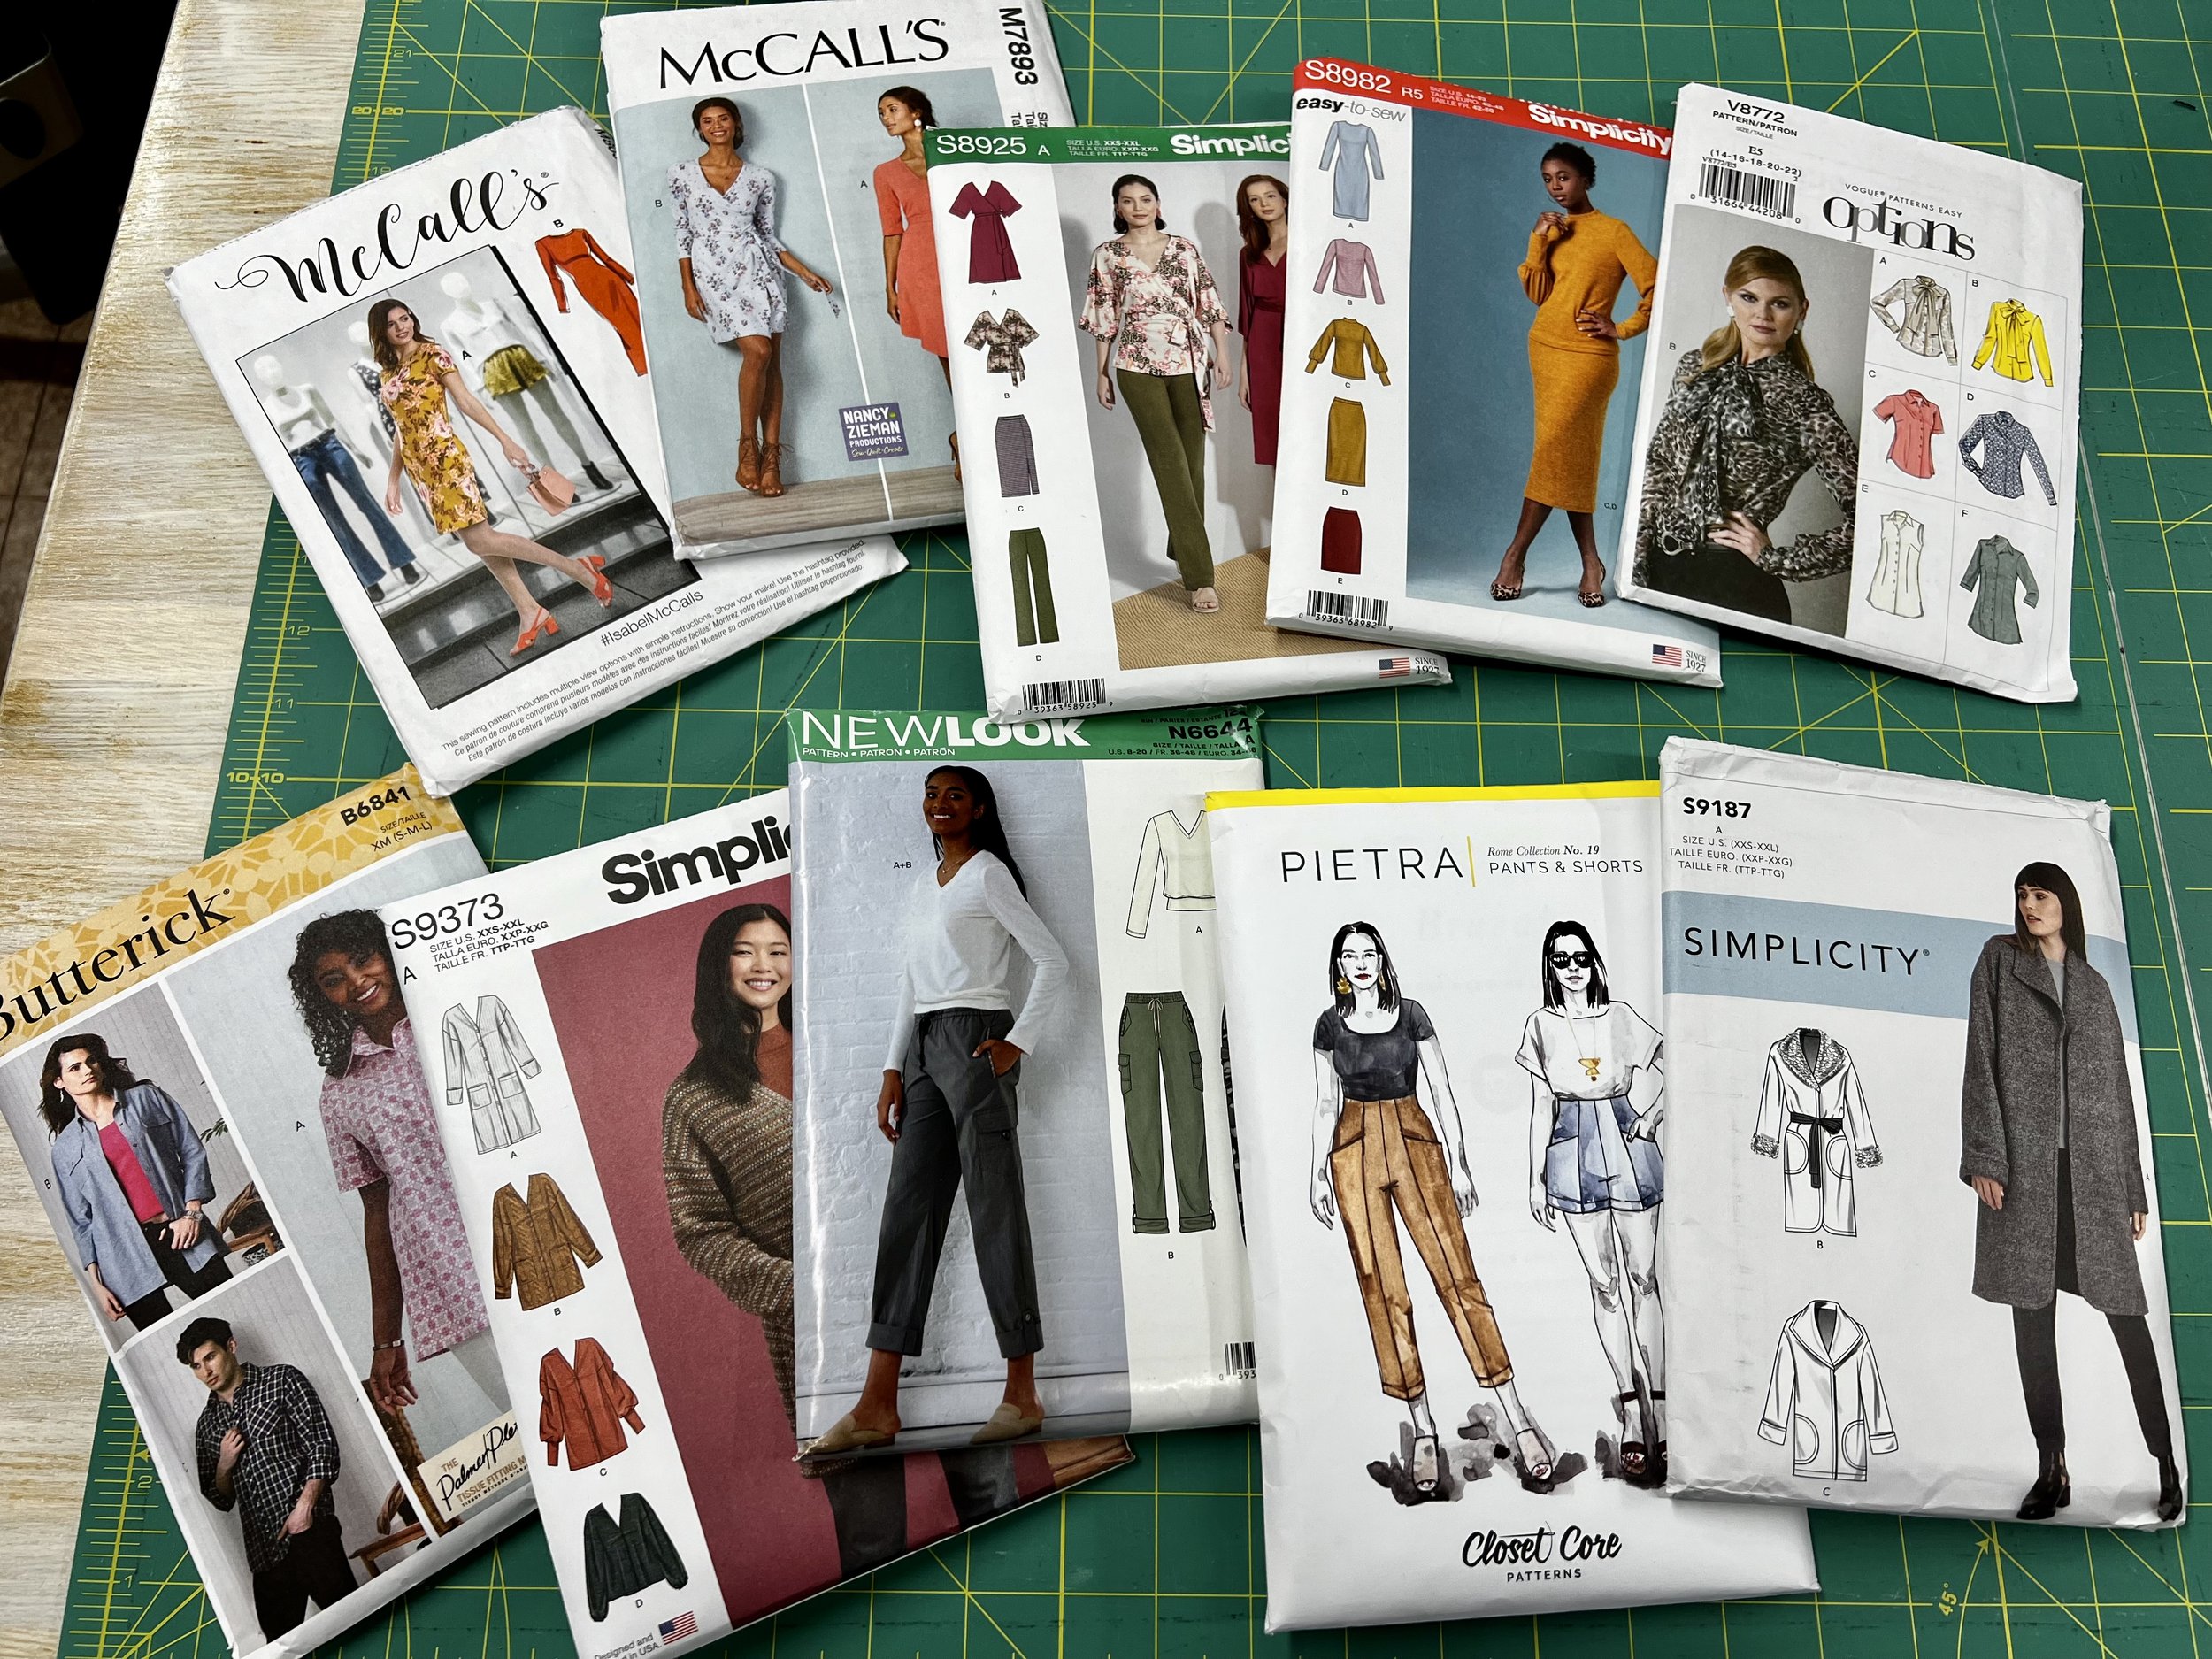
So here are some of the patterns I got along with a few vintage patterns.
S9463 - Mimi G’s Dress, love view B. After making M6696 I’m ready to make something with a flounce and this would look great in a linen. Can you tell I’m ready for summer?
B6845 - This pattern was sold out on Something Delightful’s website but I was able to find it at my local fabric store. Its a re-issued pattern and I wanted to get it because it includes all sizes (its a Palmer Pletsch pattern) and also it will walk me thru fitting pants. Fun and scary all at the same time.
V9181 - Another pants pattern… but this includes “Custom Fit Bottoms” for Flat, Average and Curvy Figures”.
S9426 - A dog coat pattern. My two little beagles are going to be stylin’. Hoping I can get this tackled before winter is over.
S9469 - A top from Simplicity’s newest release. I love that large keyhole detail right by the bust. I already ordered fabric and I think this would be a great pattern to do a sew along.
V1874- Loving view A for a top. I think its a perfect spring or summer top. View B looks great as a tunic with a pair of skinny jeans.
V1859 - This Rachel Comey pattern is what sewing dreams are made of. It is their Chrsytana Dress. It has Hong Kong seams, lined bodice and some lovely details. I can’t wait to make it. I love the coral hue the model has now I just have to find fabric for it.
V1645 - It is another Rachel Comey pattern. It is a jumpsuit and I think its a fun one. It reminds me of the Zadie Jumpsuit by Paper Theory Patterns. I’ve seen a lot of people who have made that jumpsuit and it looks great in so many different body styles. Fingers crossed it the same way with this pattern.
And lets talk about how Etsy loves me…. They love me so much they keep sending me emails to spend more time on their site. I have been pretty good at resisting and then other days I just cave like a house of cards.
V1343 - An out of print Tracy Reese dress, and I already have fabric for it. Such a fun fabric too with flowers, snakes and bugs. I know a little unconventional but I think its fun.

Vintage Butterick 5865 - its an A line dress with a really fun detail and a slight v neck. It was available in my size (and for a vintage pattern that is a rainbow unicorn if I ever saw one) so I grabbed it.
Vintage Butterick 6091 - Fun knit raglan sleeves dress and a cape. The front illustration is beautiful and it gives me so much inspiration. I already got fabric for this dress too and waiting on fabric for the cape which is in route.

Vintage Patterns
Not a big pattern haul but I must say I’m excited about it. We shall see what the McCalls and Butterick pattern releases bring. Fingers crossed they are good!

Simplicity S9469 - Pattern Review

S9469 Simplicity Sewing Pattern
If you didn’t grab Simplicity’s S9469 when it was released, you should go get yourself a copy of this pattern. It is an easy sew. This pattern is a woven top with a keyhole neckline or v neck line with tie strings with three quarter length balloon sleeves that are gathered with elastic.
Pattern Sizing: Pattern has one size range from 6 to 24. I cut a size 22 but I could have cut a size 20 based on the amount of ease at the hips and bust.
Did it look like the photo/drawing on the pattern envelope once you were done sewing with it? Yes looks exactly like it does on the pattern envelope.
Were the instructions easy to follow? Yes the instructions very easy to follow.
What did you particularly like or dislike about the pattern? I like the pattern, I wouldn’t say its a quick sew but at six hours total I can say its fairly easy and relatively painless to sew.
Fabric Used: I used a rayon challis from Telio Fashions purchased thru Fabric.com.
Pattern alterations or any design changes you made: I did view C with the three quarter length sleeves. I also didn’t do the elastic cuffs. So I drafted by own sleeve binding cut on the bias and used that instead of the elastic. I like that finish much better.
Would you sew it again? Would you recommend it to others? Yes, and I will be making View A next with the V neckline. I just need to find the perfect cotton lawn fabric for it. It’s the perfect summer top.

Simplicity S9469 Sewing Pattern, a quick and easy to sew shirt

Top 10 classic patterns to always in your stash

Have you ever thought of ten patterns that you should always have in your stash. The ten patterns that you can make over and over with different fabrics and never tire of them? I’m partnering with Ana Luisa Jewelry on classic jewelry and patterns that will have timeless staying power. They are having a great Valentine’s Day Sale. Its going on now and it ends on February 15th, 2022. So go check them out. https://shop.analuisa.com/zl-massonlifestyle I’m wearing the Ursa White Necklace, Celine Ring and the Elise Earrings.
Here are my top ten classic patterns…
M8058 - Perhaps one of my favorite patterns ever! I may have to go get another copy just to have laying around! Its a body con dress to be used with knit jersey. Why do I love this pattern so much? I can make any view with 2 yards of fabric. I can make it in one day and it has six different views with a v-neck, crew neck, sleeveless, long sleeve and we haven’t even gotten to making it tea length or above the knee. I can dress it up with a jacket, a beautiful necklace and heals and be ready for a night out with friends. OR I can make it in a fun print and just wear it with sandals, a fun pair of earrings and be ready for an outdoor picnic in the middle of summer. It is also one of the most reviewed patterns on Sewing.PatternReview.com
M7893 - This pattern has been around for quite some time. It is a wrap dress, which also makes it a quick and easy make.. I even did a sew along for this one! I made it with less than three yards of fabric. There are quite a few other wrap dress patterns out there and so many of them are wonderful such as V8379, B5030 (that Diane von Furstenberg knock off!) or S8925. You can’t go wrong with a wrap dress, they are flattering to so many body shapes.
S8925 - Talking about this pattern, it IS a wrap dress, but it also has a top a skirt and a pair of leggings. I like this pattern so much that I’ve made that pretty dress twice! I’m sure you’ve seen me a few times with it. I believe the fabric is now back in stock at Joann’s as part of their spring / summer collection.
S9373 - Cardigan pattern, this is a new pattern from Simplicity. It has four different views with a duster, a tunic length, and a shorter crop cardigan. You can wear it with a dress, over workout clothes after the gym or even a pair of jeans. So many great uses for this pattern.
S8982 - Great pattern with a top with gathered sleeves, a body con dress, a skirt and two different skirts. It’s one of those patterns that you can use to make a wardrobe capsule.
V8772 - I researched button down shirt patterns for quite some time and some times you just want to make a classic button down shirt. This pattern has quite a few variations of it with a pussy bow collar, sleeveless or a traditional collar. It is fitted so make sure you do a muslin before you make it.
B6841 - You all know I love a good button down shirt, and I’ve had my issues with this pattern mainly for the lack of finish garment measurements on the back envelope but I’m not going to dwell on that. Don’t pass up on this pattern. Its one of those palmer pletsch fitting patterns and its a good one! yes it is oversized and perfect if you want to use it to make a shacket or a slightly oversized button down flannel shirt. I’ve now made two button downs with this pattern and there are so many more in my future.
N6644 - I’ve entered the year of making pants and as a recovering former florist I love pants with some side pockets to put a phone, a floral knife or a piece of paper that I can reference again and again. Plus this pattern has an elasticated waist…for those days when you have to work but also make a quick trip to the buffet and a v- neck top. I’ve mentioned time and time again how hard it is to find a sweater pattern with a v-neckline… and this is it!
Pietra Pants by Closet Core - Business in the front an party in the back. I love these pants. I made a pair last summer and lets just say I wore them out so many times I may have to make two more pairs for this coming summer and a dressier pair for work. Easy to fit, easy to make… and trendy with slanted pockets at the front. Double bonus it has a high waist.
Last but not least…. S9187 - It is an oversized coat, and if you are a beginner its perfect! There are no sleeve heads, no canvas fabric, no pad stitching! None of that. It is a great pattern for a coat. It even has a few pieces if you want to do a little bit of trim on the fur and triple bonus you have a snap as your closure.
One common thing on all these patterns… you can make them with 3 yards (2.8 meters) of fabric or less.
The link above contains a commissionable link. That means that get a small commission if you make a purchase from Ana Luisa at no additional cost to you.
What is your top sewing pattern… that you know it almost feels like you are stealing because you have made them so many times but still love them just as it was the first time.

Sew Along M6696 - Part 3 The Plackets and Collar

I can see the end of the sewing tunnel, and I’ve been taking my sweet ol’ time with this dress. We can all agree that there is a lot of slipstitch asked of us in this pattern, but luckily you can either grab needle and thread and spend some quality time sewing by hand or you can top stitch. Our final video of this sew along has you making choices (which is really the beauty of sewing your own clothes), do you want to slip stitch or do you want to top stitch.
We ended our last video doing a narrow hem, which I have to say I’m all for tackling those hems early on because I don't like leaving the hem for last. So we are on to the plackets or front bands as they are labeled in the M6696 sewing pattern.
I interfaced only half of my placket pattern pieces as I’m using denim fabric and I want to make sure things don’t get too bulky and stiff. In goes the plackets and yet again I have to grade my seams. If you are using a light weight fabric such as challis or linen. You might not have to do this but since I’m working with denim… I have to grade those seams! Those extra little steps make a huge difference.

Notice how just half of my placket is interfaced, this is to avoid it being too stiff as I’m using denim
Once the plackets are in I can finish off the bottom of the hem which would encase the side seams. This is one thing I love about this pattern. You could potentially French seams the sleeves and the sides and have a dress were you don’t need to use your serger at all, as all your seams would be encased. That’s what I call a beautifully drafted pattern.
So lets move along. You will have to slip stitch or top stitch the plackets to finish them off by stitching in the ditch… I choose to top stitch and they look great!

Use a stitch in the ditch as your “top stitching” for a beautifully finished look in you forgo slip stitching.
I’m thisclose to finishing this dress. Next up is the collar. Always stay stitch that collar area, you will be working in, pinning, easing in the collar and stitching so you want to make sure it doesn’t stretch on you. As always start in the back center and work your way up the sides to the front when you stay stitch.

Collar “sandwiched” in between the collar band
Stitch the collar and “sandwich” the collar between the collar band pattern pieces as I shown in the picture above. I mention in the video that I don’t tend to press in the collar pieces because I want to make sure the collar wraps around my neck. So I usually tend to grab my tailor’s ham and steam the collar/collar band around it so I get that collar stand to lay nicely.


The image on the left is the collar as I’m about to steam it around my tailor’s ham so it curves around my neck nicely, the image on the right is once it is steamed. It stands on its own. It’s ready to attach it to the dress.
Once I do that I stitch in the collar to the dress.

Nothing like a good collar to finish off your dress
Lastly, I stitched in the ditch the collar so I finished attaching it to the dress. One thing to note, I usually slip stitch this part. I always do but today I decided to just go with a quick stitch in the ditch and I’m okay with the way it looks.
The dress is ready for buttons and its done!


M6696 Sew Along Part 2 - The Skirt and Waist Band

Phew we made it thru that bodice and that always feels like quite the accomplishment, but we are moving along with the skirt and the waist band for part two of sewing pattern M6696.
There is darts all over the place in this dress and just like the top we have four of them. Two in the front and two darts in the back.

Press the front darts towards the back, and press the back darts towards the center back.
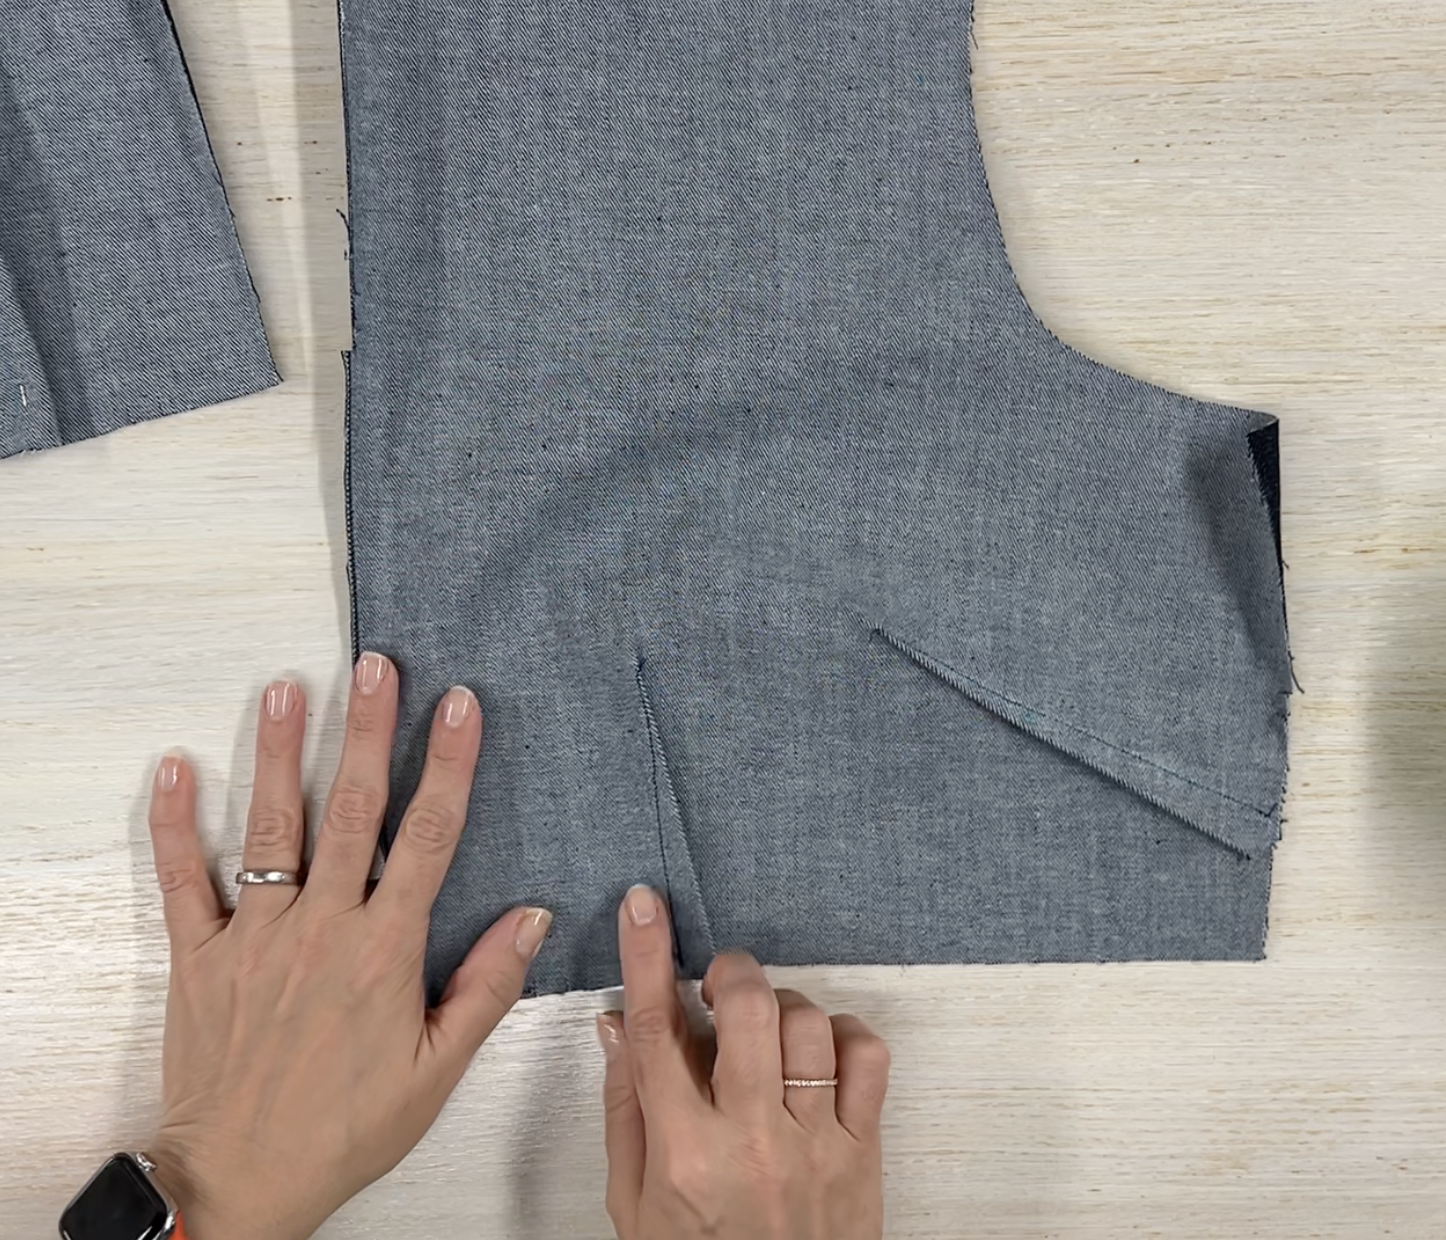
Moving right along into the pockets. If you recall in my adjustments video I mentioned that I didn’t care for the pockets as drafted but would use S9251 to create that round slash pocket and use those pattern pieces in lieu of the ones in the pattern.

When using denim, avoid cutting pocket facings made out of denim to minimize the bulk. I used printed cotton fabric for mine.
I’m using denim and as always trying to avoid bulk so I’m using a printed cotton for the pocket facings. It’s just one way to have a little bit of fun with your clothes. You can do this for pocket facings, plackets and even inside yokes. They will most likely never be seen but you will know they are there.
Once you are done with the pockets and top stitch, go ahead and join the two front pieces to the back. You now have a skirt.
Its time to join the bodice to the skirt and we will use the waist band for that. The waist band has single notches, double notches, it has seam lines… it is pattern markings galore BUT here are a few things to remember. Start at the center back. Center back of the skirt, center back for the bodice and center back for the waist band. For the bodice you will see two circles in the back. If you gathered the back bodice or did a pleat (like I did) these need to meet and match with the waist band. Now grab the skirt and match the center back for the waist band and the center back for the skirt. Once those are all matching you can keep going.
Match the side seams for the bodice and the skirt for both side seams! Lastly match the darts for the bodice and the skirt. If you are like me and you made a few fitting adjustments along the way this is the best way to make sure they are all aligned.

Match the side seams and match those bodice darts to the darts on the skirt!
Its important that you do this, and I will say it again. Match those seams! This is the difference between a homemade looking dress to one that others will ask “Where did you get it?”.
Lastly for sew along number 2 is the hem, and I must say I’m glad the pattern is asking for the hem now because I despise hems and some times its the last thing I want to do. So turn up your hem 1 - 1/4” and then turn inside a 1/4” for a clean finish. I’m using denim and I don’t want any bulk on my hem so I will just finish my raw edge with my serger and turn up 1 -1/4” and then top stitch.
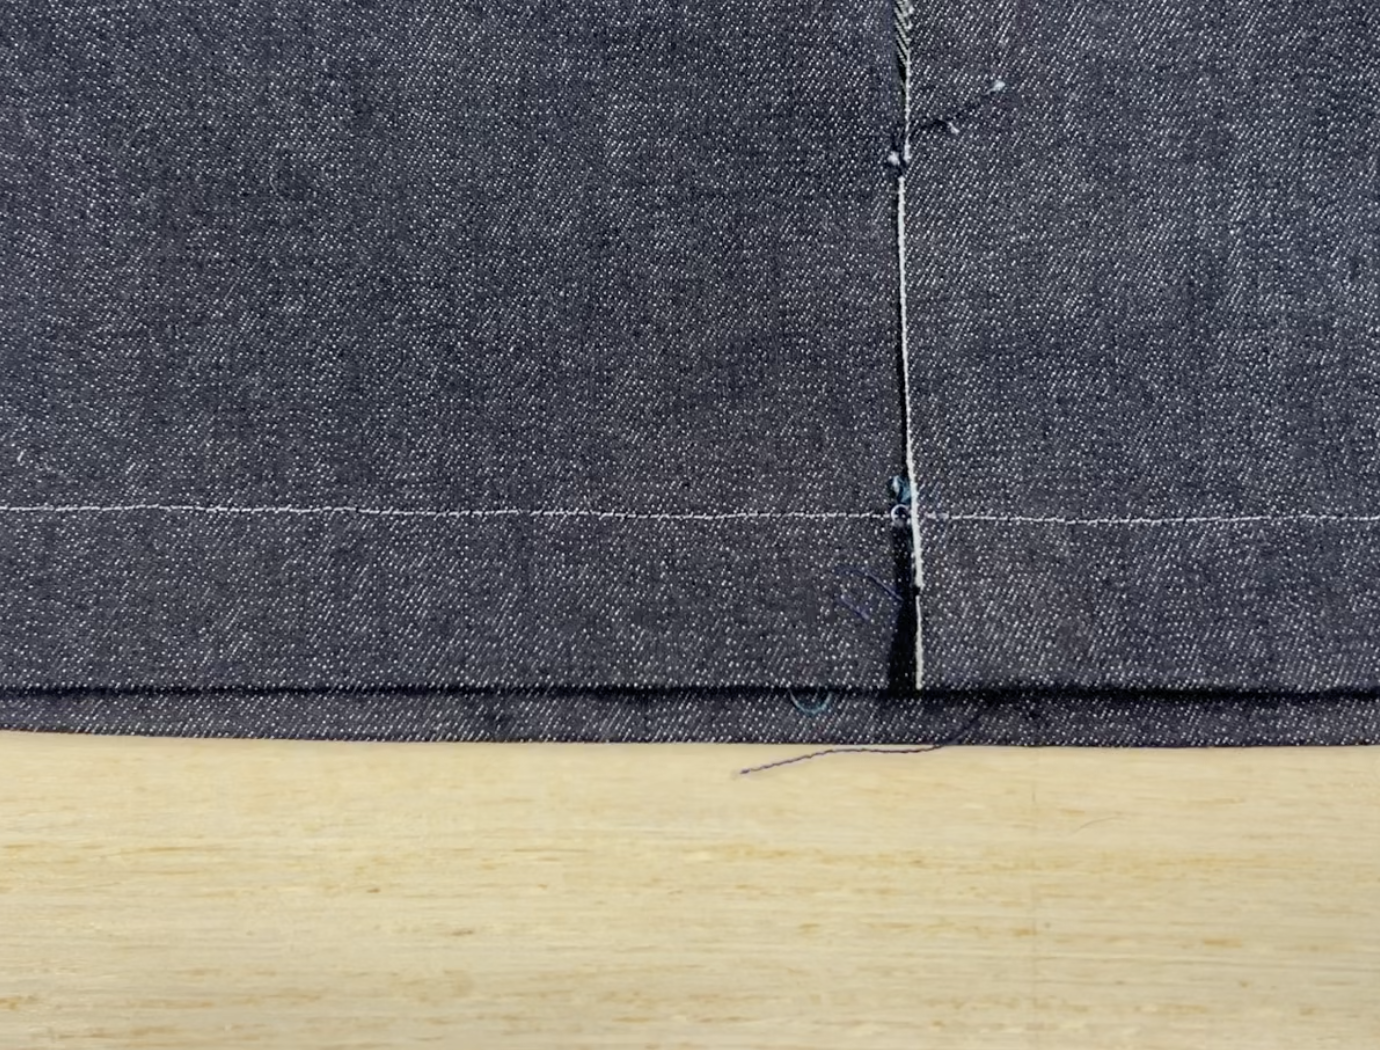
Topstitched hem, not quite finished but we have to do it before we do the plackets.
We are done with part two of this dress….

Sew Along M6696 Part 1 - The Bodice

Last week I talked about all the adjustments I made to the M6696 pattern it self, changes that I knew I would have to make like a bicep adjustment and a few that I just didn’t care how they were drafted such as the pockets. This week we dive right into sewing this shirt dress. I must say this is a great pattern and the instructions are pretty darn good.
You can buy the pattern at McCall’s Website here is a link to the pattern. I’m using a light weight denim fabric with stretch. I got it from Melanated Fabrics about a year ago and I’m afraid it is now out of stock but this pattern works with a variety of fabrics. Using denim is the reason why I took the majority of that pleat (or I should say gathers!) in the back of my bodice and why I’m grading my seams to minimize bulk.
I try to keep my sew along videos condensed into one video but in order to go thru this entire pattern it will have to be split into a few different videos. We sew the bodice with darts, we attach an inside yoke using the burrito method, there are plenty of opportunities to split stitch on this pattern so I’m going to show you how to save some time but also make sure your inside yoke looks beautifully finished. We also set in sleeves and I teach you how to trouble shoot if your sleeves have some a little too much extra ease like this pattern does.
Once your darts are done, make sure to press them down or towards the back.
As always don’t forget to press every single seam after you have stitched it. It makes for a professional looking finish, and it’s the difference between something looking homemade versus a beautifully finished garment.

We deviated this time around from slip stitching the inside yoke. Behold the burrito method.
I’m all for using a little bit of needle and thread from time to time. It’s part of the slow sewing that I want to do this year. But that inside yoke is not the spot that I want to slow down, perhaps we will do that for the sleeve cuffs or the collar. Using the burrito method to install the inside yoke is a quick way to get a beautiful finish on your shirt dress.
I mention in this video that one of the things I saw from a reviewer on Pattern Review for this pattern was that the sleeve ease on the sleeve caps for this pattern may be a tad too much. If you sew them the usual way we may get puckers no matter what. So if you have that issue, just go ahead and pull the sleeve piece in 1/8” toward the top so it is easier to ease it in.

Set that sleeve in just 1/8” at the top of the sleeve cap so it’s easier to set it in.
Setting sleeves can be tricky, trust me I know all about them! But when do you know when you got the job done? When the seams at the bottom of your sleeve are aligned and when there are no puckers.

The seams are aligned!
I told you on my adjustments video that I wasn’t so sure about those sleeve cuffs and sure enough, once I stitched them in and tried on the bodice it wasn’t going to happen. I went ahead and drafted an simple sleeve cuff with no pointy ends. I stitched it in the same way as I did with the original sleeve cuff pattern and I slip stitched the modified cuffs for a clean finish. If you are not feeling like using needle and thread just yet, top stitching is perfectly acceptable. Just make sure its straight!

Modified Sleeve Cuffs
That’s the beauty of sewing your own clothes. Don’t care for the way a pattern piece was designed? No problem, you can change it! This was one of the easier pattern pieces to change. Just measure the length of the bottom of the sleeve pattern piece. Remember the bottom of the sleeve already has a 5/8” seam allowance, so you have the modified pattern piece width. Then I knew I would have to make the pattern piece at least 3 inches deep because I was going to fold it and then use 5/8” (times 2… remember two seams!) to stitch it in and then slip stitch it, so I had a width of 1-3/4” on my sleeve cuff. Don’t be afraid to draft your own pattern pieces, it’s all about trial and error…. you do have to factor in a little bit of math too, but keep trying and you will get better at it.

M6696 Sewing Pattern & My Wearable Muslin
I’m working on creating a sew along for pattern M6696. This pattern has been around for quite some time. I know, I keep arriving late to all these pattern parties but some times I like to let others make the pattern way before I do and read the reviews before I take a “stab” at it. Sure enough there are plenty of reviews online for this pattern, and they all mention the same exact thing that was bothersome but some more on that later.
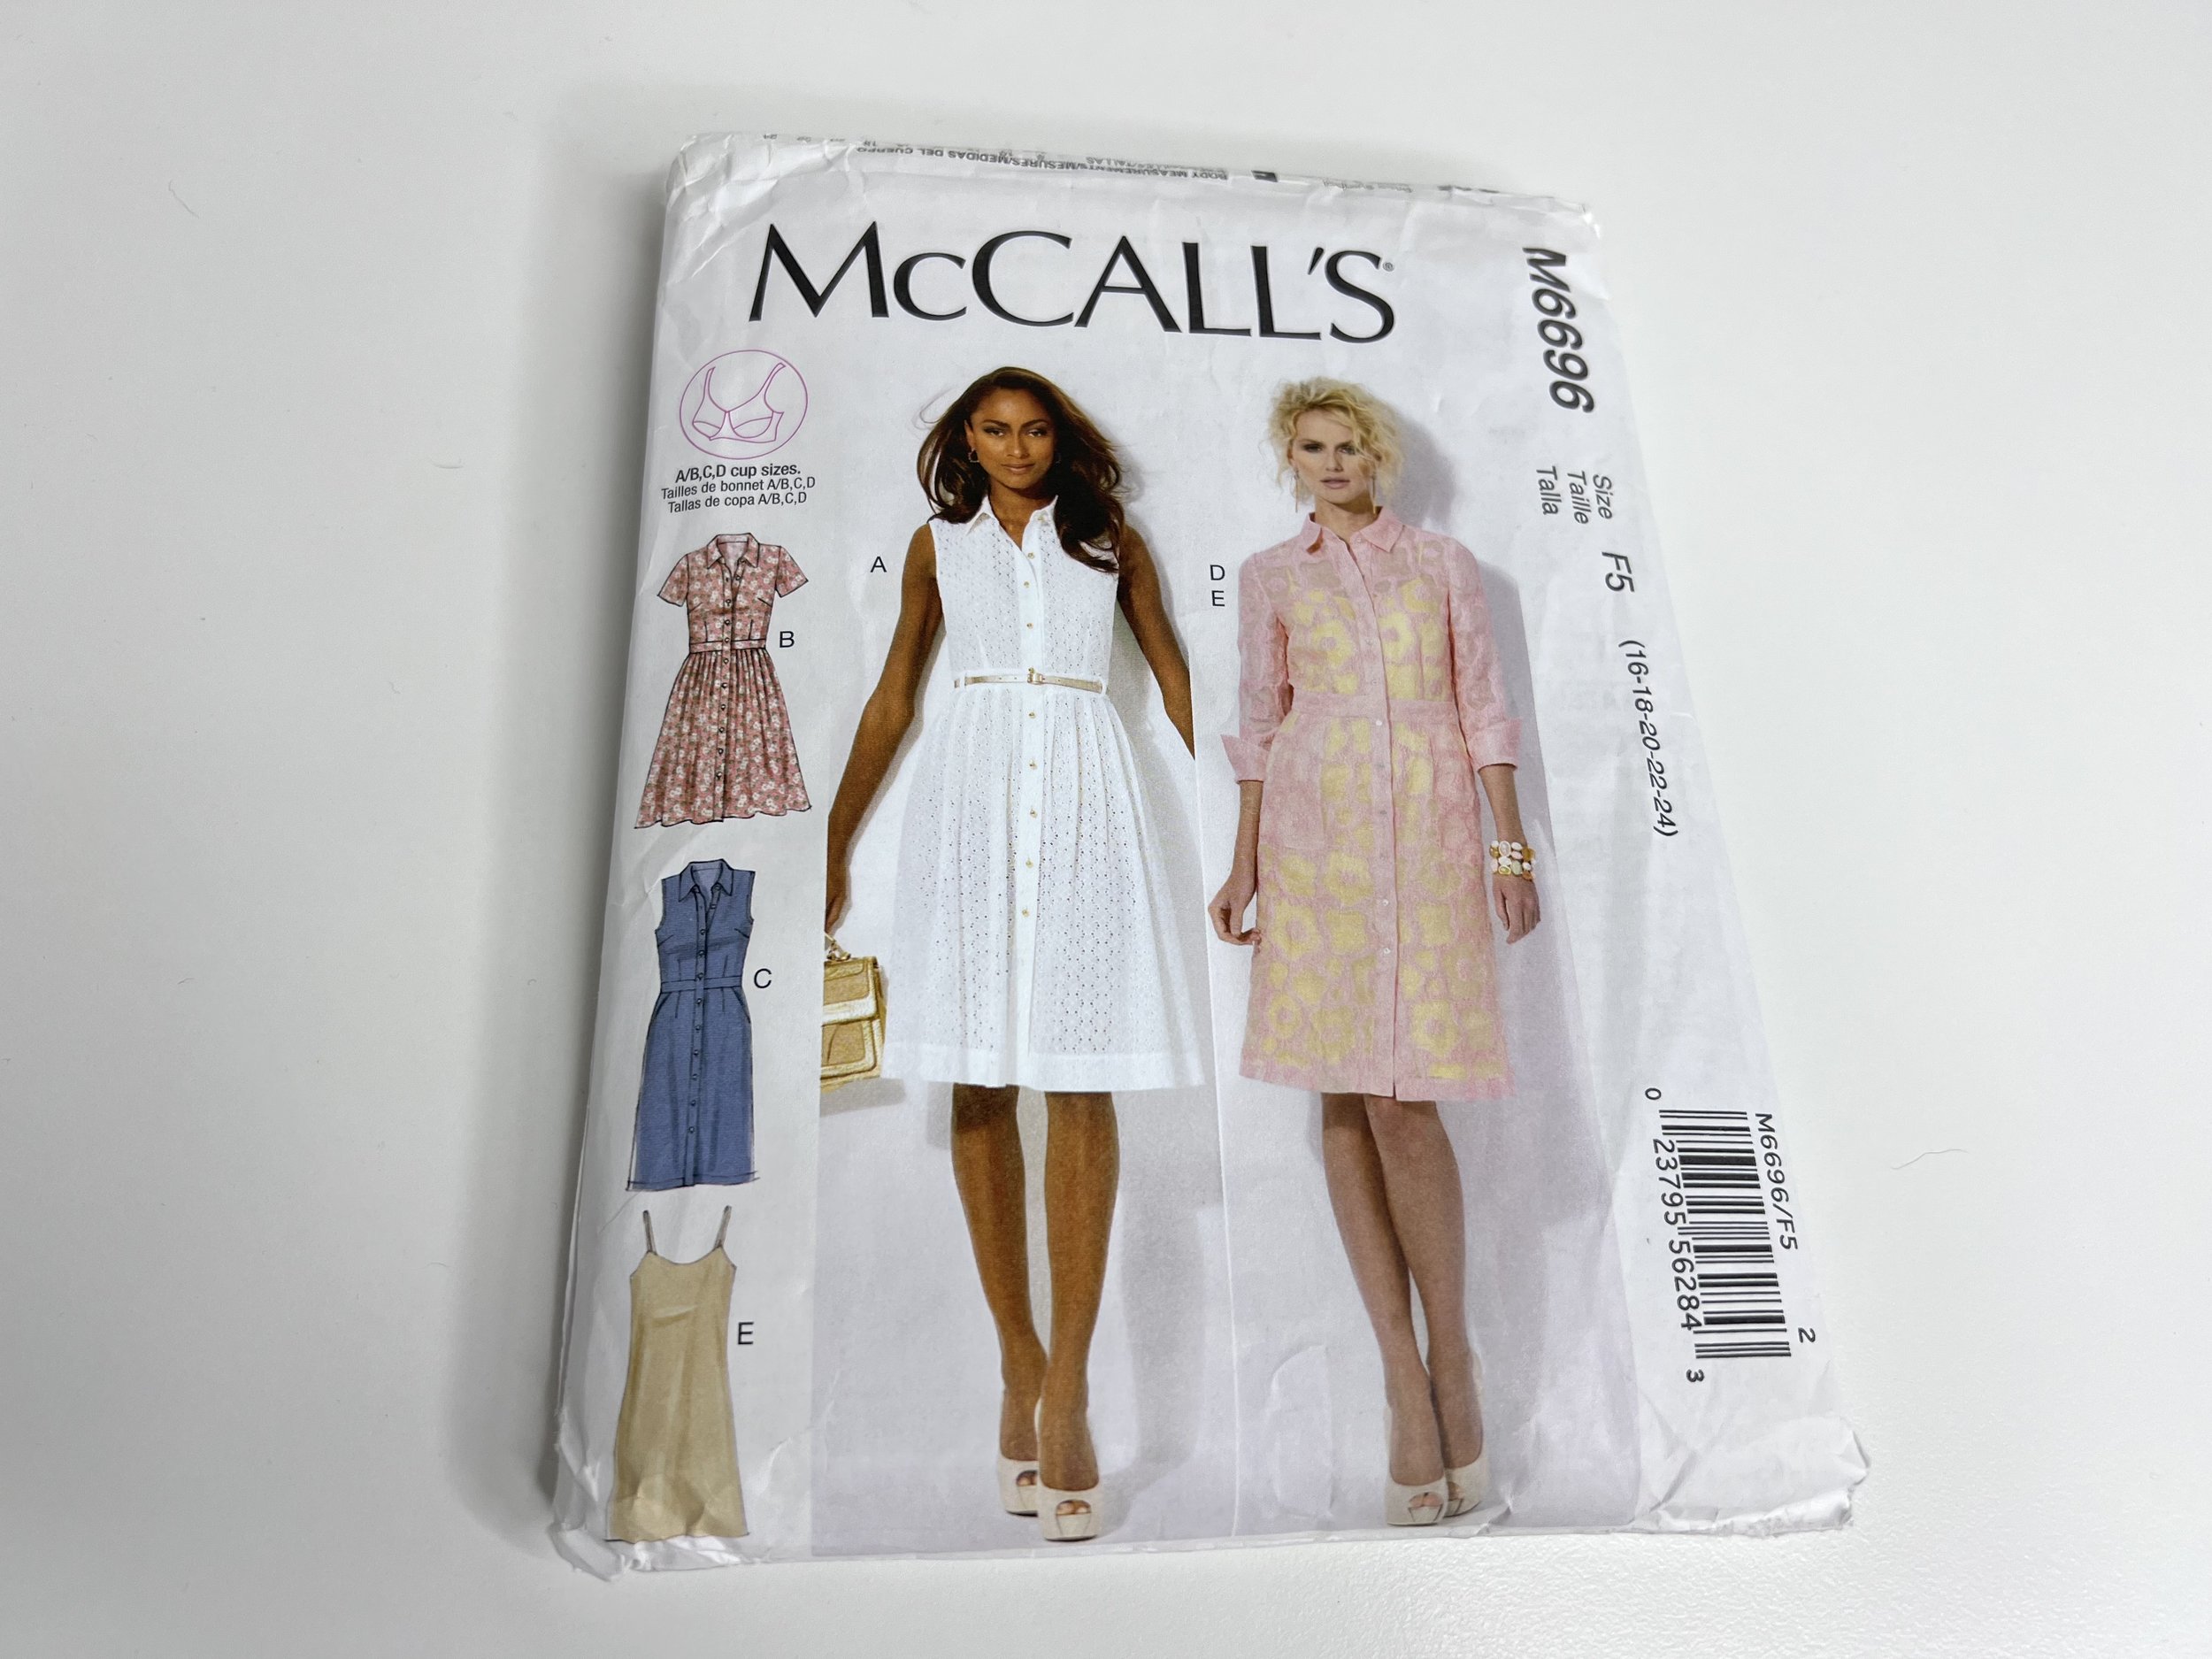
M6696 Dress Pattern
So here are some of the adjustments I made.
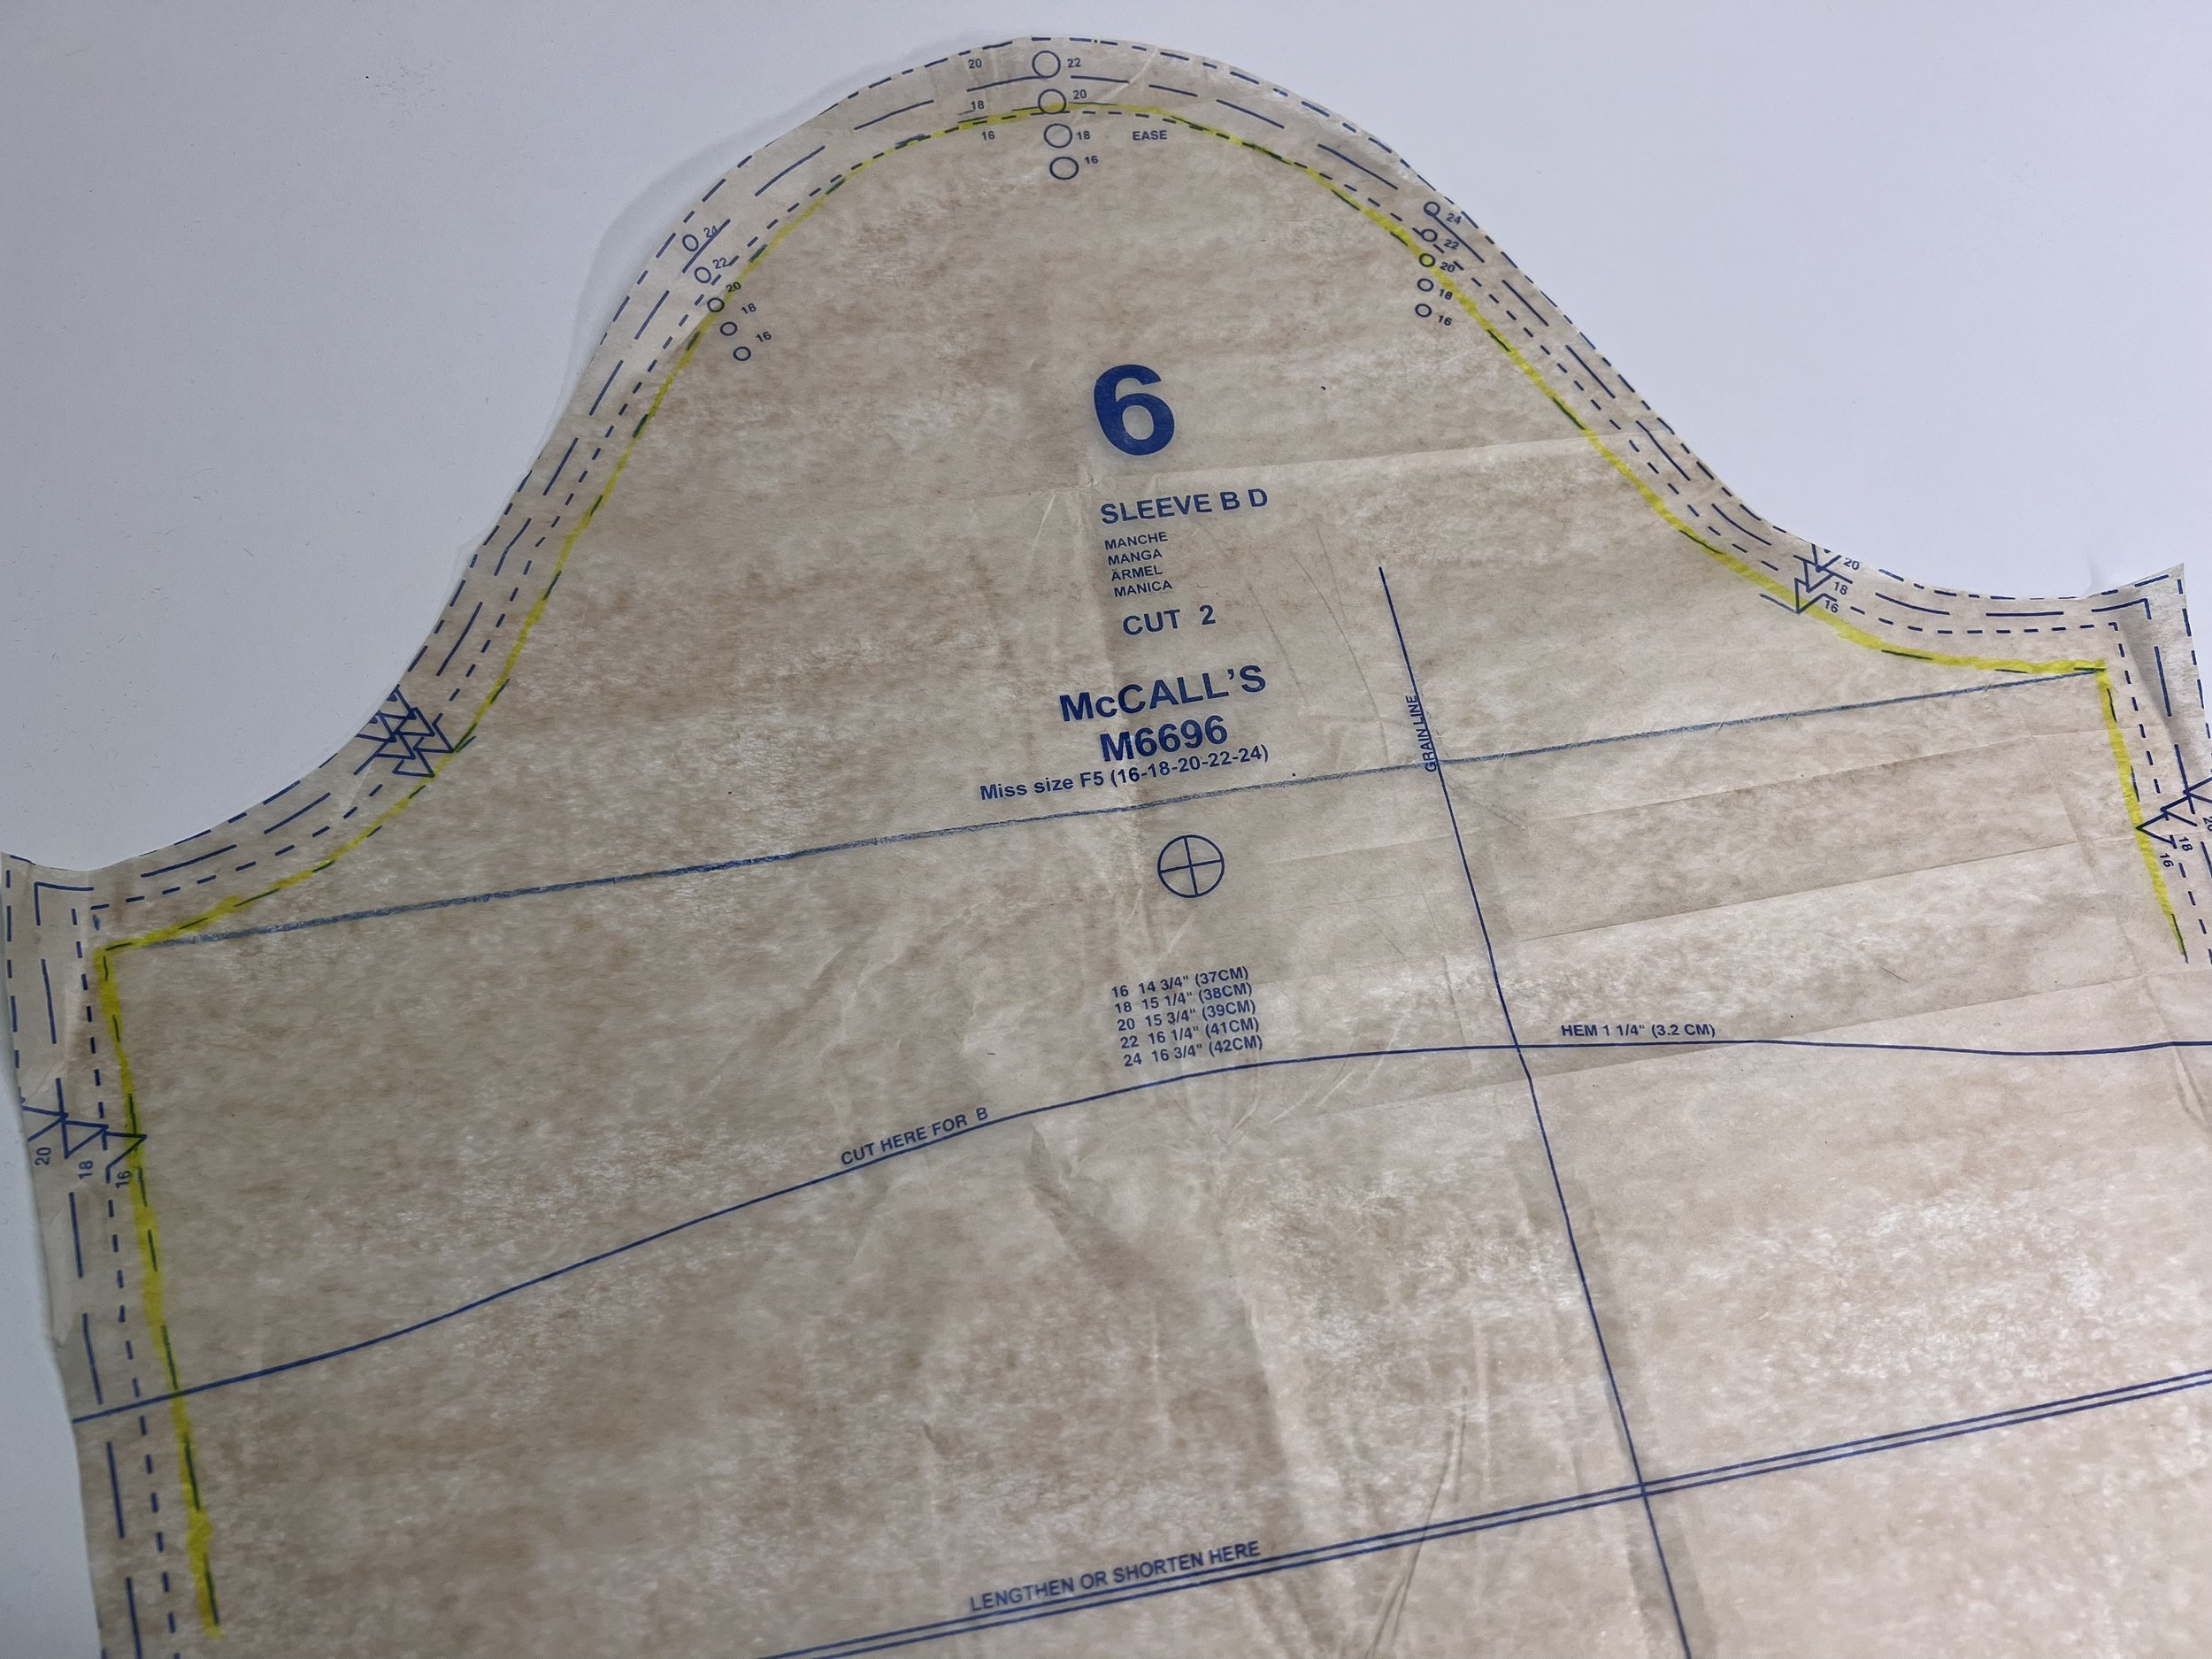
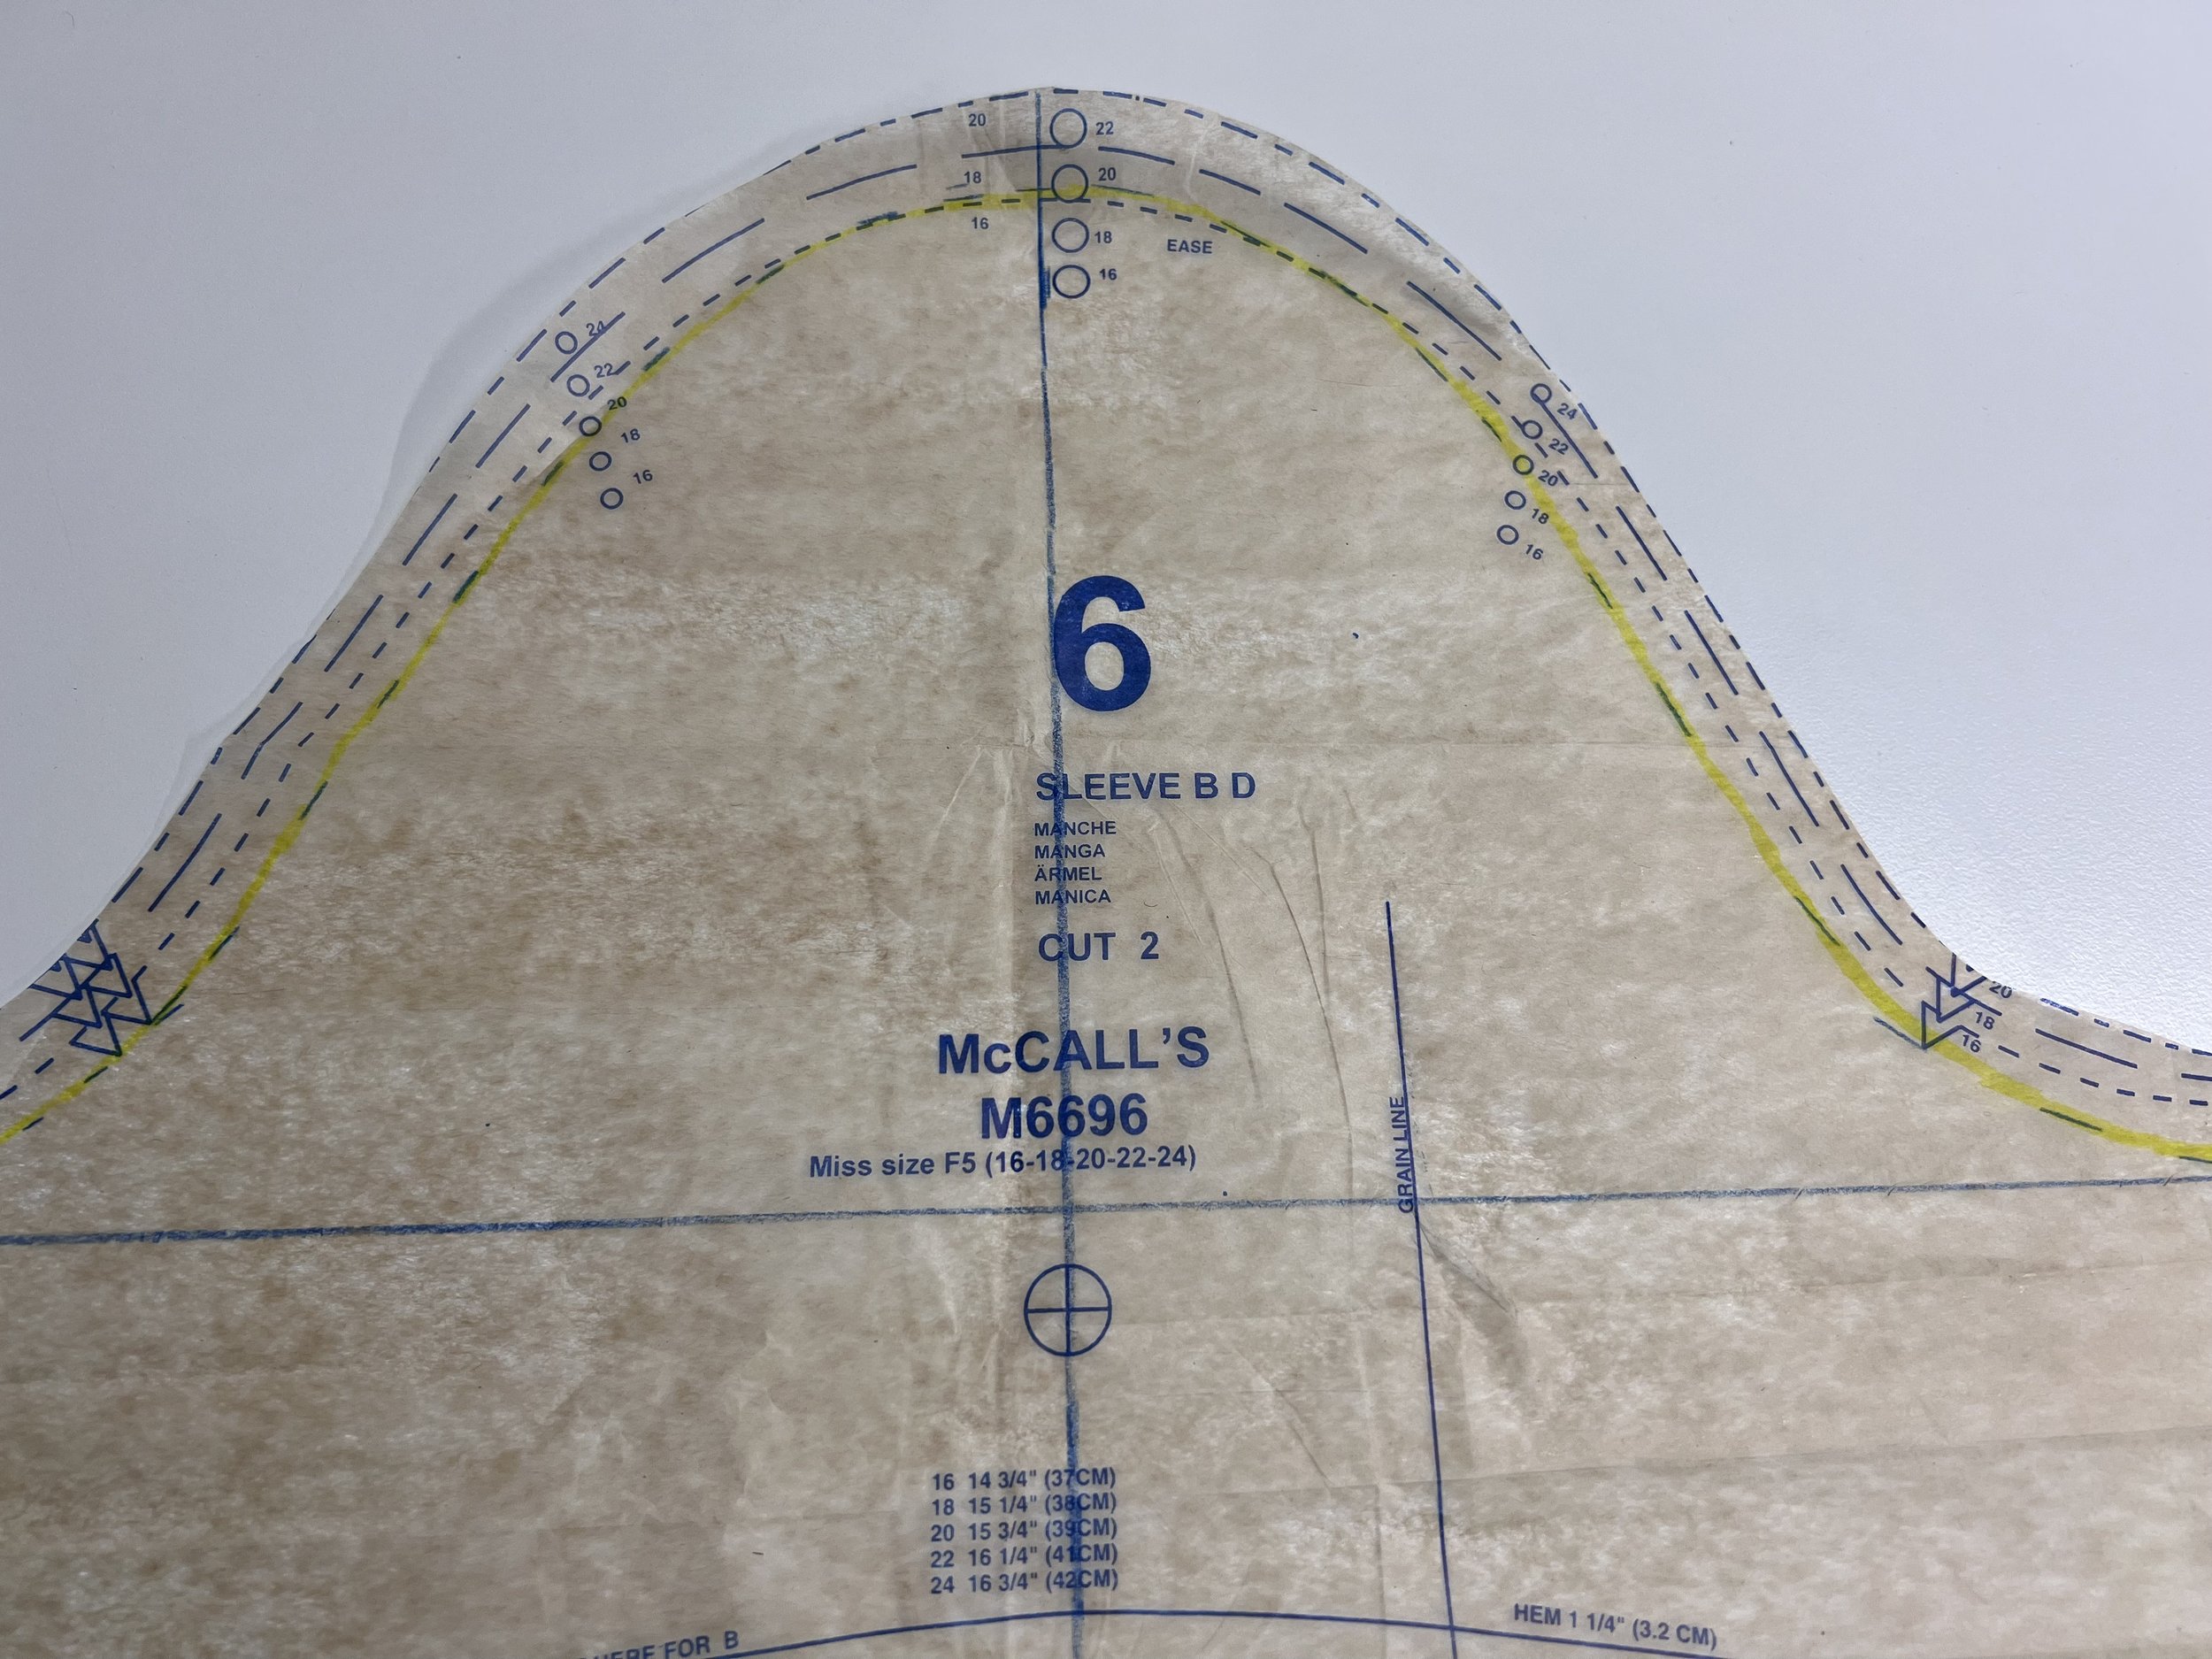
Bust darts - I lowered the bust dart around 1.5” - this is a standard adjustment I have to make for most woven patterns. Always. If you are wondering how you know when you have to lower or raise the bust dart? All darts must point to your bust apex. You can see mine in yellow highlighter below. I usually do a quick tissue fit on this and this pattern was no different. I had to lower it.
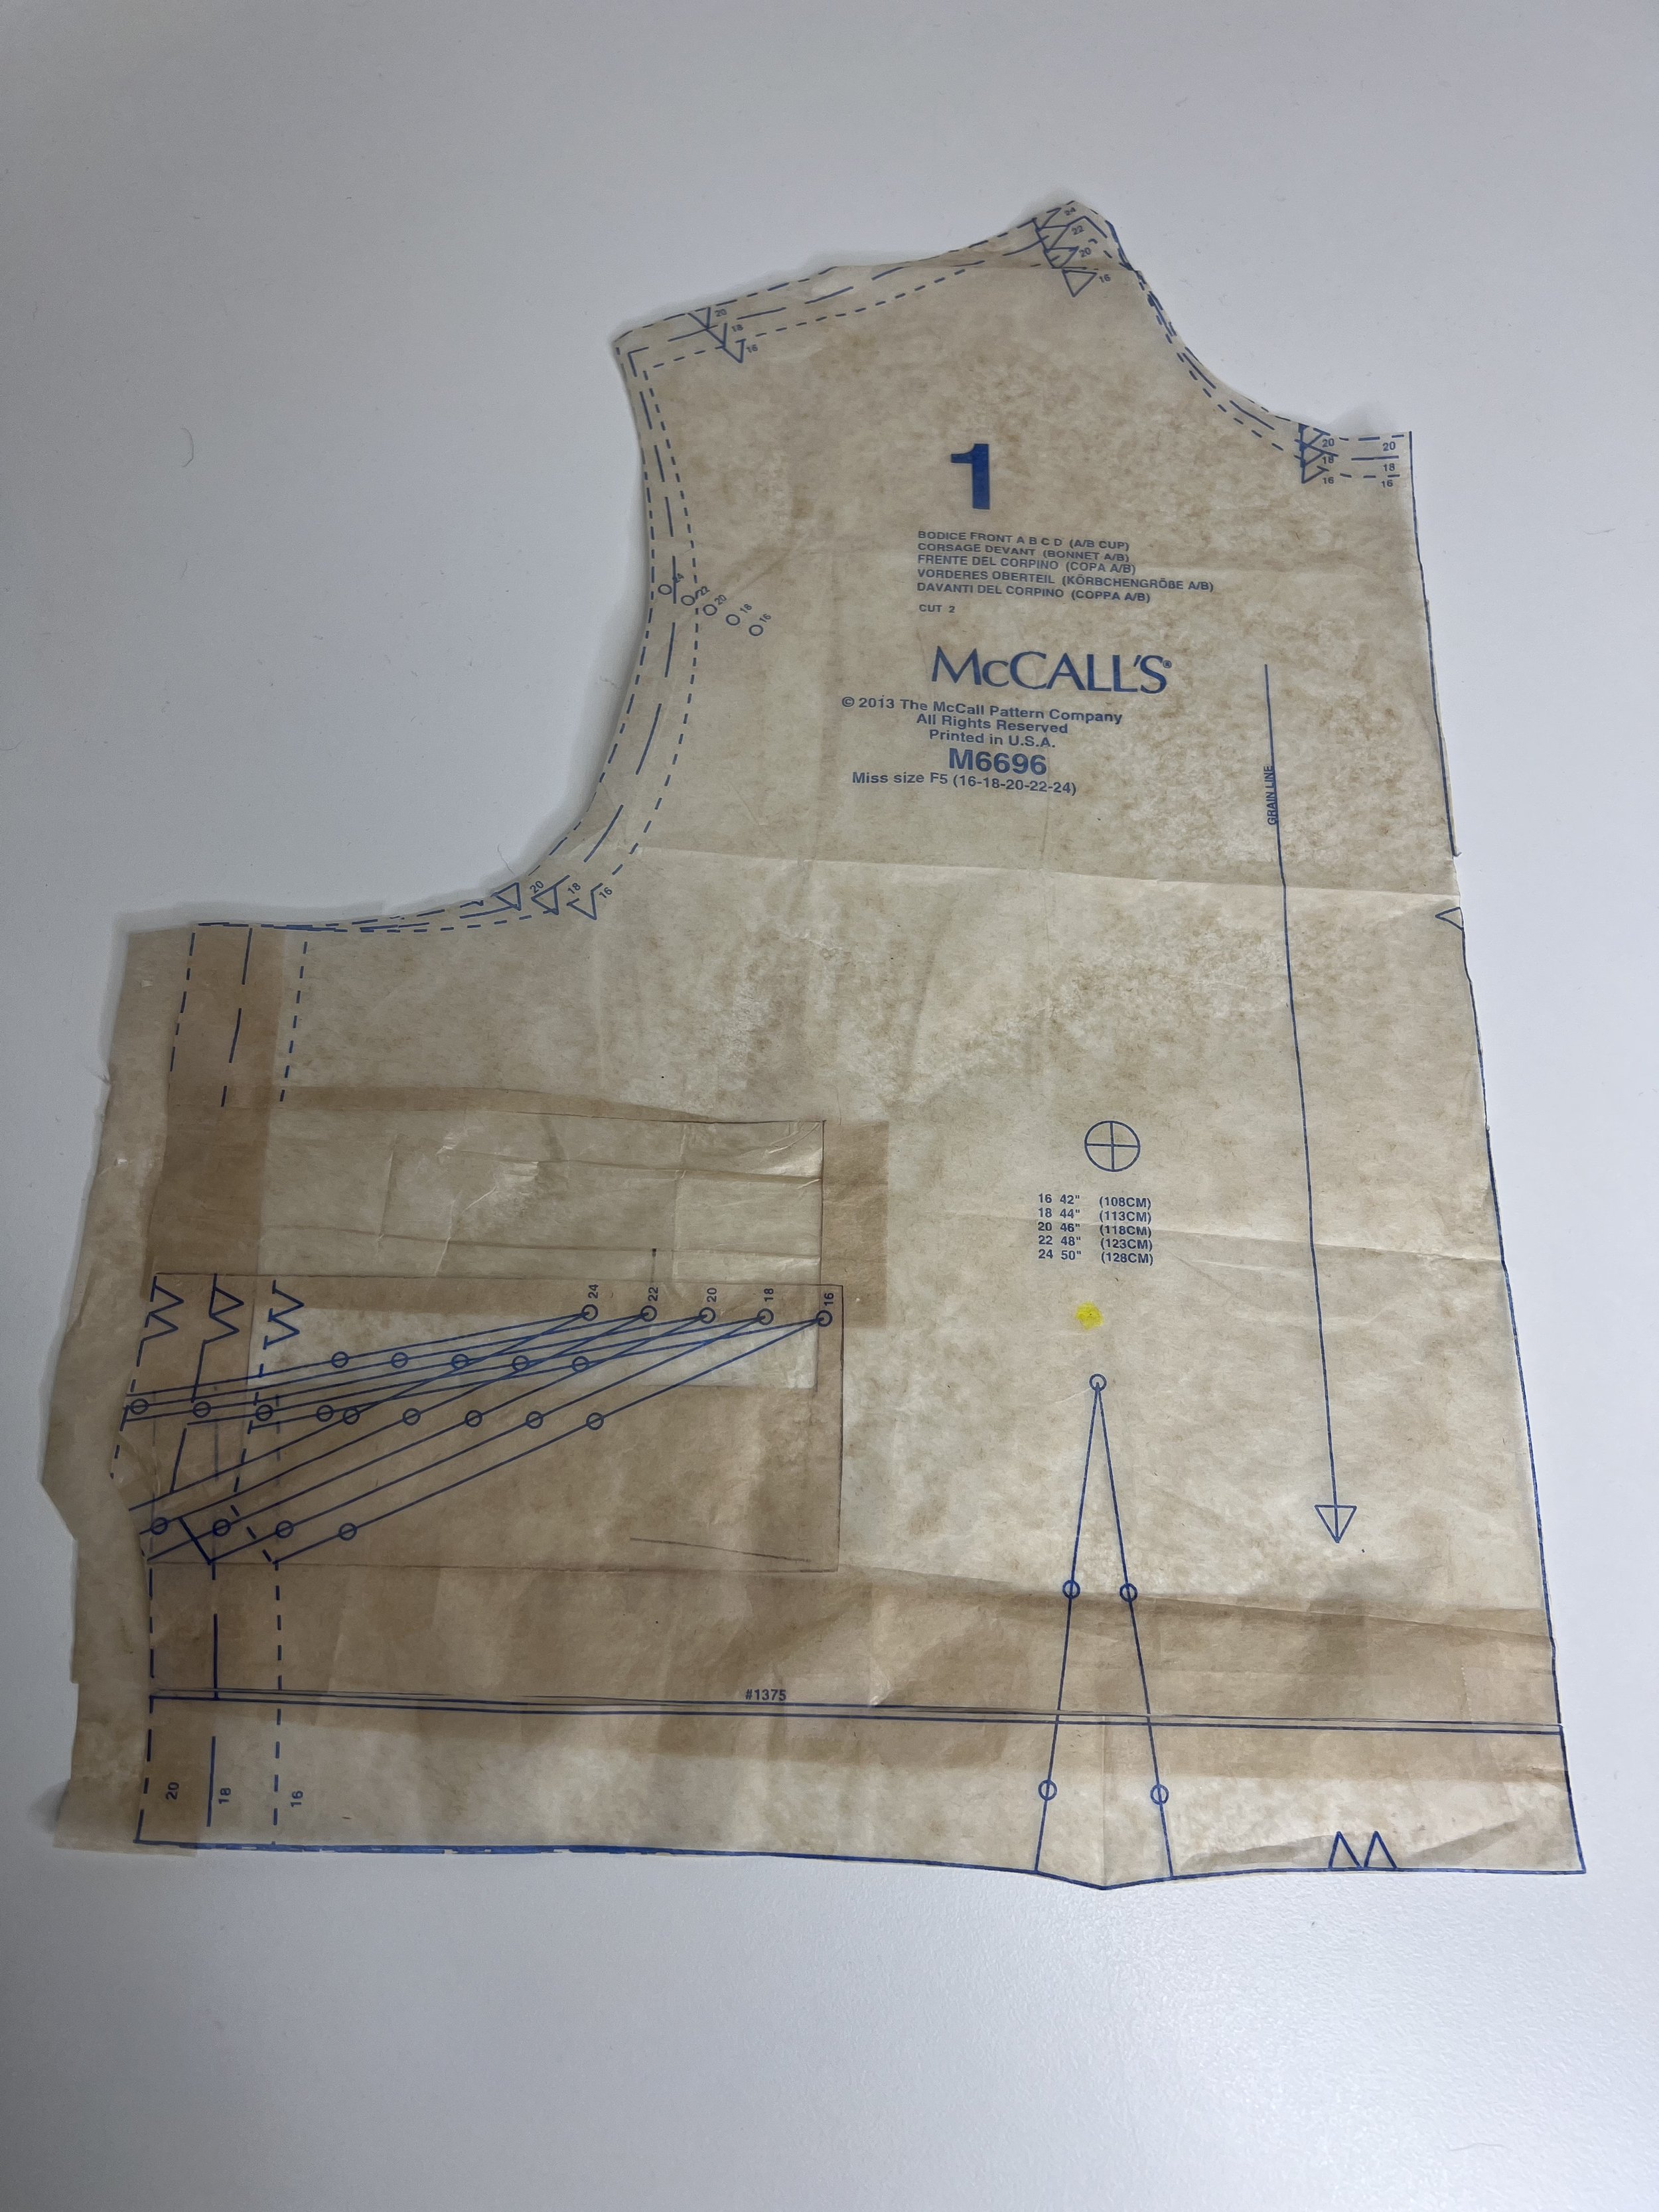
Lowered bust dart on the pattern piece, yellow highlighter dot has my apex that bust dart had to come down.
Size and taking fabric stretch- I cut a size 20 but I had to add 5/8” to my muslin for the bodice essentially making it a size 22. HOWEVER, the muslin that I made has zero stretch and the fabric I’m hoping to use for my final garment has stretch, so I will cut a size 20 and see how it behaves / stretches after one wear. I will also leave the bodice seams finished with a serger but I may have to open those side seams and take it in some more… we shall see after one wear. You can see the additional seam allowance in the picture above. I should have cut a size 22 but I know I’ll end up taking it in based on the stretch amount of my final fabric.
Waist width- I added 1/2” to the waist for the skirt front and back, which will get me to my usual waist size. I wonder once I make my final garment how much will it stretch naturally. I want the fabric to be fitted but not tight. I don’t want the buttons to be pulling on the fabric, so I rather have more fabric to play with than not enough.
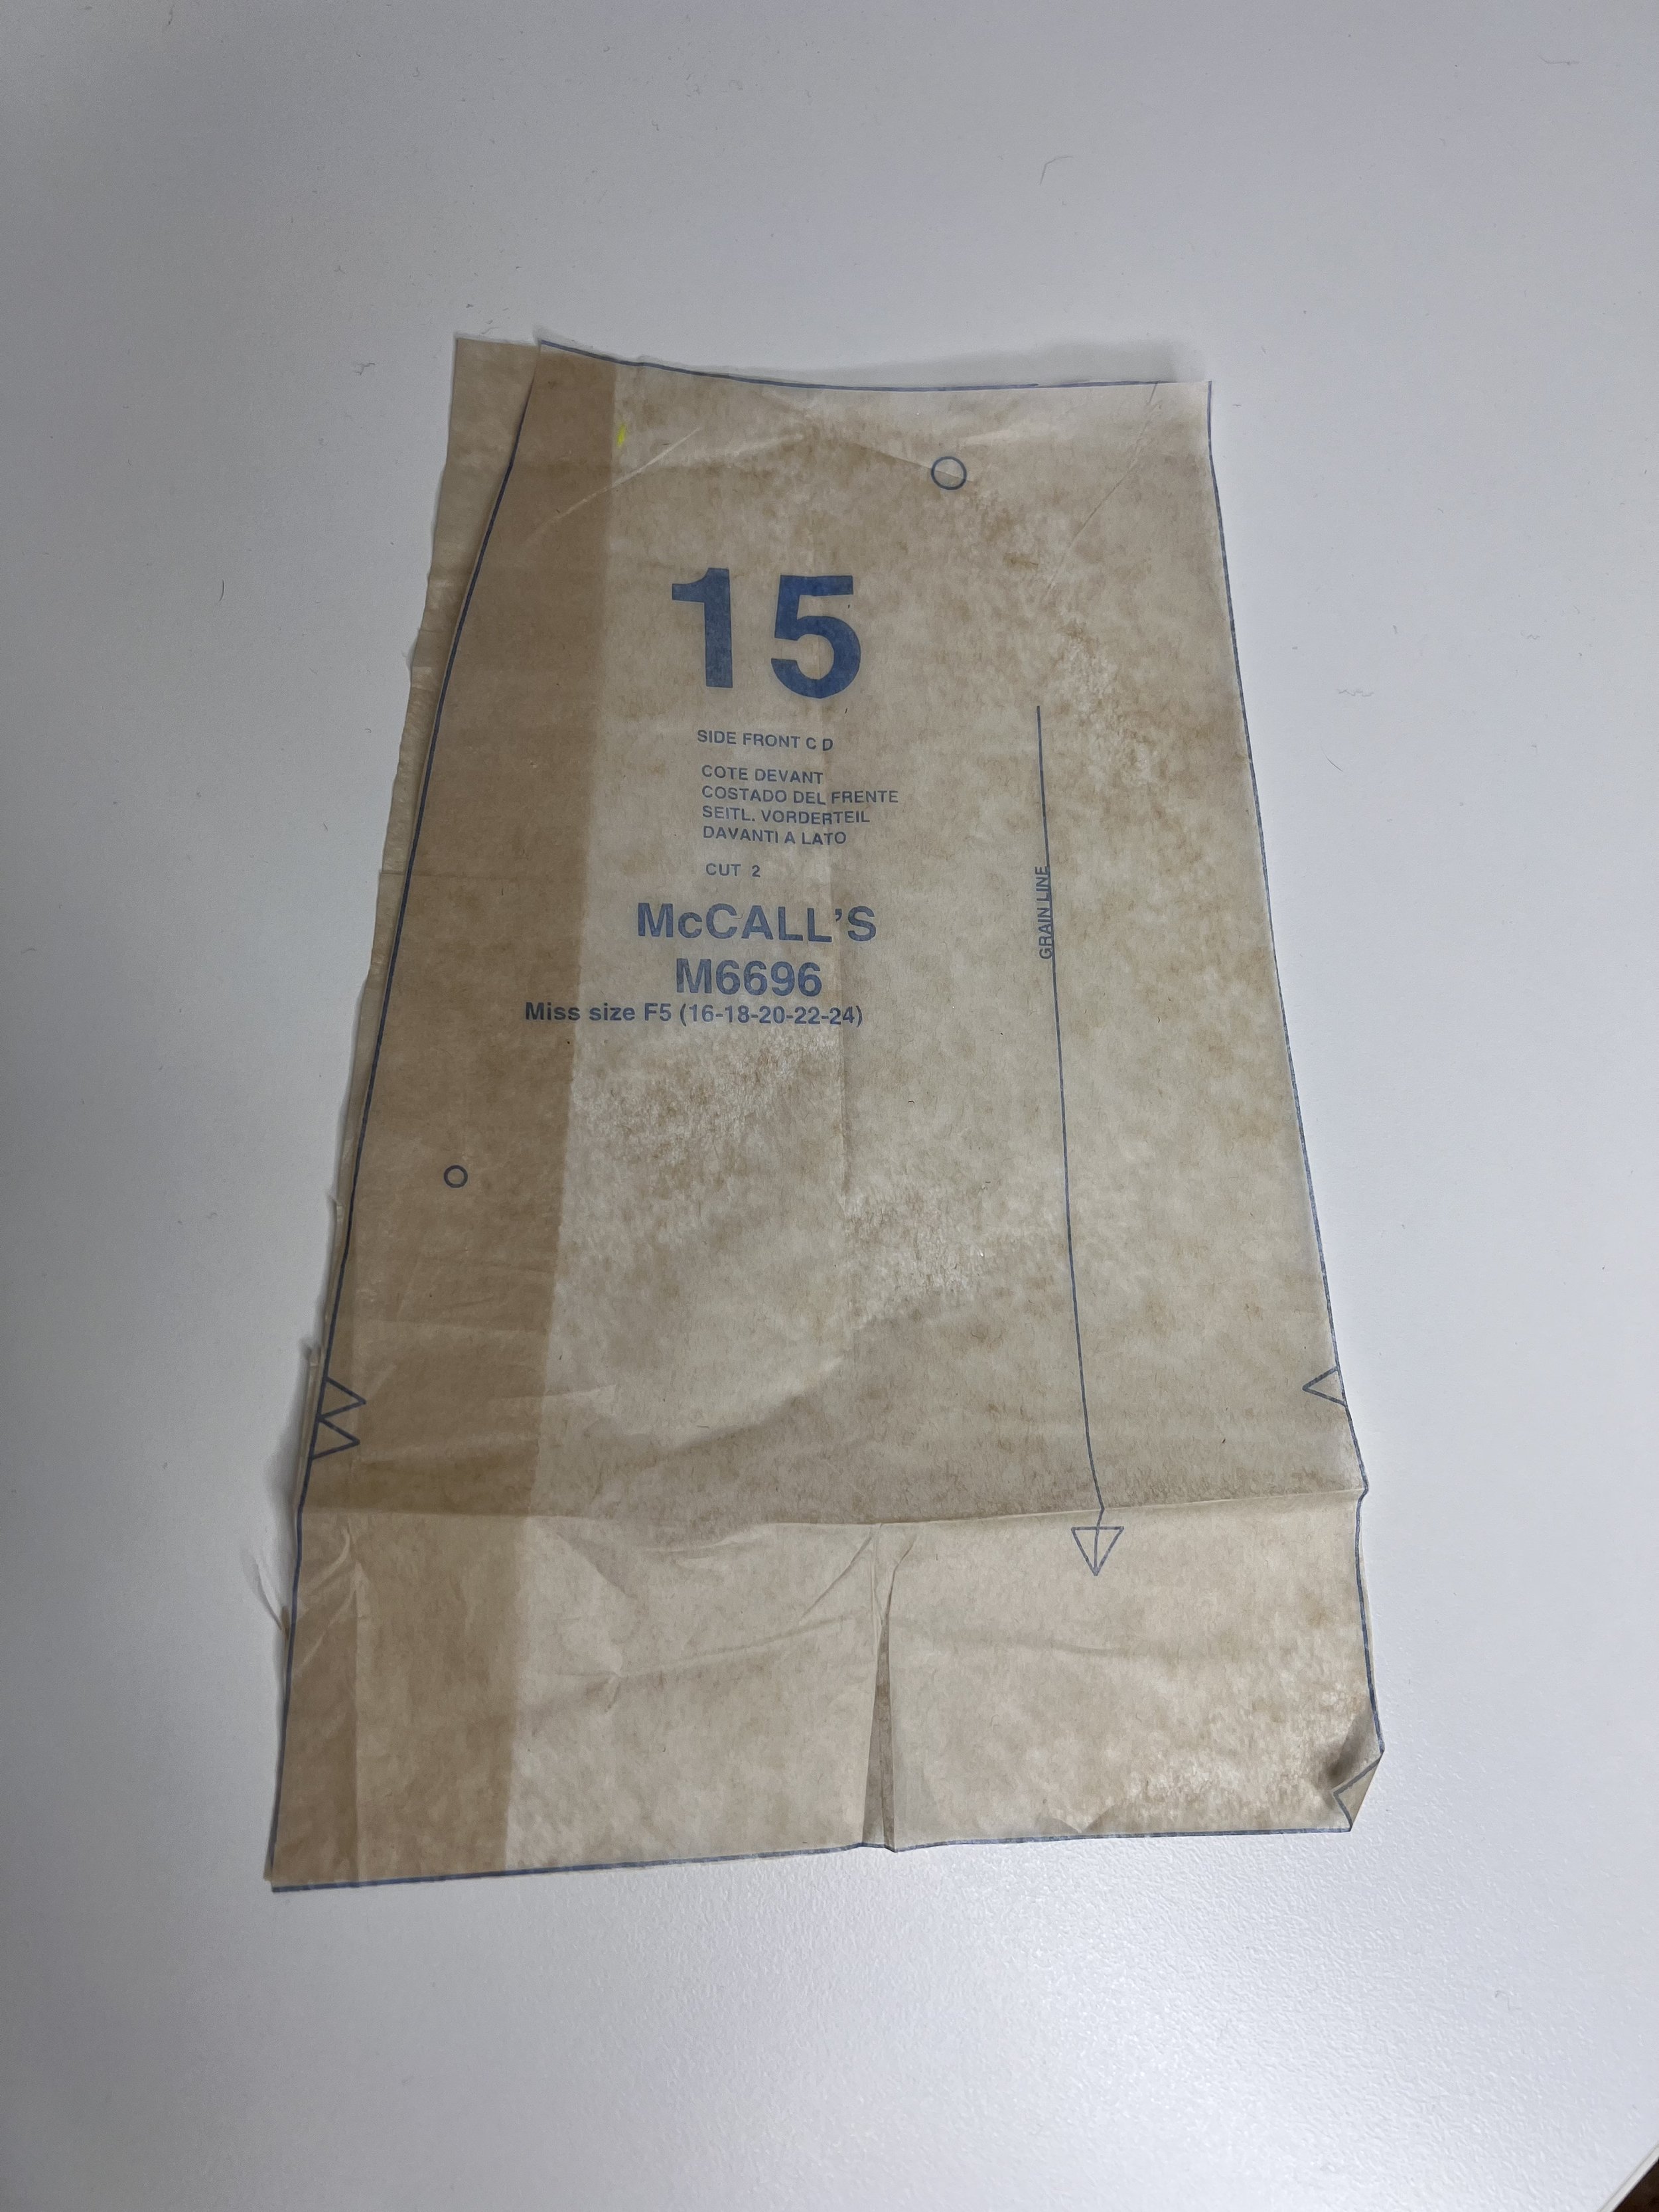
Added width to the side front pattern piece for the skirt portion. I already added width to the bodice so now it needs to match the bottom piece.
Pockets - I changed the pocket shape for the skirt. I don’t care for the cut of the pockets. They usually stay open when you wear this style of pockets and it is just ugly and unflattering so I changed that too. I used S9261 pocket pattern pieces for this, made a copy of the pattern piece, aligned the circles in pattern piece no. 14 and that is that. So an easy change.

Left pocket facing is my new drafted pocket facing piece with the rounded edge and the original piece with the 45 degree angle.
Bicep Adjustment - I had to do a bicep adjustment and if you haven’t watched the bicep adjustment video its a good one if you ever are in the need to make a bicep adjustment.
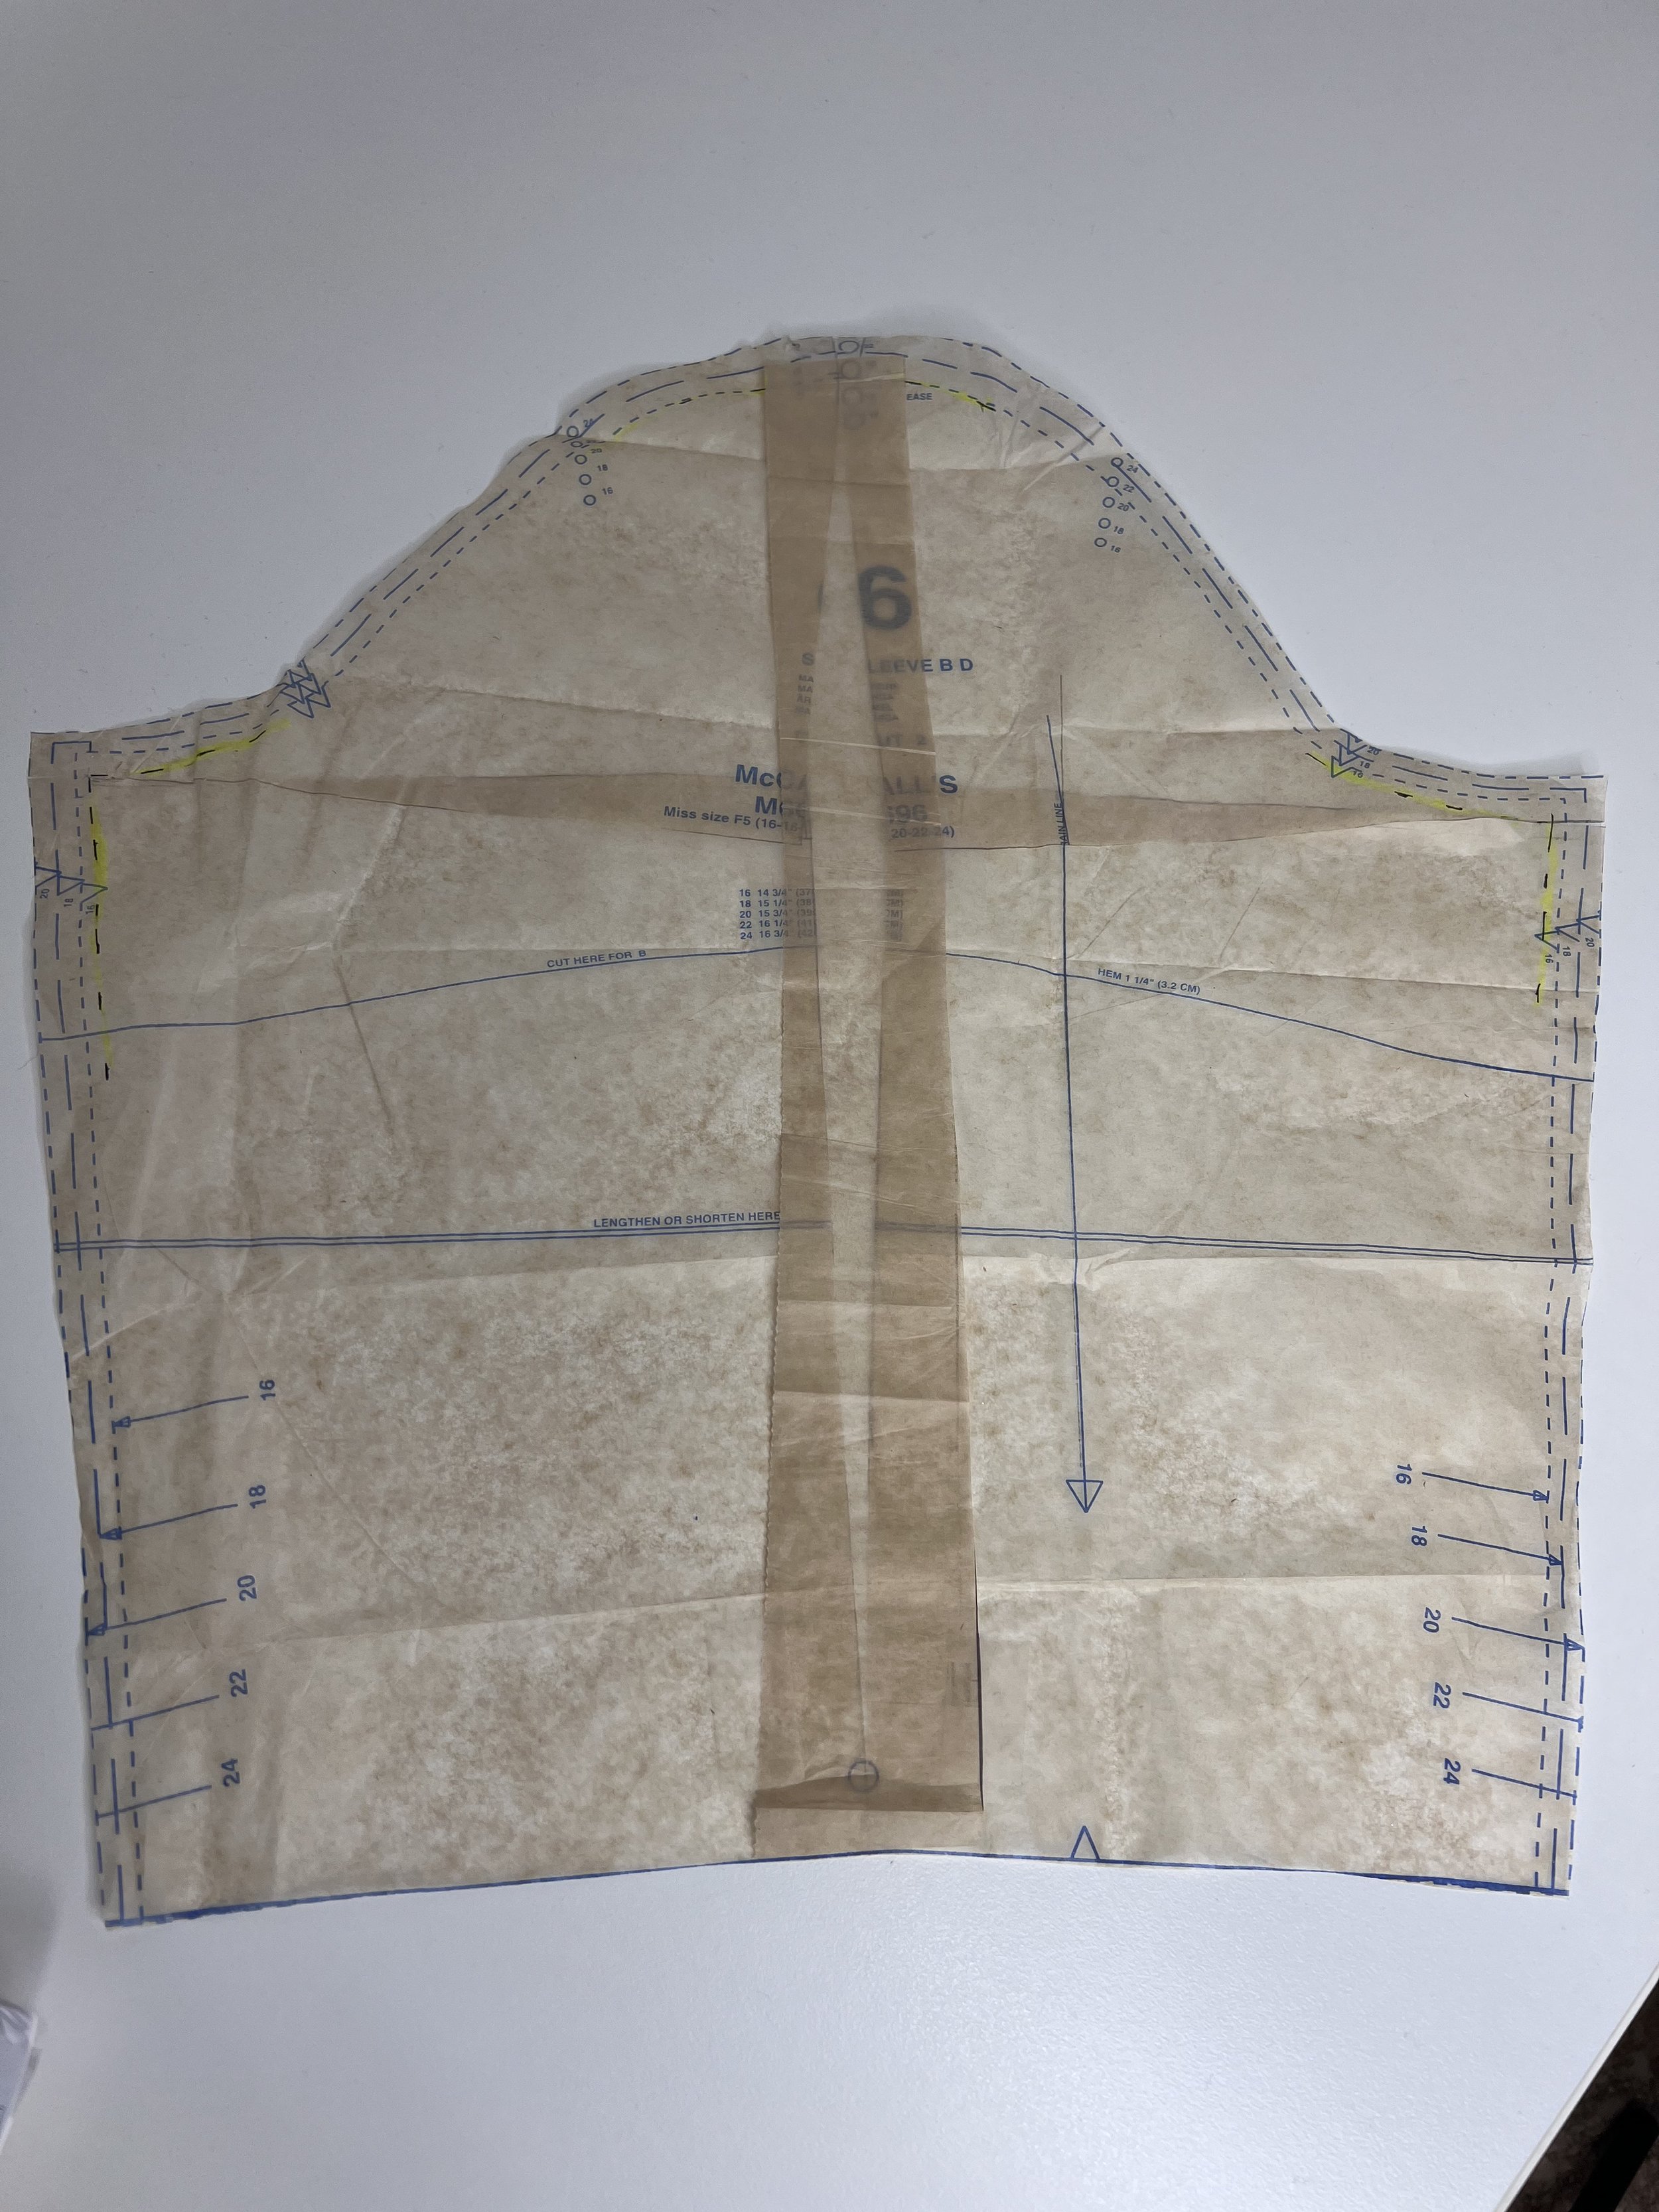
Bicep adjustment on M6696. I added an 1” to the overall width.
Sleeve Cuffs -Although my muslin is sleeveless I know I will be changing the cuffs on the pattern. I don’t particularly care for the cuffs on the pattern. There are a few options…. I can redraft the pattern piece so take out some of the pointy ends, I can use a regular cuff but that may be more work than I want to do, OR I can gather the sleeve a little, add a sleeve cuff and be done. I took off 1” off the pointy ends, I’ll try and see how I Feel about them once I put one in. The right picture is the original pattern piece for the sleeve cuff and the left one is the folded pointy ends folded 1”. It’s another quick change on this pattern piece.


Waist band - I kept the entire length of the waist band pattern piece, and it shouldn’t surprise me I used the entire length. I knew I would add some with to the waist and this was a safe assumption to make because once I joined the bodice to the skirt I could always cut away any excess fabric. So keep that in mind when you are cutting your pattern and if you are a rectangle shape like me, then perhaps this is a good way to give yourself a buffer on that waist band.
Back pleat - This was the number one item mentioned on all those pattern reviews. Sure enough when I made bodice muslin no. 1, I agreed with all those reviews. I took out that back pleat, not completely but I left about 1/2” in, and looking at my muslin it still feels like a lot but I want to be able to move a little. Those pleats in the back bodice are rather large and depending on the fabric you are using can look like a big bag of extra fabric. I just folded the piece almost 2” but its almost 4” worth of pleats depending on the pattern size you cut. So that had to be reduced considerably. I added width to my front bodice but notice how I didn’t add width to the back bodice piece… that’s because I knew there would be extra fabric in there to account for the waist width. The back bodice pieces are usually at an angle slanting down… Look at my pattern piece, its straight.

Eliminated around 4” inches of that back pleat at the top and at the bottom of the pattern piece. There is still a little left at the bottom but its an easy adjustment by just measuring and folding the extra tissue to eliminated it or decrease it.
I believe this pattern was released back in 2017. There is a reason it is still being printed (five years later) and it’s still selling quite well. It is a classic dress pattern to have in the pattern stash. I can see multiple iterations of this pattern. Sleeveless, or with sleeves, perhaps ditch the pockets altogether and do a button down shirt dress with the waist band. I can also see this as a beautiful lace (burnout fabric!) dress with a bias cut slip dress underneath… which by the way it has that pattern piece included. You can use linen, chambray, rayons, viscose… heck my second muslin is made out of quilting cotton and it looks great (hello wearable muslin!).
Don’t love the Big Four patterns and you want to look into an Indie Pattern that is similar to this one? Then try Megan Nielsen’s Matilda dress pattern. It’s pretty darn close, the only difference you have pockets in the front bodice and outside pocket detail in the skirt pieces.
So needless to say I’m excited to make it in my lightweight denim fabric. If you haven’t gotten the pattern, I highly recommend it. I would recommend this pattern for a confident beginner or intermediate sewist.


How to Thread a Double Needle and How to Use it.
If you’ve been following me for a while, you know I love knits. As with all knits I like to finish my hems for most knits with a double needle. Not only do I use a double needle for hems, I also use it for top stitching. It’s a handy sewing needle to have in your sewing arsenal. But let’s talk about a few things to note.
There are different kinds of double needles…. There is a Universal Double Needle, a Jeans Double Needle, Metallic Double Needle and a Jersey Double Needle. Don’t believe me? Go check out Schmetz’s needles website. By the way, the have Schmetz has a really nice handy little app you can download that can help you pick the needle type for the type of fabric you are sewing… I have it on my phone and I refer to it often for any fabrics that I’m not quite so sure on what to use.
Some double needles also vary in width! And there is even a triple needle out there and of course the uses for it are many but mostly decorative stitching. But let’s stick with double needles for now.
I usually tend to use a stretch jersey double needle or a Universal Double Needle. It all depends what I’m sewing (I switch between jersey and some topstitching of woven fabrics) but as you thread a double needle the biggest thing you need to keep in mind once you start using is:
Length your stitch. Lengthen your stitch to 3.0mm to 3.5mm.
Loosen up the tension a little. Just a little! Too tight and it may cause tunneling between the two rows of stitches.
Test on a scrap piece of fabric.
If your machine has a double needle function make sure you turn it on, its a safety so you don’t hit the needle plate. That would be a quick way to damage your machine and break the needle.
Do NOT backstitch!!!! So leave your threads long when you start and when you end and you can tie them by hand.
Lastly, go slow. You are using double the thread, if you make a mistake… that is more thread you are ripping out.

Get the Ready to Wear Look with Sewing Patterns
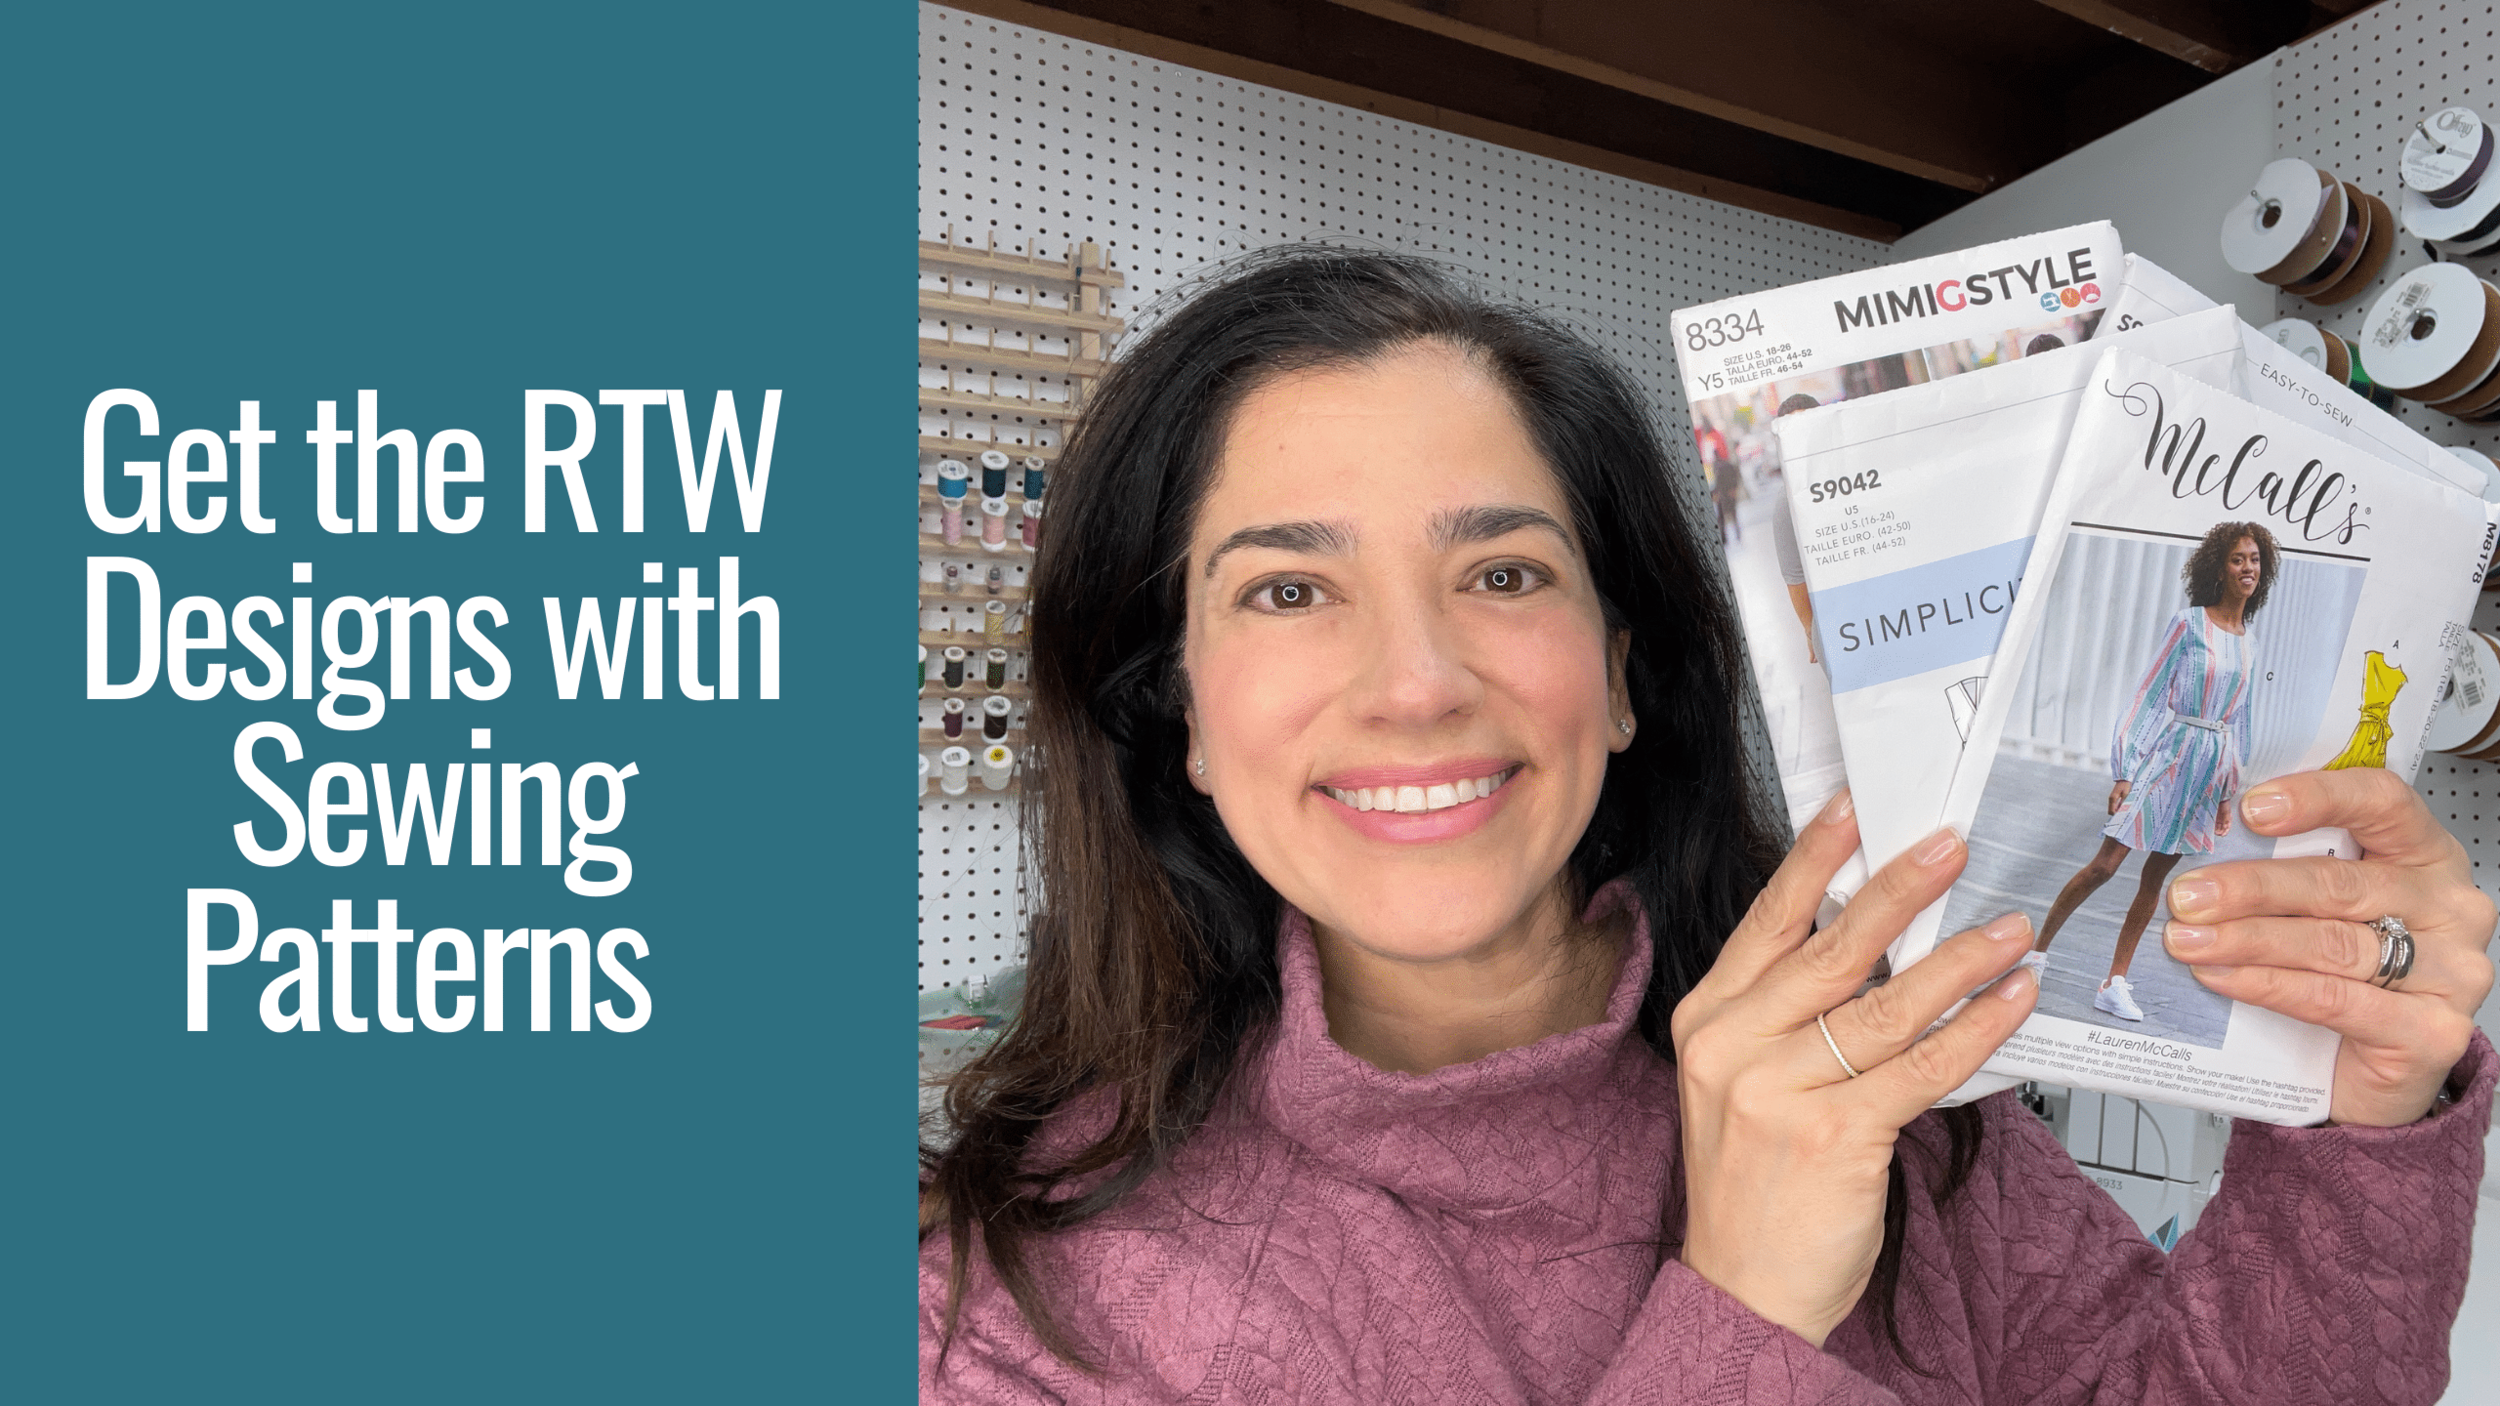
I haven’t done one of these in quite some time. I do these so you get some inspiration as to what you can do with the sewing patterns that we see over and over again. They are very much inspired on Ready to Wear styles out there. Some patterns are older, but some are quite new.
So let’s start with Ralph Lauren because why not? I get ads for Ralph Lauren all the time. I love RL, there is something about that classic style that works year after year. Upon seeing the picture below with the model in the faux suede leather dress I thought, I’ve seen this pattern before. Sure enough I recall seeing something rather similar from Simplicity. its S9042, view B is rather close, you would have to add in a collar, get rid of the band and add a set of cuffs but you could get away without them too.


I don’t know about you guys but I miss Cynthia Rowley and her sewing pattern designs. I don’t think I’ve seen one issued in the last two seasons. But Instagram must know I love her because they serve me with Cynthia Rowley ads ALL the time. I saw this black dress with some rib knit at the waist and my mind reminded me we had seen something similar before, and Simplicity S9135 fits. You would have to add in some slash pockets but that’s easy to do, and if you are wondering what is a good slash pocket pattern I highly recommend Mimi G’s S9261 dress (I’ve hacked that pattern for knit dresses more times that I would care to tell you!).


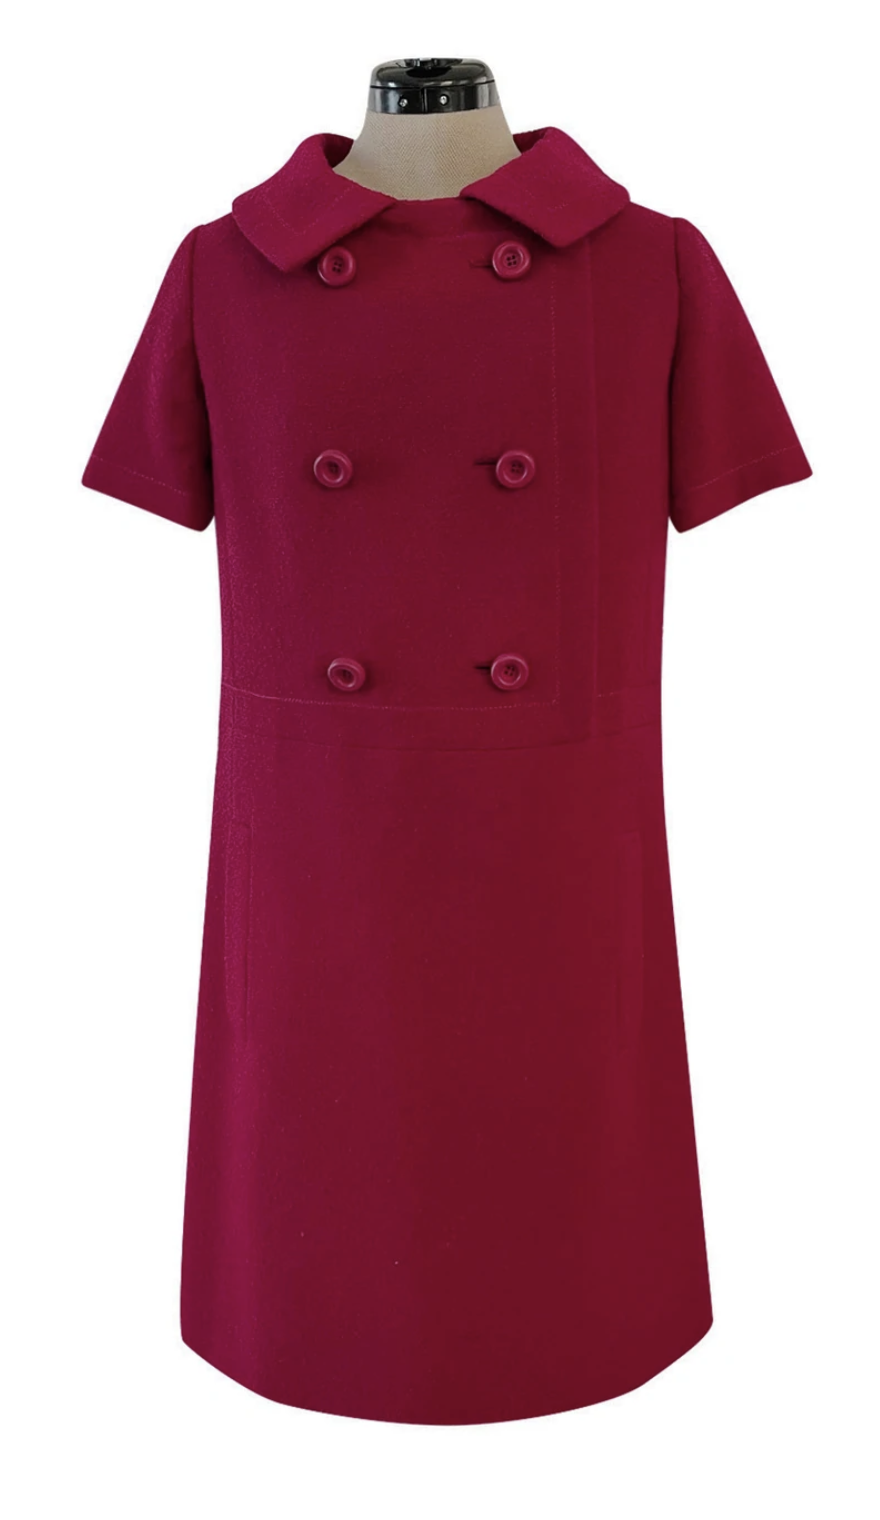
Here is an oldie making a comeback courtesy of Simplicity. Its actually a really good one if you love Dior’s Marc Bohan’s designs circa 1966 Spring Collection. Don’t ask me how I thought of this one but I follow a Vintage Seller of Haute Couture on Instagram (Shrimpton Couture and the owner Cherie knows her garments well and does an amazing job as a vintage seller), she posted a picture of this vintage red dress from Marc Bohan. It retailed for $1,800 but it is now sold. But if you weren’t able to get your hands on the vintage couture you can use Simplicity S9466. This is a vintage pattern that was JUST re-issued as part of their Spring 2022 sewing pattern collection. I haven’t seen the pattern but you may have to add in welt pockets to this dress, but that is not a hard thing to do.

It is still pretty darn cold by us in the Midwest and since it’s winter its going to be cold for a while. I was just looking at this coat from JCrew. it is a Teddy Sherpa Coat… they had it in the most beautiful mauve pink hue. But like one of the stories of my life it is now sold out, but Simplicity comes to the rescue yet again. You can use S8797 to make this coat. Sure it may not be a double breasted coat but this is perfect, and I happen to love that the pattern calls Sherpa as one of the recommended fabrics meaning the pattern is drafted with this fabric in mind.


We have to do a little Sezanne because I’m all about skirts and knee high boots in winter time. So lets look at a few. My daughter loved this skirt and heck I did too! It is called the Alison Skirt from Suzanne, Free People has a similar design and they both retail around $200 plus. Its beautiful, but I’m pretty confident we can make this one. Enter Burda 6252. Can we just say it’s pretty darn close! You can find some beautiful supple faux leather or even corduroy and make it.


Let’s keep going because I absolutely loved this skirt. It is by Sezanne, and it’s called the Keira skirt. It too retails for upwards of $200, closer to $300 actually. I love designs like these because they are simple and classic. Simplicity came in again with a pattern for it. It is Simplicity S9048.


Do you guys follow some of these Fashion Influencers on Instagram who post these pictures of fabulous clothes in beautiful places? I follow a few. I remember this pattern from McCall’s last year. It was McCall’s M8178. This is a dress with godets. I loved this dress, LOVED IT! But I must admit I ran out of time to make it and I saw an Influencer proucing around in a fuchsia and pale pink dress. She looked beautiful. Luckily for me she had a Like it to know it link… and its a ShopBob dress! Of course, like all good things this dress is now sold out in all sizes. I get another chance to make it this summer and I’m going for it! I actually think it would be great sew along because it’s got godets.


Lets do one last one. I know I’m late to this party but this pattern has been in my stash waiting for me and I suspect that some of you have it too. But as I was glancing at some of Altuzzara’s designs this red dress caught my eye. Red, knit and with just enough fun. Yes, I will have to make some modifications but that’s what pattern hacking is alllll about it.


So what do you think? As much as I like to say at times, I’m bored by this last sewing pattern release I have to admit the sewing pattern companies are giving us the looks, they are keeping up with the ready to wear trends and it’s up to us to sew it!
The Bicep Adjustment
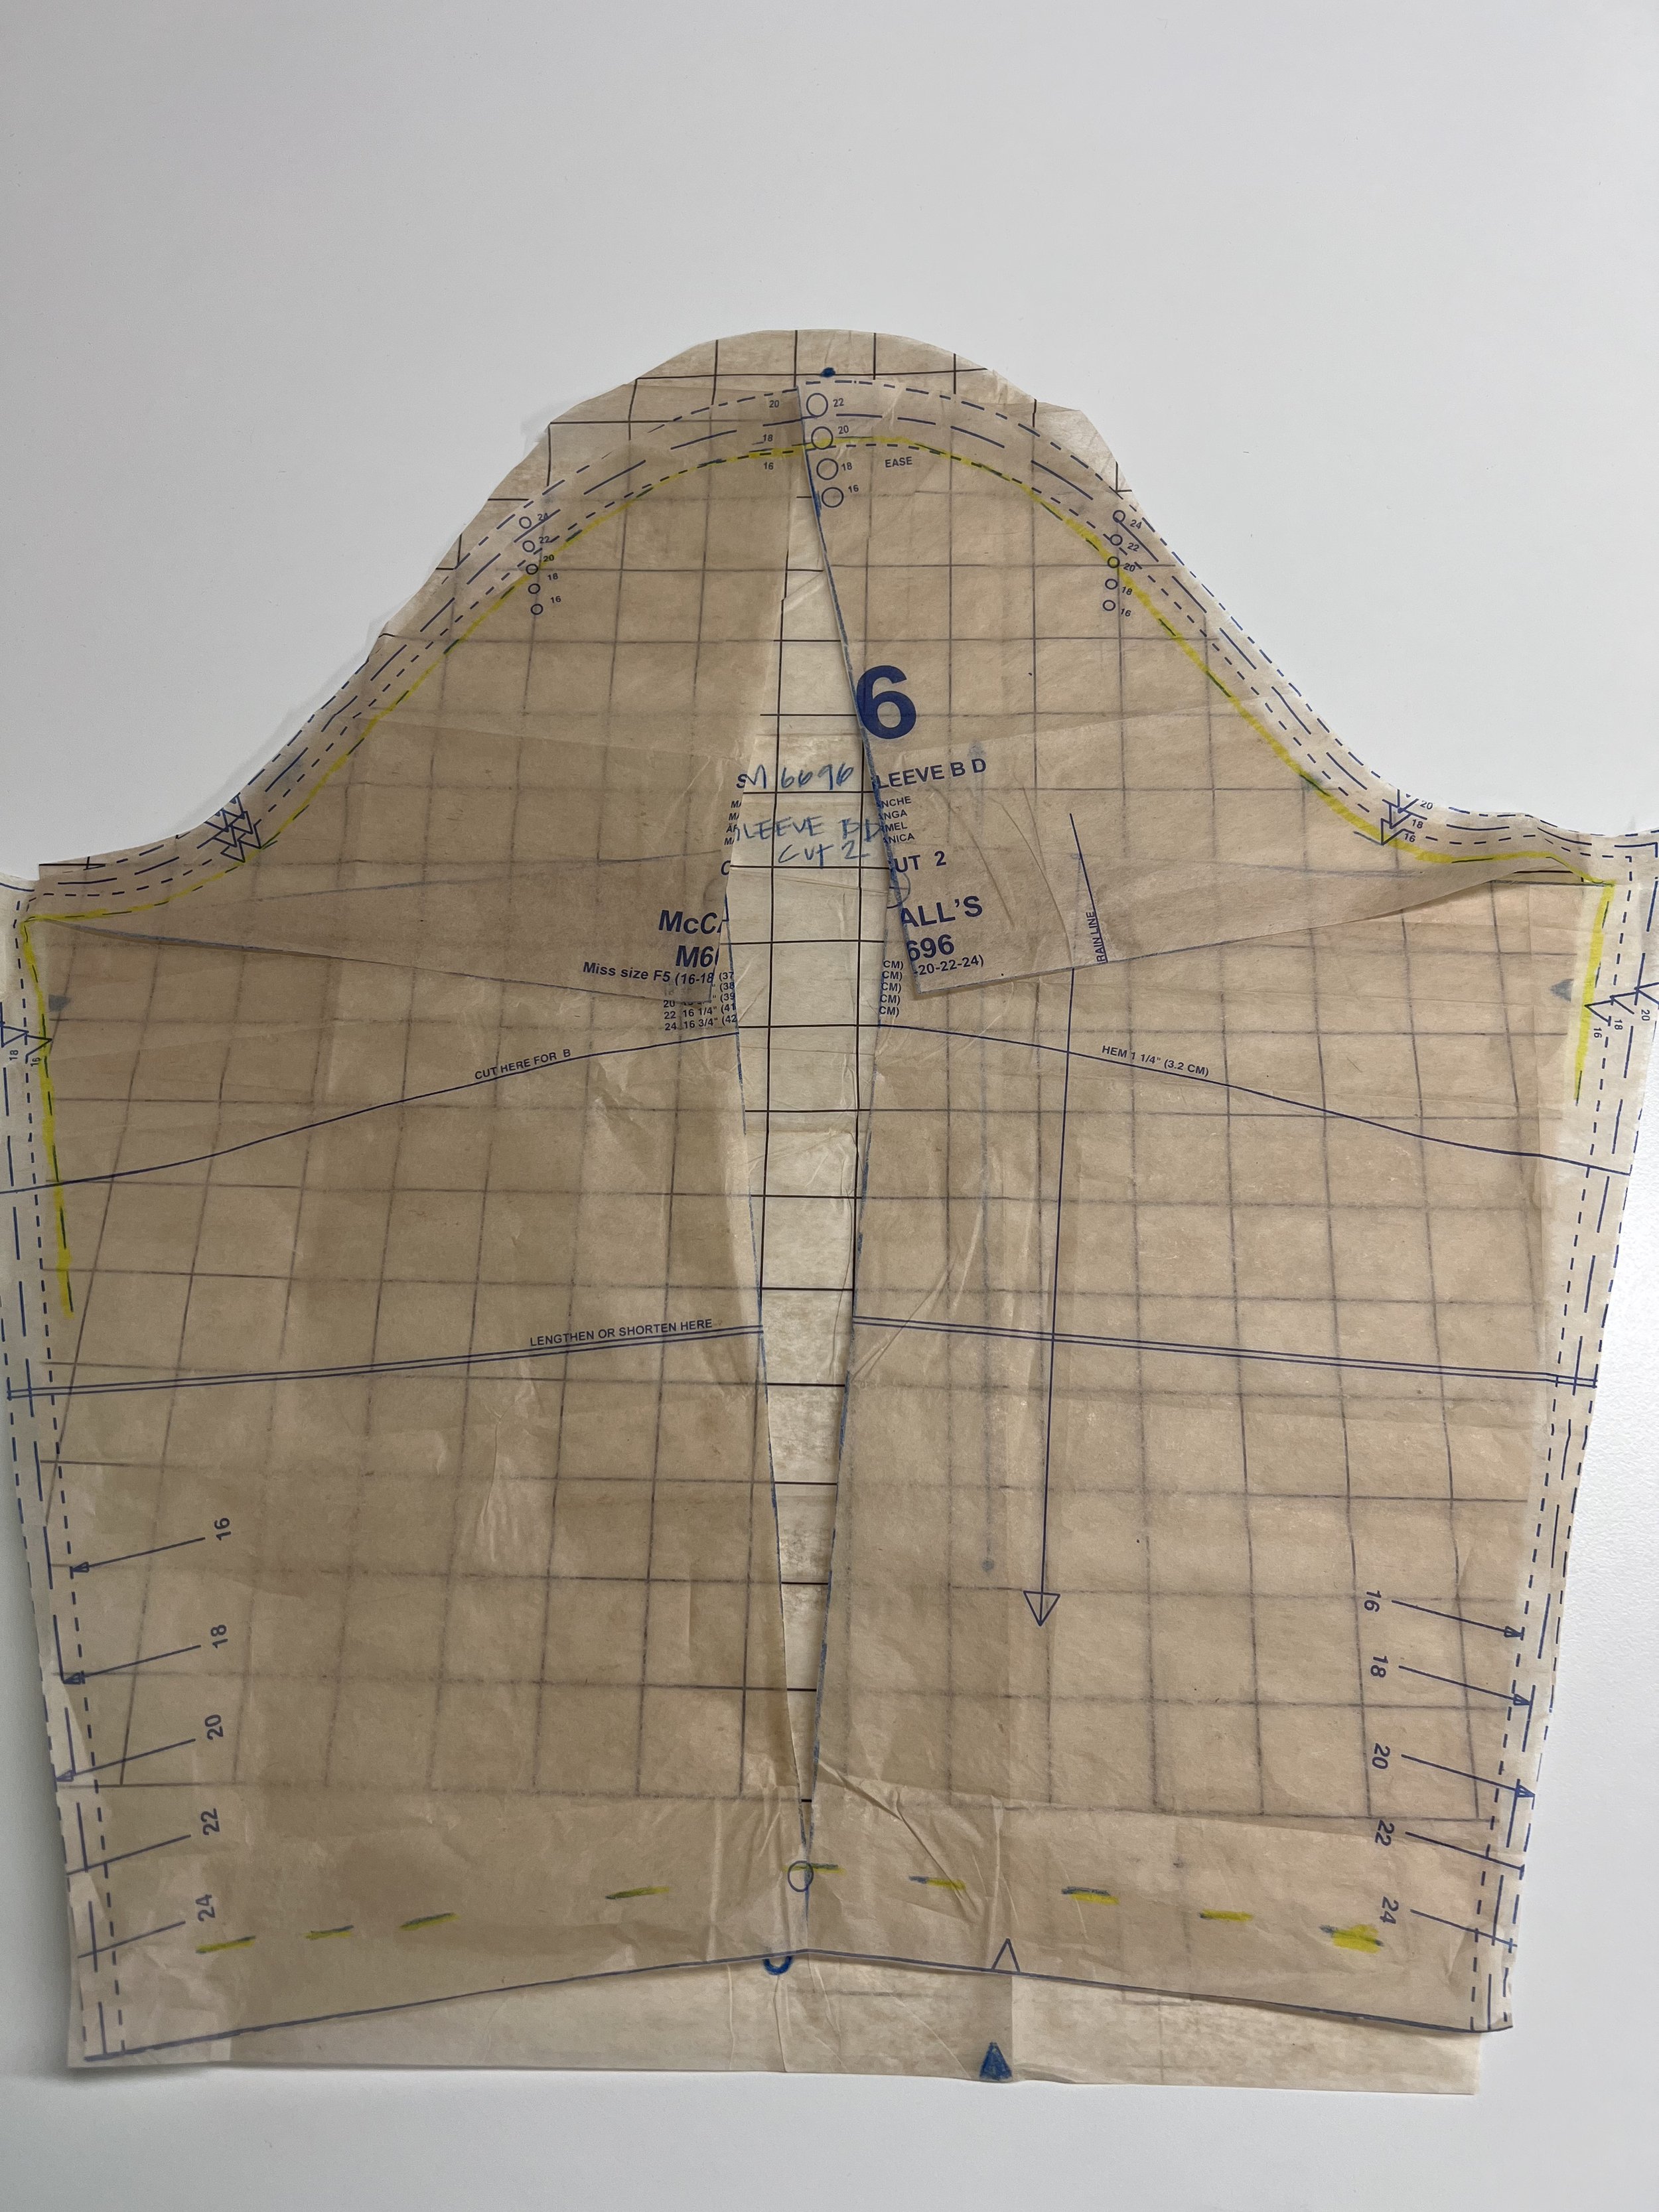
Whenever I’m working on a new pattern, out of habit I always measure myself. Upper Bust, Bust, waist, hips and biceps… I’m sure you do that too right? I do. Every. Single. Time. As I start working on M6696 I know that I will have to yet again do a bicep adjustment amongst a few other adjustments, but for today lets focus on on bicep adjustments.
So first of all, how do you know if you have to do a bicep adjustment? So first things first, figure out the size of the bodice or size of the pattern that you have to cut. In my case I’m using a size 20 based on my bust / upper bust measurements so I’m cutting a sleeve for a size 20 bodice. My bicep measures 15”. The size 20 for the sleeve pattern measures 15-3/4”. I could use this piece as is BUT the sleeve will be tight, and as I move about I don’t want to have a tight sleeve.

I’m using a size 20 bodice so I’m cutting a size 20 sleeve. If this is your first time doing a bicep adjustment, trace the sleeve pattern before you make any adjustments!
As a rule of thumb, you should have between 1” to 2” on the upper arm for all woven garments. Key word here woven garments. So although my 15-3/4” sleeve will fit I don’t want it to be tight so I’m going to add an 1” to the pattern piece so I will give myself a 1- 3/4” ease.
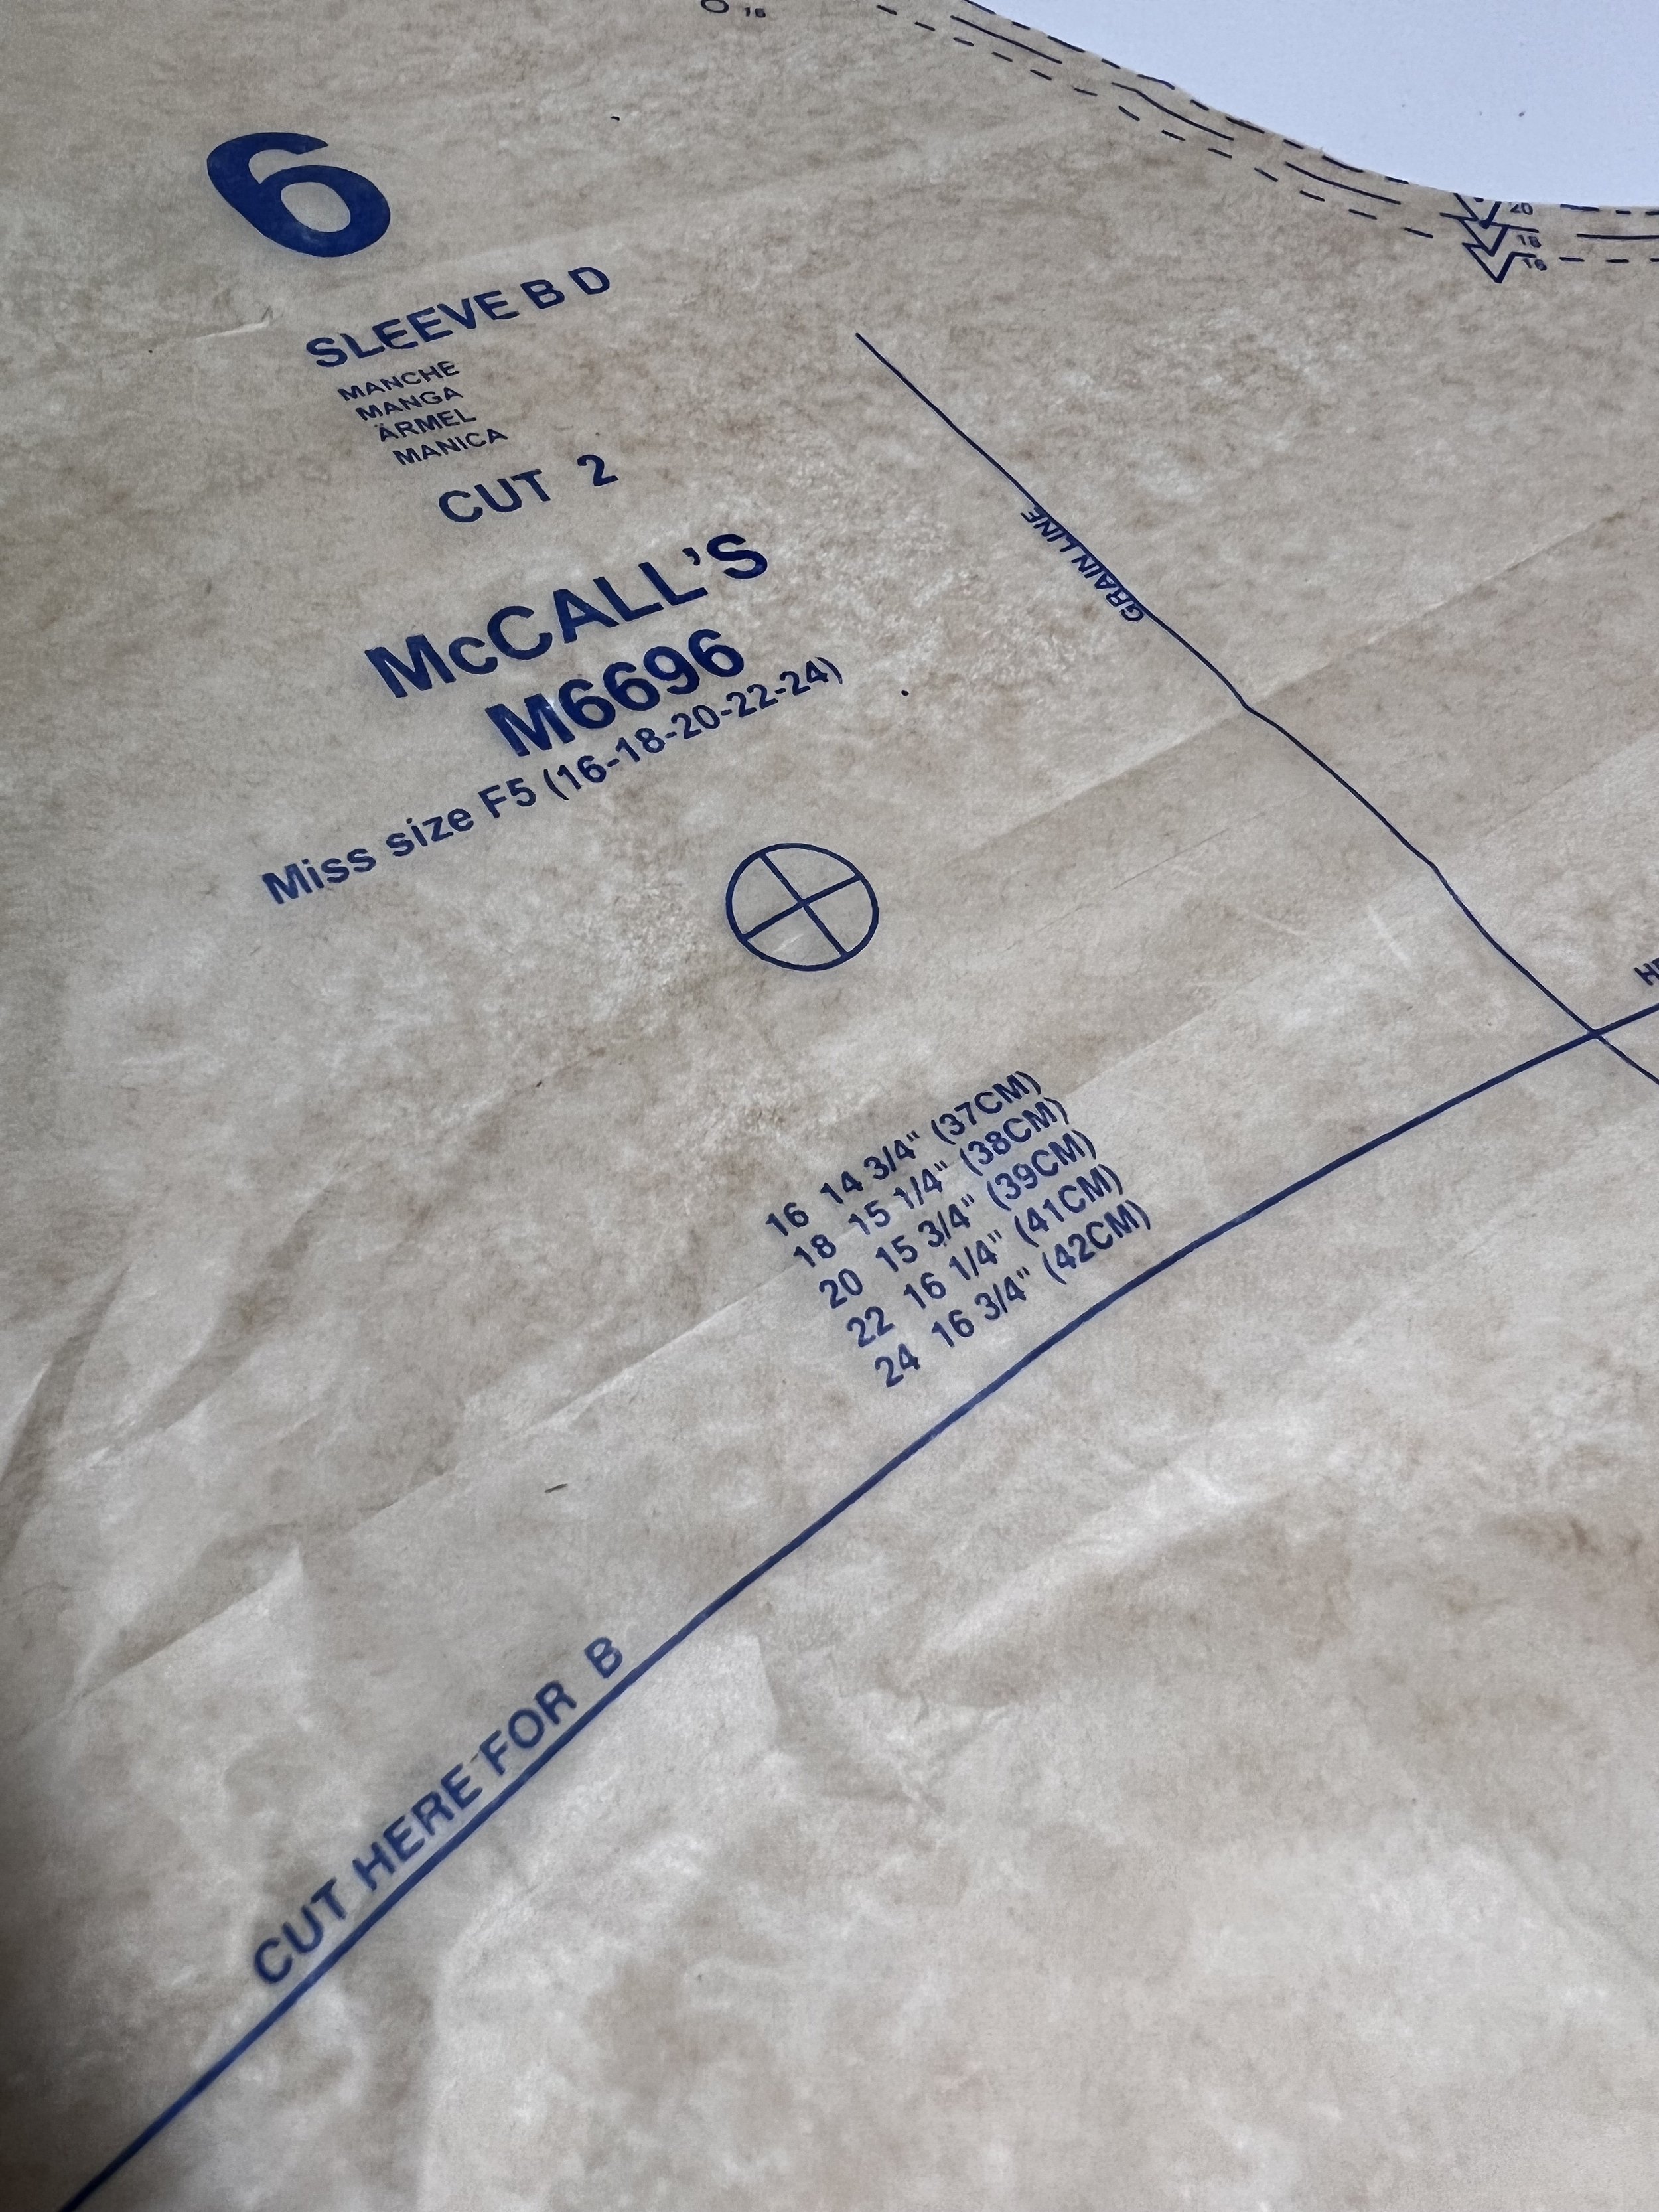
M6696 sleeve pattern piece. In it, you will see the measurements for the biceps for each size. If this is not listed, all you have to do is measure the pattern from side to side and take out the seam allowances (in my case 5/8”) so remember there is a seam allowance at each side of the sleeve!
Ease is really up to you, so I’m giving myself a little extra room. If I try it on and I want it to be tighter then I can always take it in.

Traced sleeve pattern, make sure to mark your grainline, notches, circles, top of the sleeve, etc.
If this is your first time doing a bicep adjustment, I suggest you trace your sleeve pattern first!!! So we have to do a little prep work so we can begin.
Now that you traced your sleeve, I want you to mark your seam allowances on the cap of the sleeve and the sides. In my case it is 5/8”. Use whatever seam allowance your pattern uses. It is always listed in the pattern instructions.


I used a blue pencil and high liter yellow line to show my seam allowance at the sleeve cap, sides and also at the bottom.

Here is the sleeve pattern with all seam allowances on the sides, cap of the sleeve and also at the bottom.
Now I want you to draw a straight horizontal line ———- from side to side. Use a ruler! Where will this line go? It will go were the two seam allowances intersect. This also happens to be the widest point of your sleeve.
Draw a horizontal line —- from side to seam were the two seam allowances intersect.
Now I want you to make a vertical line | from the top of the sleeve cap to the bottom of the sleeve. Make sure you are at the top of the sleeve cap. You may see notches close to the middle of the sleeve but that may not be the exact top of the sleeve. Again top of the sleeve! to the bottom of the sleeve.
Make sure you draw a vertical | line from the top of the cap of the sleeve to the bottom of the sleeve pattern. Make sure you do this at the TOP of the sleeve.
This is where the fun begins!
I want you to cut with your rotary cutter or your paper scissors. Thru those two lines, BUT I want you to leave about 1/16” of an inch of paper that we will use as a pivot point. I want you to do this for both vertical and horizontal lines. Go slow! If you cut thru it just grab a small piece of tape and reinforce it in that gap.
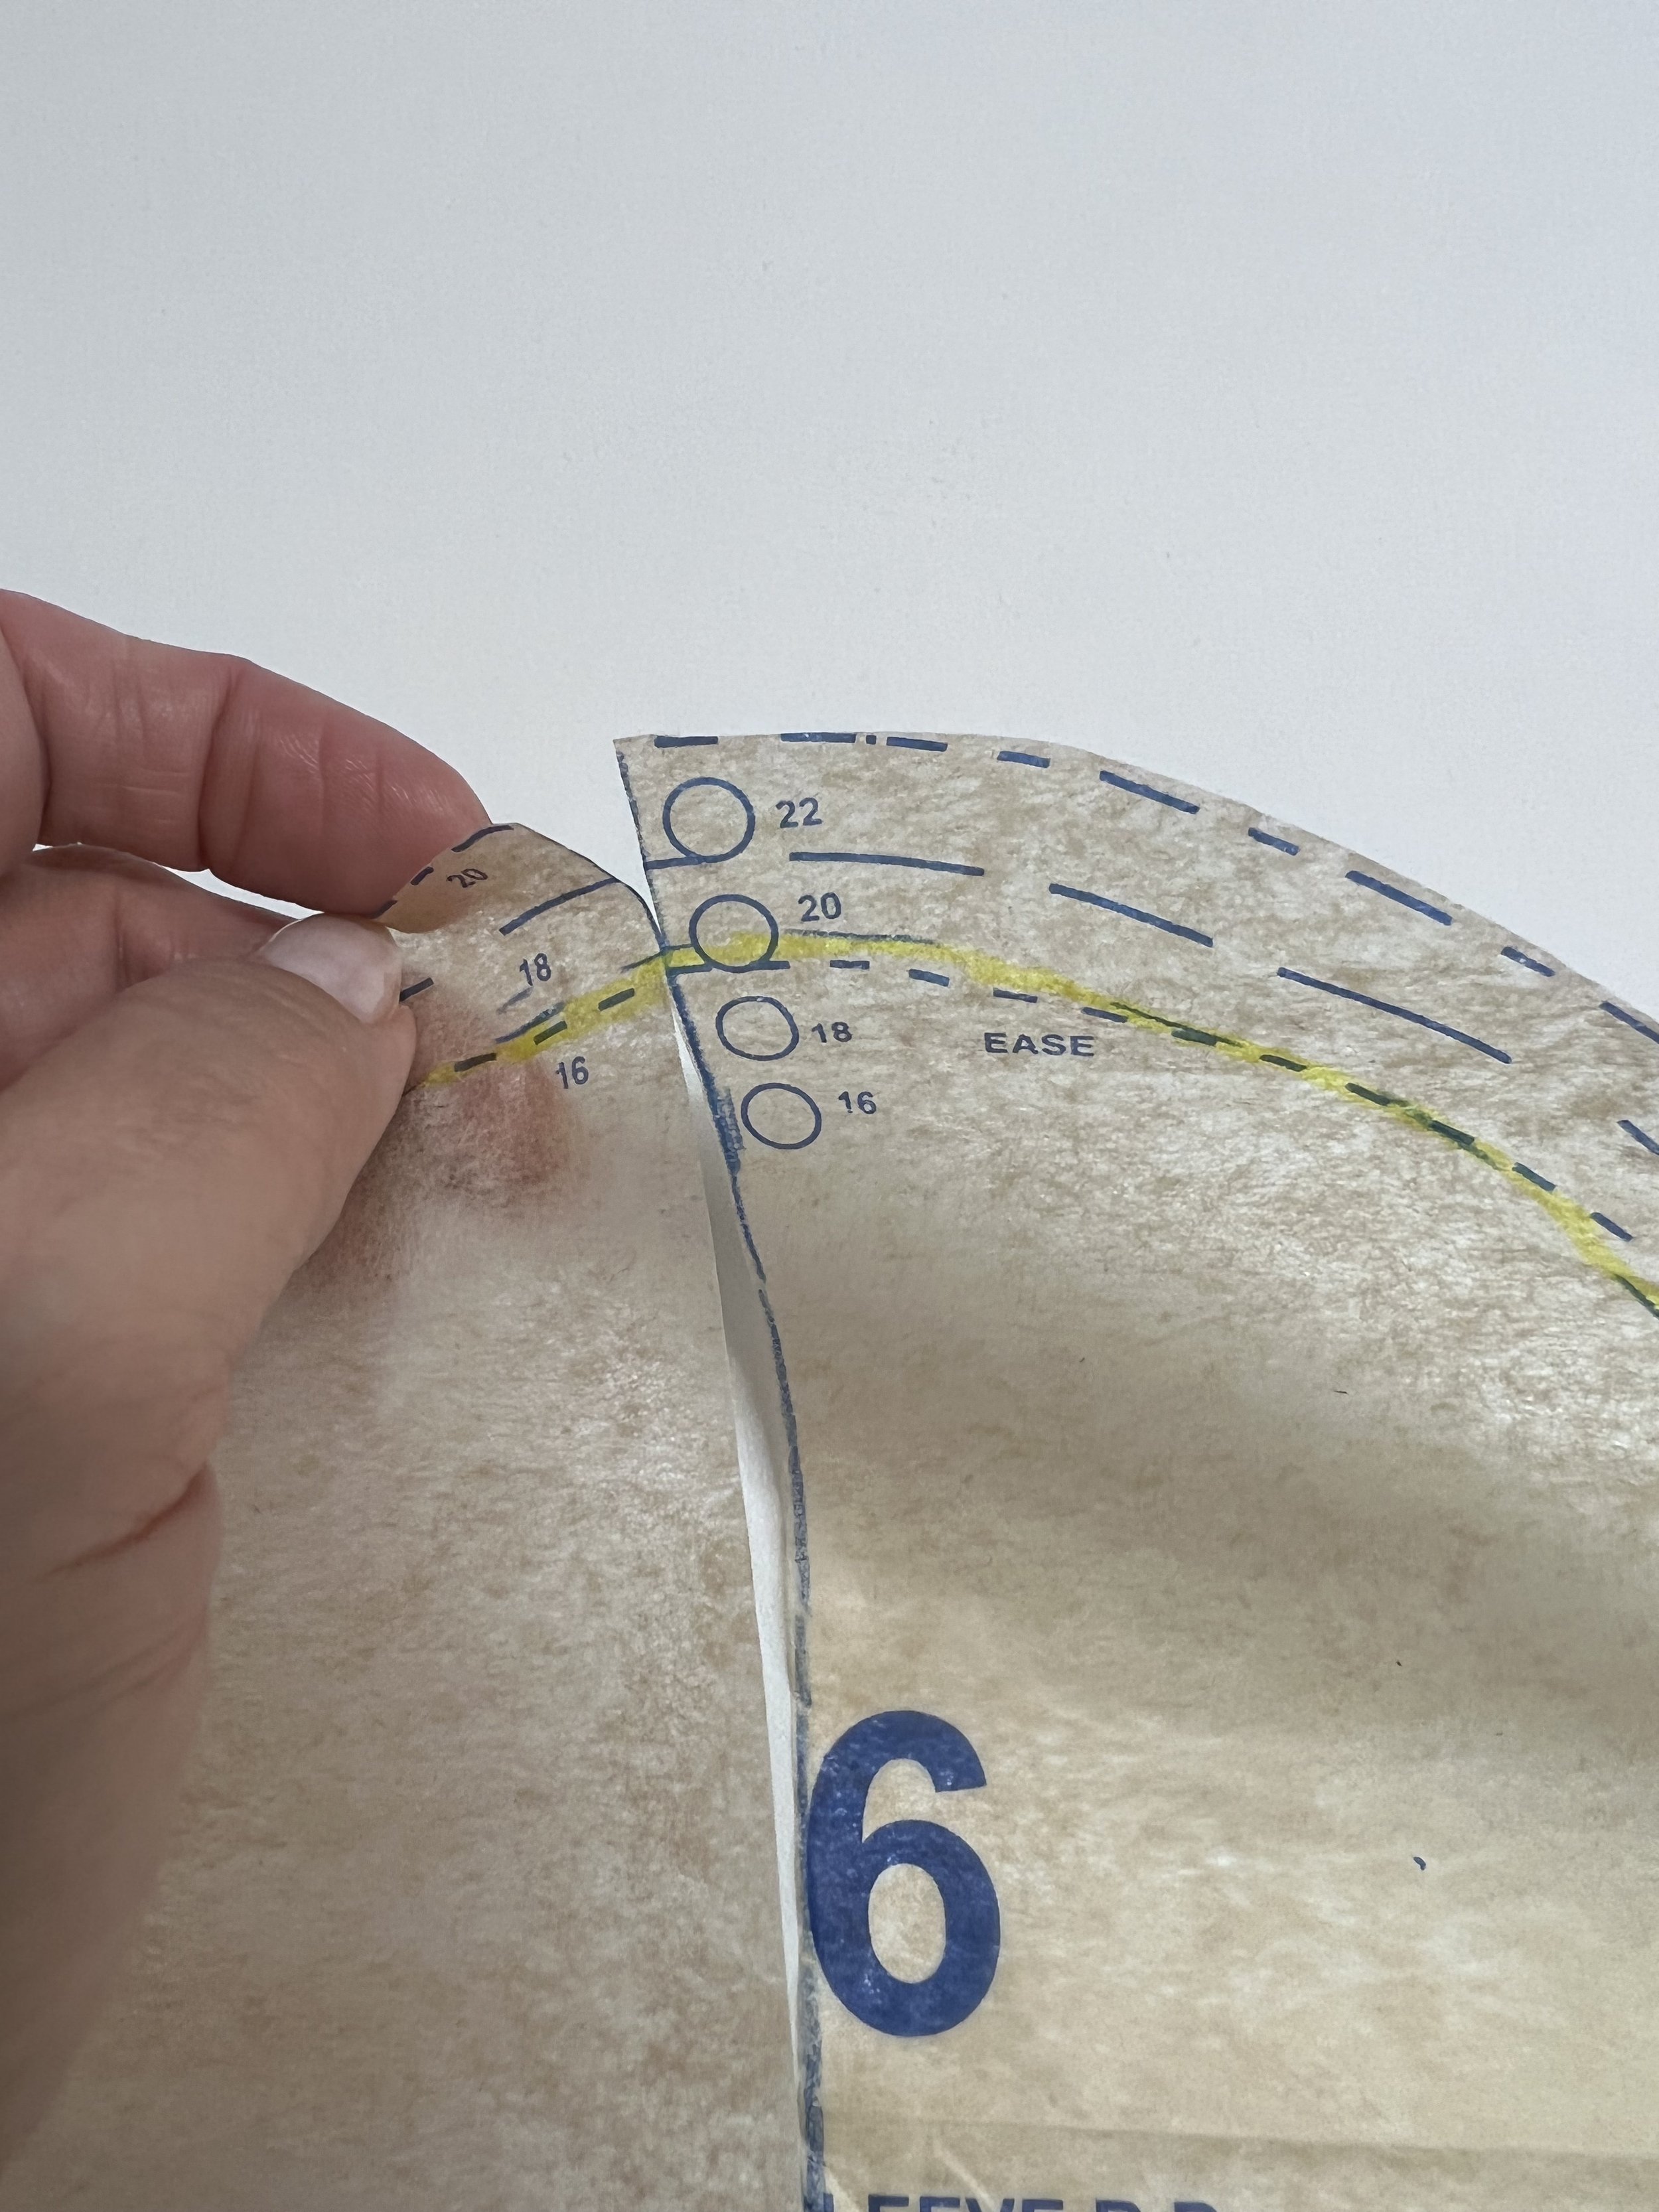
See that little pivot point I left? Its small but it will help me keep the pattern piece together but also manipulate the pattern so I can adjust as needed.
You should be able to move the center of your sleeve. That gap in the center of your sleeve is how we will add 1” to the width of our sleeve. You can add an whatever amount you need to add to this spot. It may be 1/2”, 3/4” or even 7/8”. Add whatever amount you need. Use your ruler!!! Do not “eyeball it”


Use a ruler to measure how much you need to add.
Now that you have added 1”, grab some tape and tape the sleeve down. I also like to add in a cut of tissue pattern paper and as a reinforcement. You should also make sure the bottom of your sleeve is straight across so add tissue paper there too.
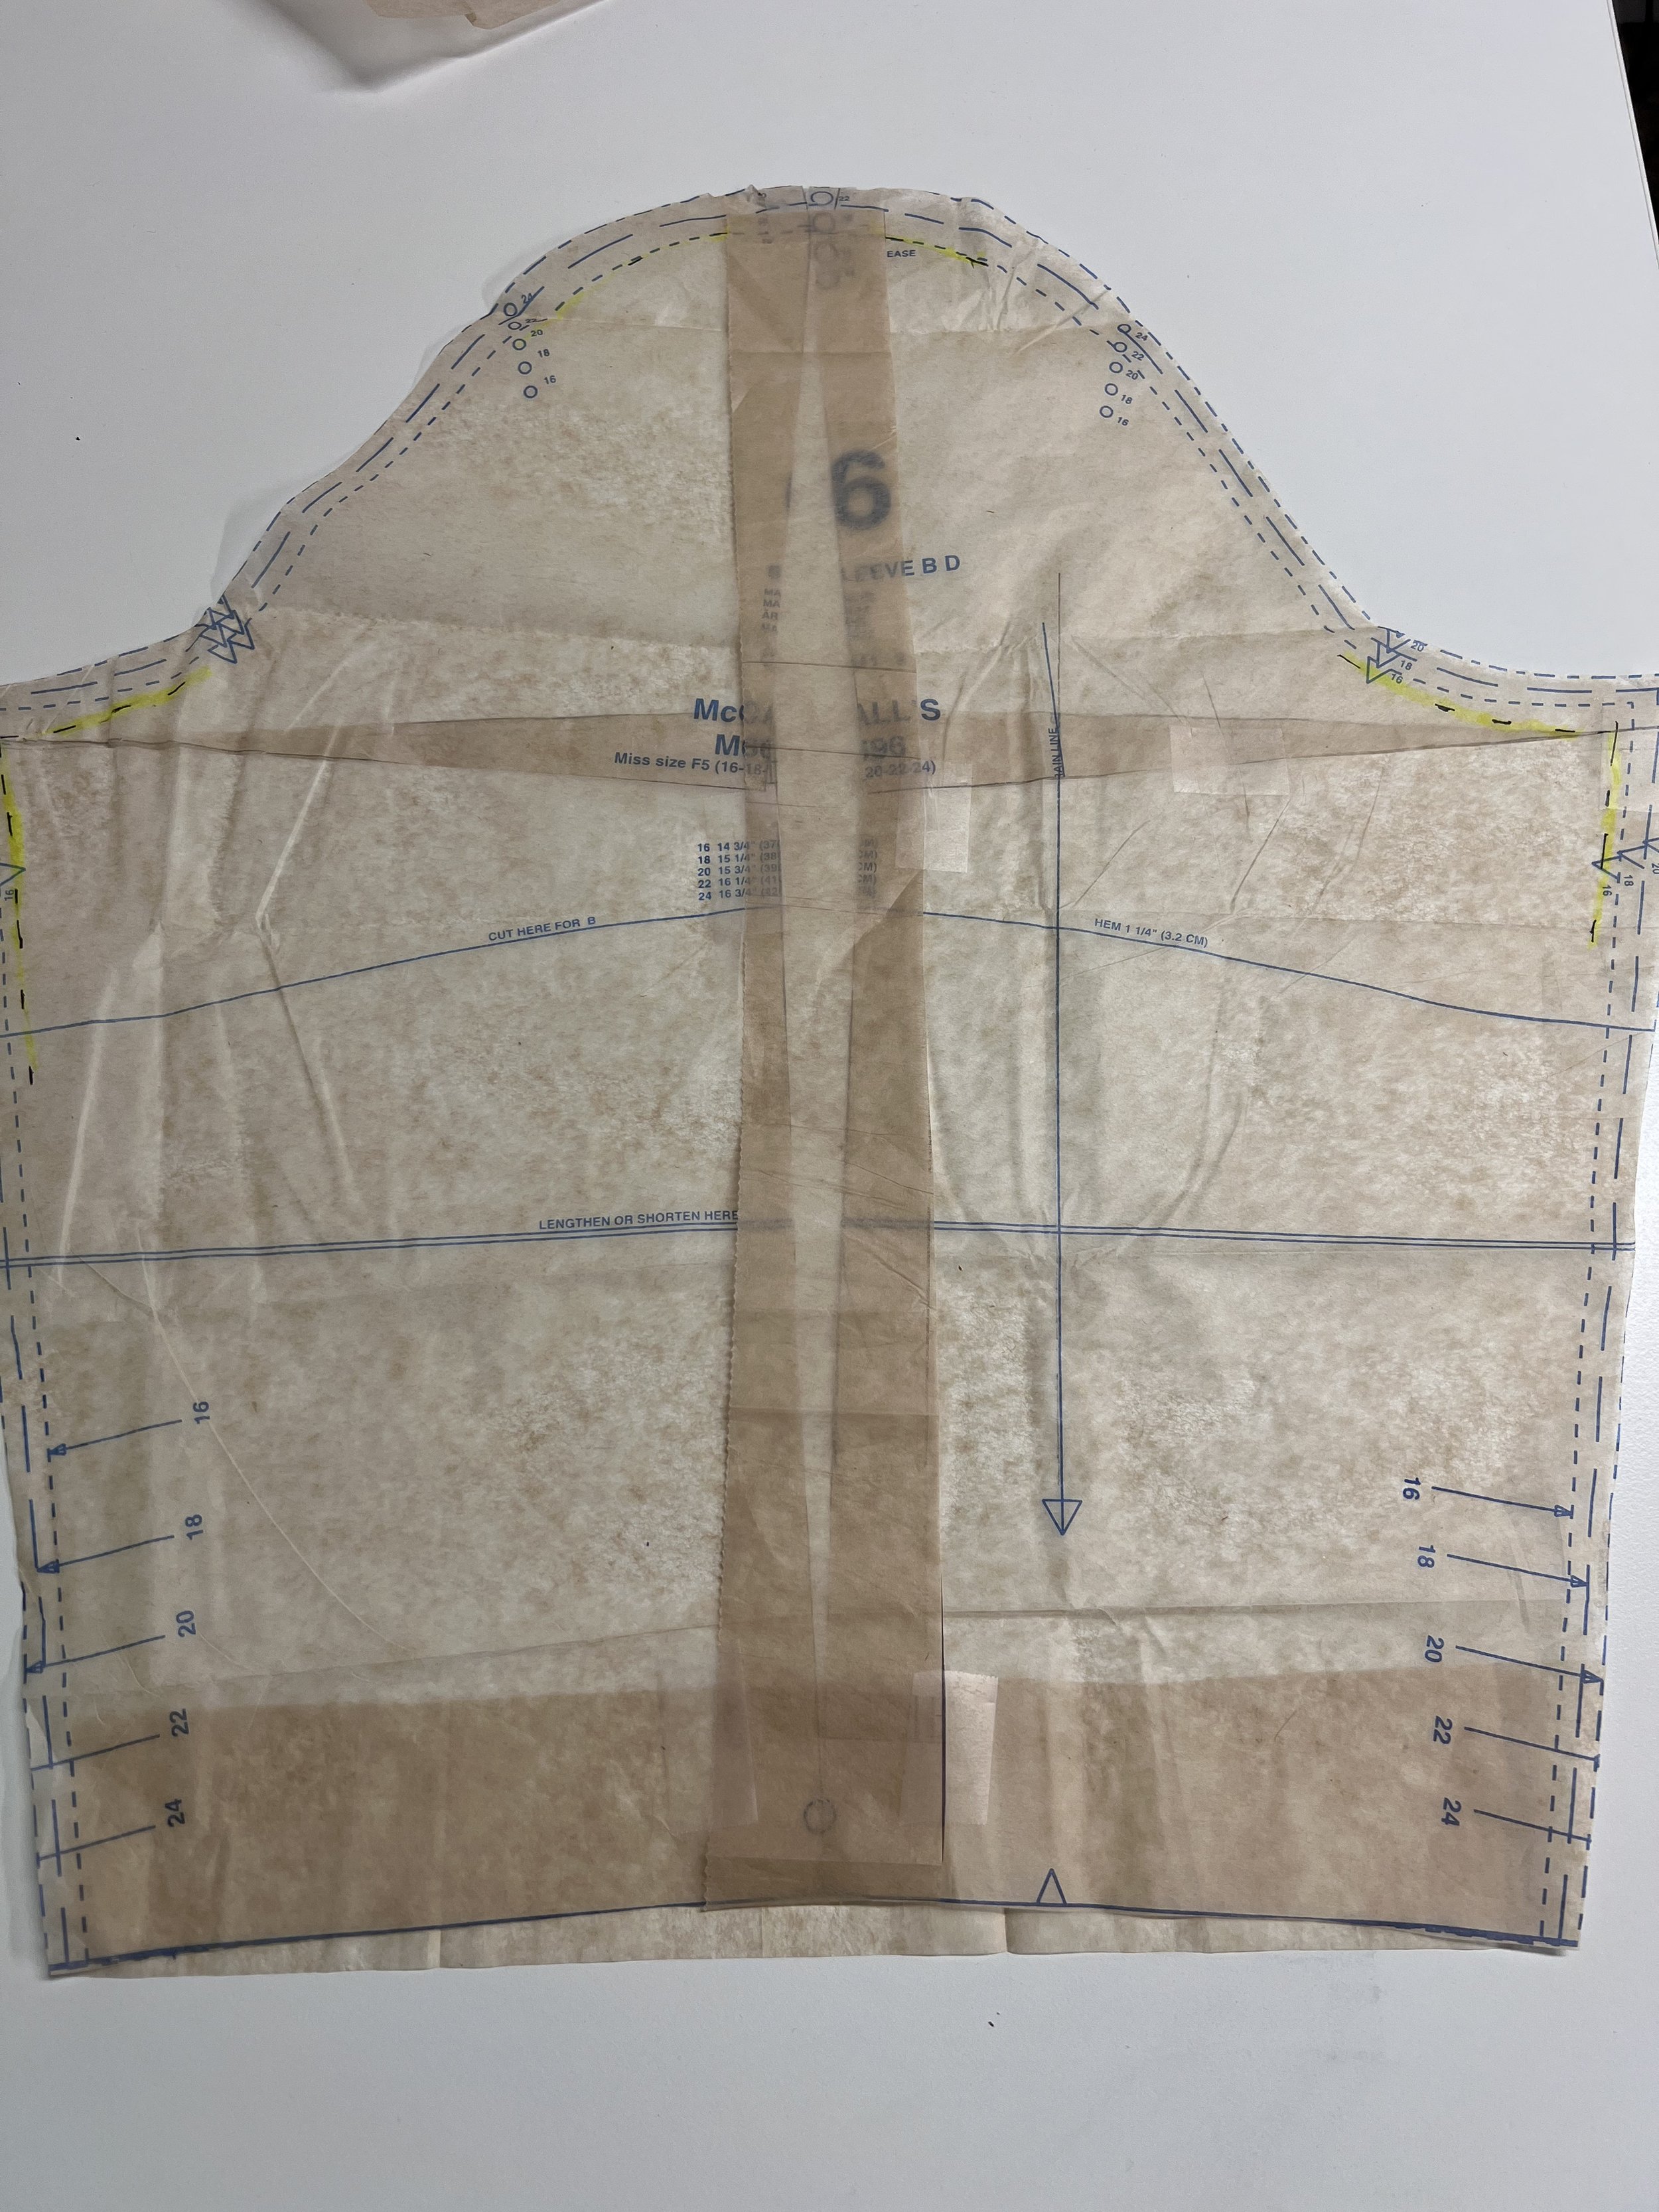
Add tissue paper in the middle of the sleeve pattern piece to reinforce it once you have measured and also add tissue at the bottom of the sleeve. Lastly, make sure to extend your grainline on the pattern piece so you cut it on grain. It is now ready to use!
Your bicep adjustment is done and the pattern piece is ready to use.
But what happens if you need to add more than 1” to the bicep? If you add one more than 1” the top of your sleeve cap will get distorted. See the picture below?

Perhaps you may need to add more than 1” to the bicep pattern piece? Now what? The top of the sleeve pattern piece gets distorted.
That’s where that sleeve that we traced comes in handy. I want you to use that sleeve that we traced to redraw the top of the sleeve cap. Once you have done that … you are done!
Use your traced sleeve pattern to re-trace the top of the sleeve cap along with the 2” bicep adjustment.
Subscribe to our newsletter.
Sign up with your email address to receive news and updates.